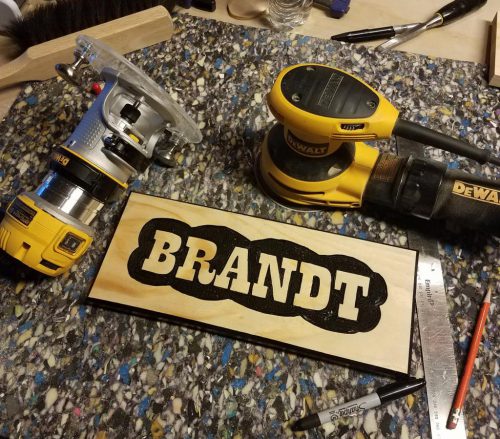
Router-carved signs are a common sight at fairs or even in pop up shops at the mall. I’ve been watching a bunch of Dave Rhoten’s videos on YouTube and finally I decided it was time to try it for myself. I purchased a Dewalt DWP611 along with two special router bits and a nice base plate from Dave’s store.
I bought 1×8 select pine from Home Depot (mostly knot free) and put on a couple coats of shellac. Then I used the laser cutter at work to draw the letters that I wanted to cut. That made the layout portion of the project very easy!
The next step was the most time consuming. I used a very narrow V-bit to carefully cut around the outside of every letter. Then I put in a bigger 90 degree V-bit to draw the big cloud around the outside and cut out everything between the cloud edge and the edge of the letters.
After a little cleanup with some chisels to remove any remaining high spots, I covered the whole piece in black spray paint. When it was dry, I sanded the top which removed the paint from the letters and the part outside the cloud leaving the indented part black. The shellac coating helped to keep the paint from bleeding too deep into the wood on the parts where I didn’t want it to stick.
Finally I used my keyhole bit to cut a slot in the back for a screw or nail so it could be easily hung on the wall.
This was a gift for Don’s brother and his wife in Montana as a thank you for letting us stay with them. And since I was making one, I decided to make two and give one to Don as well. It’s a fun and relatively quick project, but it takes patience!

