
As we’ve done a few times before, we hopped on the ferry in Edmonds and floated across Puget Sound to have lunch in Kingston. When we’ve done it previously, I’ve thought that it would be kind of neat to have a timelapse of the trip so this time I packed my Go Pro. I had a flexible tripod that I kind of wrapped around the railing and then held it in place with alternating freezing hands. I didn’t do anything too fancy to stabilize or straighten the video, but there’s a lot of fun stuff to see!
Cape Disappointment Drive Timelapse
I enjoy making timelapses when we go on road trips. I rarely watch the whole thing straight through, but sometimes there are interesting spots that are fun to revisit. Plus, it’s a fun little project to have going along the trip.
I made a timelapse of our trip from Woodinville to Cape Disappointment State Park in the southwest corner of the state for our most recent camping trip. The video has the trip down immediately followed by the trip back (6:36 is when we are at the campground.) On the trip down there, notice the incredibly bad traffic. It added 2 hours to the 3.5 hour drive. On the way back we only hit one bad spot but it was really bad and even the backroads were jammed. It added 30 minutes.
We are planning a drive out to Montana soon to visit some of Tyla’s family. I’m working on some modifications to my setup to make it easier to do those super long timelapses.
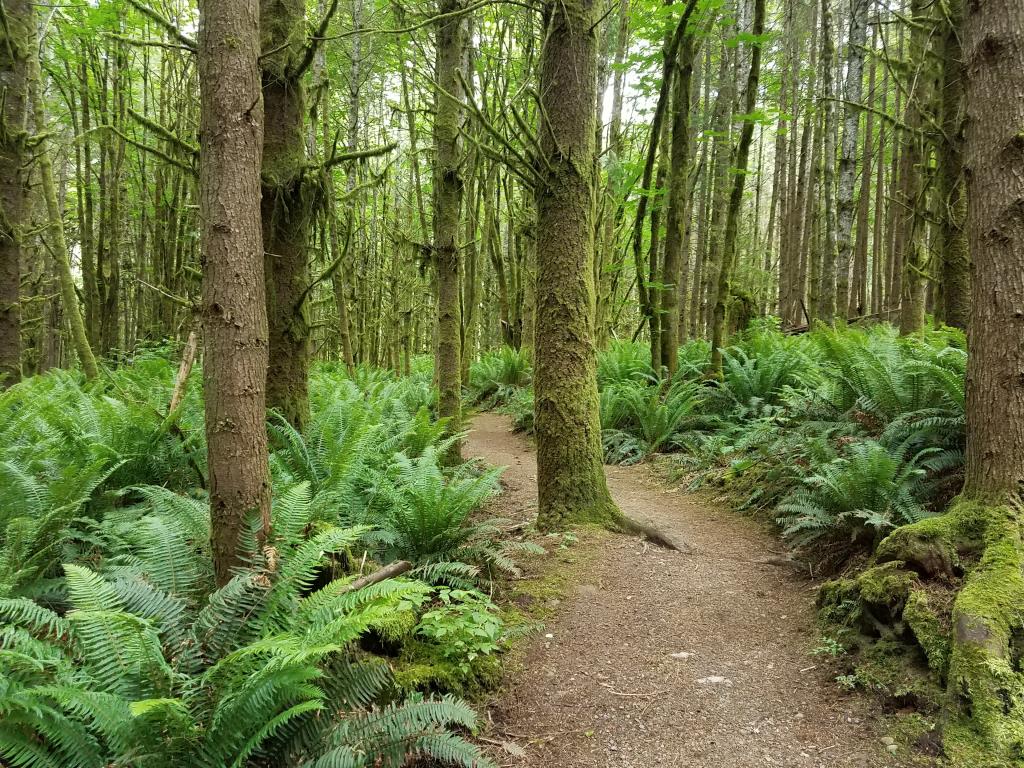
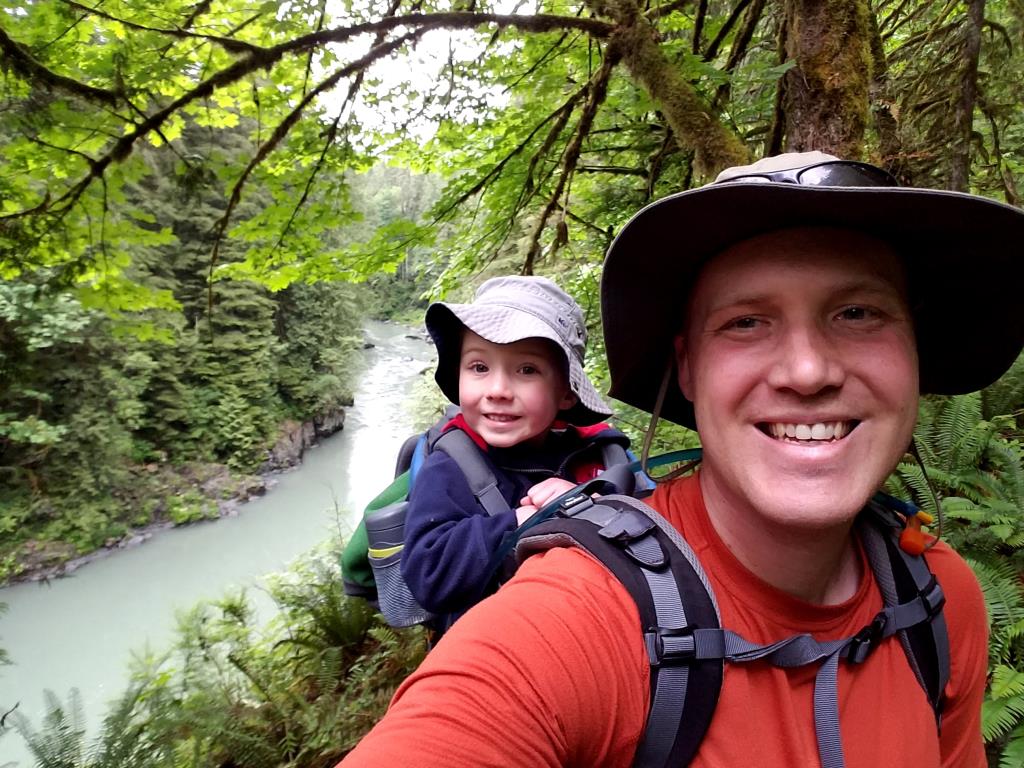
Lime Kiln Trail
After the success of our Little Mt Si hike, Logan, Elijah and I headed out again. We picked out a very kid-friendly trail so that Elijah could spend a lot of time on his feet instead of in my pack. That worked for about half a mile and then he rode the rest of it. I didn’t push it because he seemed legitimately tired (he was falling asleep in my pack) but it worked out fine. The trail doesn’t have a lot of elevation gain but it is 8 miles round trip.
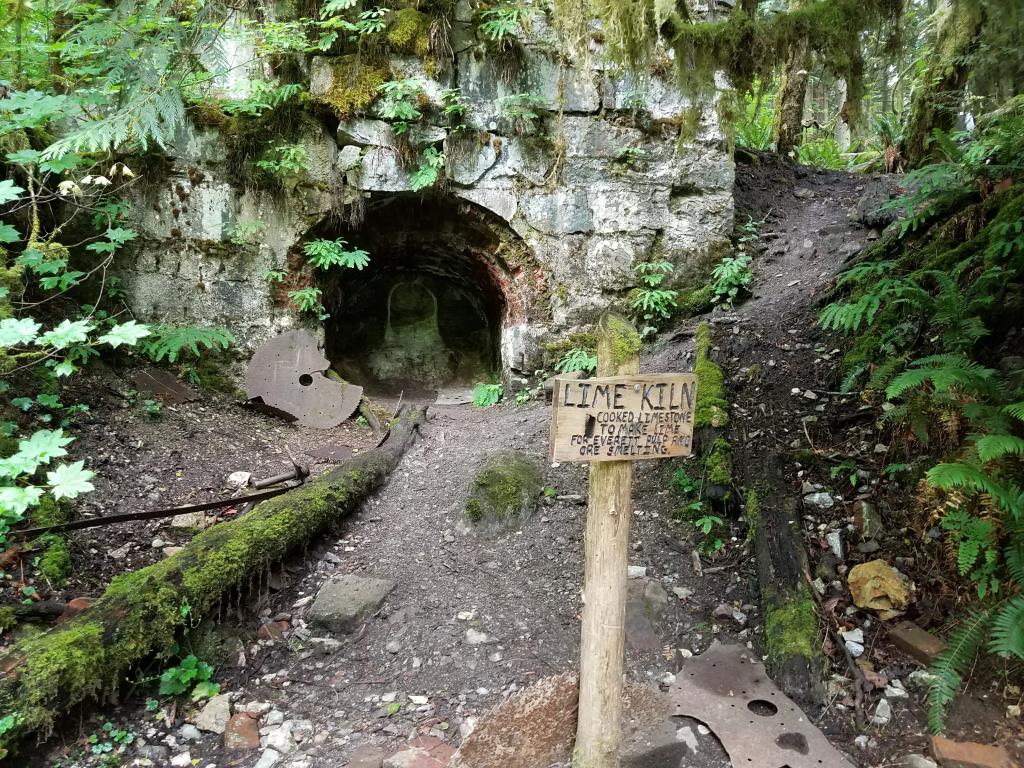
There isn’t a huge payoff but the walk is pretty. You go past an old lime kiln and then in another mile you hit the end of the trail at the edge of the river. We had lunch there and made our way back.
The trail itself is indeed kid friendly. It’s generally fairly wide and relatively smooth. There were, however, a lot of bushes and trees growing in from the side of the trail so you have to be careful not to smack people in the face behind you. It was especially tricky with a kid riding in a backpack.
I really enjoy these hikes but I’m struggling with how to keep Elijah engaged at this transition point. I don’t love hiking without a destination, but a lot of the destinations that are fun are also more than he can handle at this point. If you have suggestions of waterfalls, lakes, fire lookouts, etc that are only a mile or two round trip without a ton of elevation gain, please send them my way.
In addition to the pictures below, you can also see the hyperlapse that I posted on Instagram. (A hyperlapse is basically a video that is sped up and smoothed out so it kind of looks like you’re flying along without the normal video bumps caused by walking.)


Long Timelapse Tips
 During our Indiana trip, I made a six-day timelapse. That was by far the longest one I’ve ever attempted. How did it work? Here are some tips:
- The GoPro is a great device for this. You can set it to snap a photo every 2, 5 or 10 seconds. Generally I do 2 seconds but since this one was so long I did 5 seconds since I knew I would speed it up a lot anyway.
- Set the GoPro to the lowest resolution possible. On my camera that is 5 megapixels. Even that is a waste since you’re going to end up resizing down to 1080p anyway. The lower resolution will help you save room on the memory card and also saves battery life.
- Don’t skimp on the memory card. 32 and 64GB cards are super cheap. Just get a big one and remove this potential problem from your setup.
- Get a portable USB battery pack. I use this one, but there are lots of options. Get one that takes AA batteries. When you run out of battery, you just slap new batteries in there and you’re instantly ready to go instead of waiting for a recharge. I use and recommend Eneloop AA’s and the Lacrosse BC-700 charger. By using the battery pack to keep the internal GoPro battery charged up, I’m able to confidently let the camera run for 4 hours and it will probably go a lot longer. I changed out the batteries at lunch and at night. That way I didn’t have to worry about them dying on me.
When I was done I had over 30,000 photos. How do you process all of those into a movie? There are LOTS of options, but here’s how I do it (for free):
- Install IrfanView. It has a lot of features, but I use it to batch resize and crop all of the photos down to 1920×1080. I also rename the photos to something like image#####.jpg so that there is a sequential number for every image.
- Install ffmpeg. Decipher the command line parameters to build up the video that you want. Here’s the line that I use:”c:\program files\ffmpeg\bin\ffmpeg” -i image%05d.JPG -r 30 -s hd1080 -vcodec libx264 -y out.mp4
- Techincally you could be done at this point, but I usually take that MP4 into Adobe Premiere Elements and crop it up, speed it up, slow it down, etc.
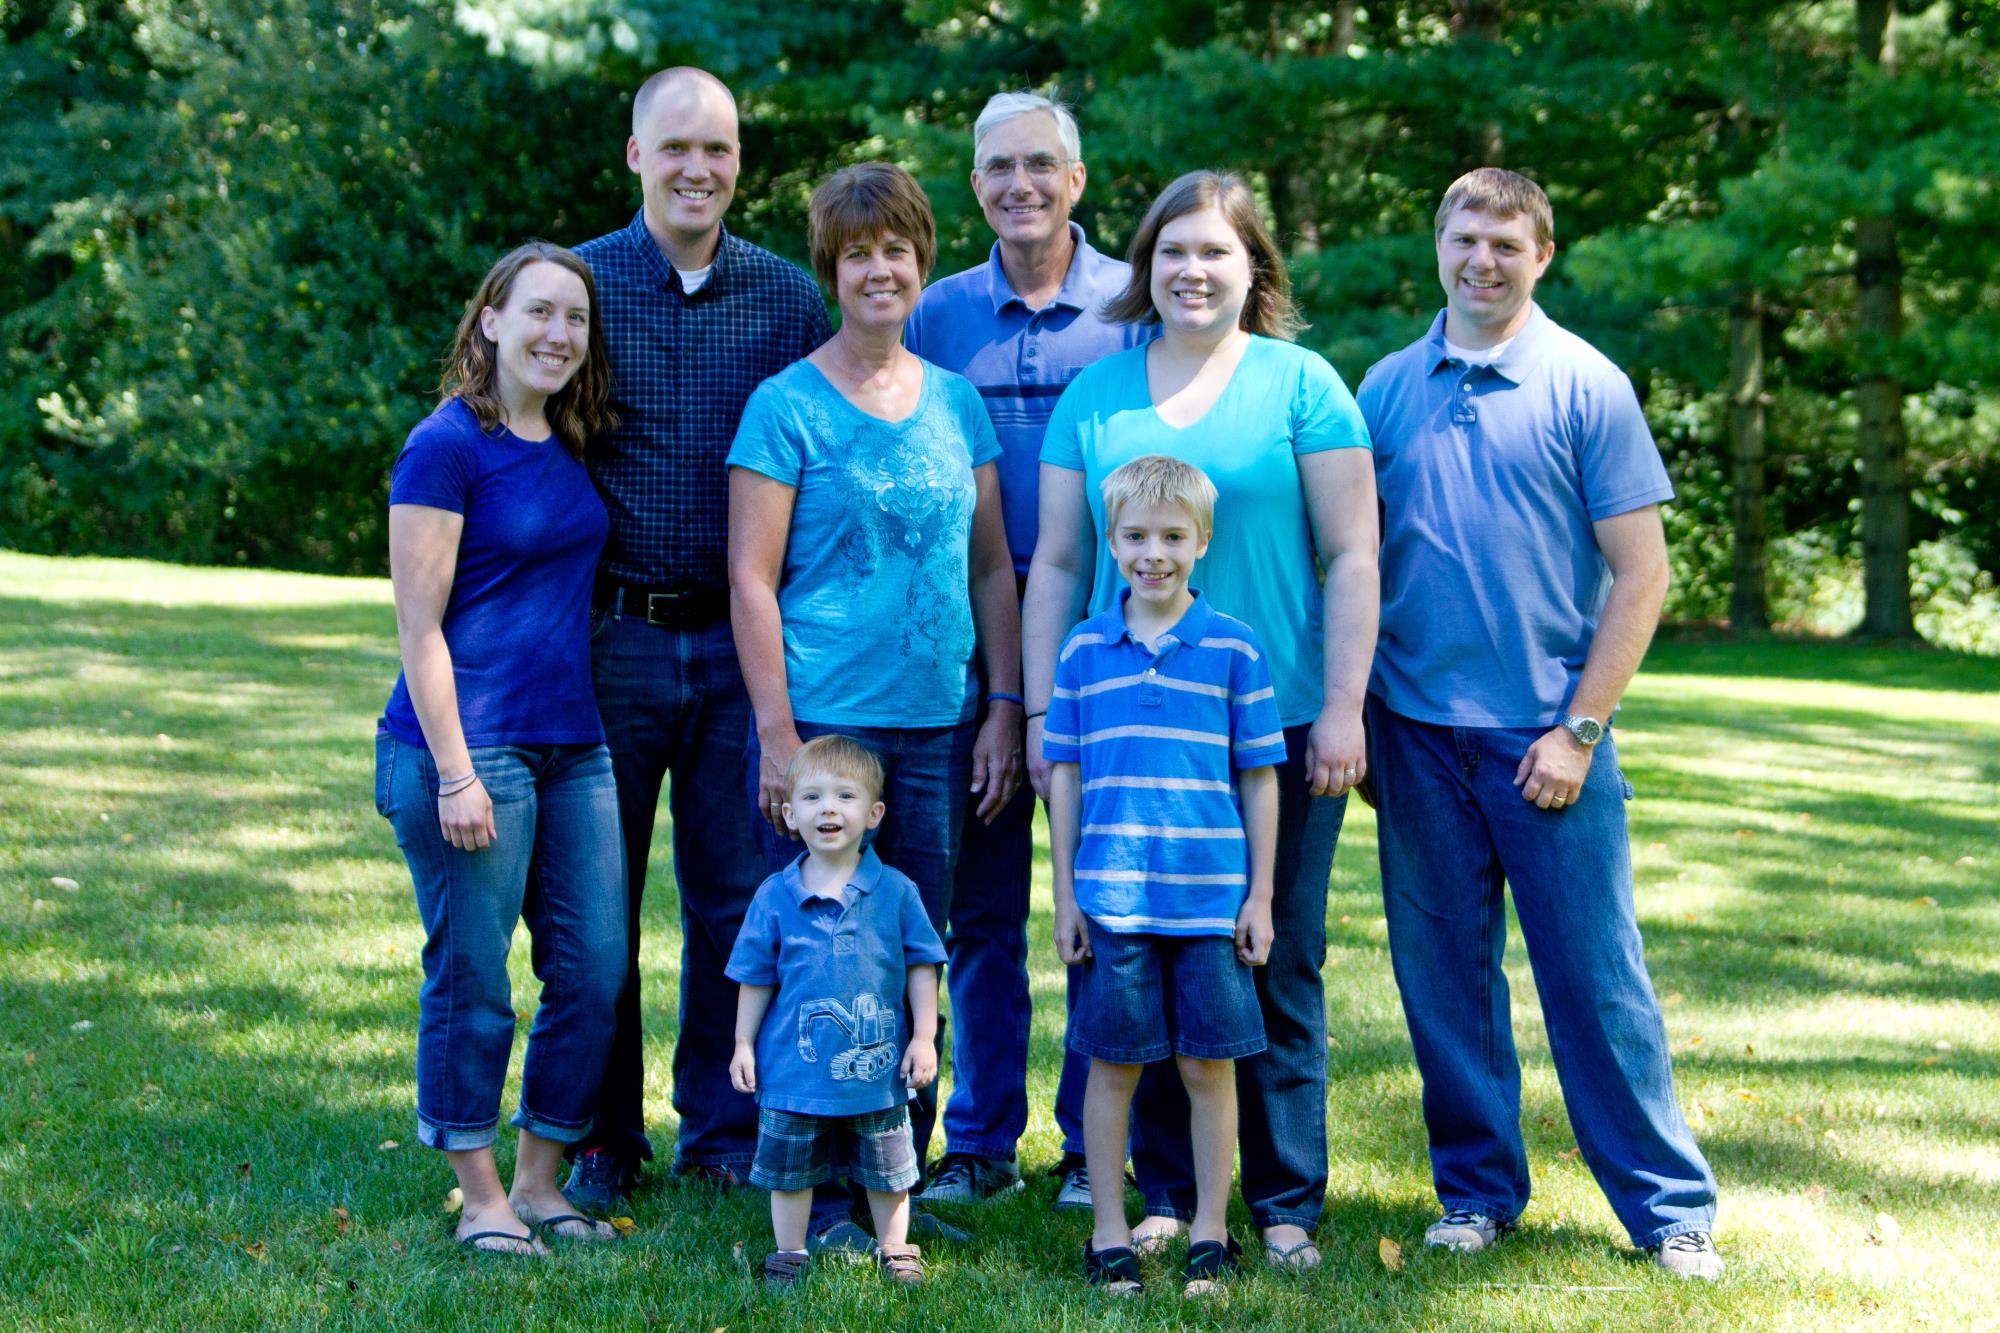
Indiana Vacation
I use that word “vacation” lightly. It’s true that I wasn’t at my normal day job, but I spent the trip doing more physical labor each day than I normally do in a week (or a month!)
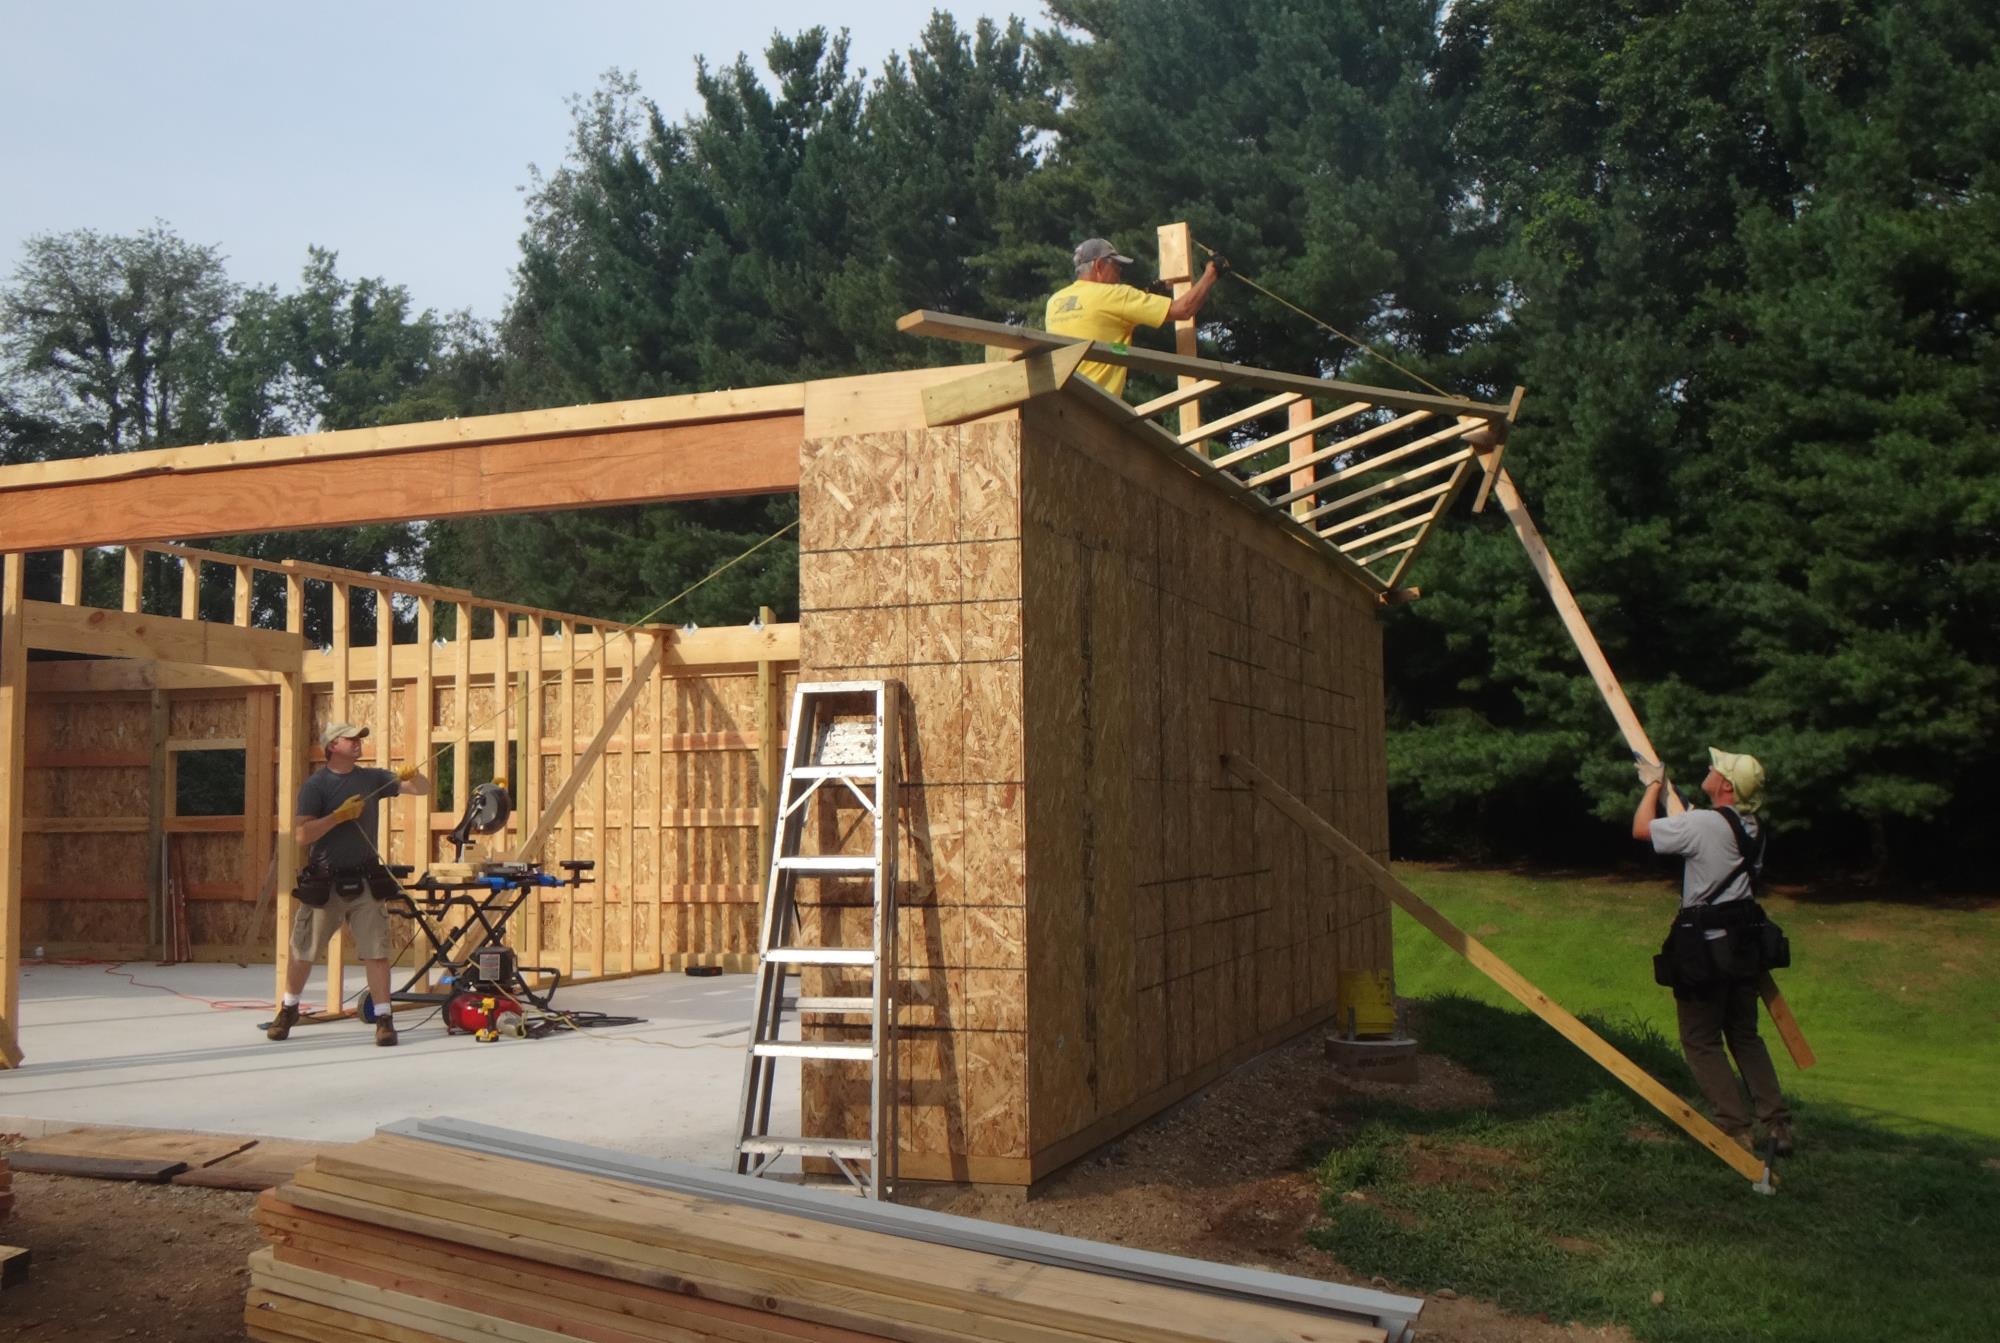
Dad and Mom already have a two car garage, but they are adding on to the end of it to have a nice shop work space and another garage bay to hold their tractors. It will be a huge win for them to keep their Allis Chalmers WD45 in the garage instead of under a tarp near the woods. Other than having the foundation poured, Dad is doing almost all of the work by himself. It’s a huge undertaking and this was a fun opportunity to make some memories with him.
Luke, Rachel and David were there for the first couple days. It was fun to see Elijah and David interacting together. They’re the only cousins they have and they rarely get to see each other. David is 7 years older than Elijah so Elijah was pretty excited to hang out with David. The reverse probably wasn’t always true!
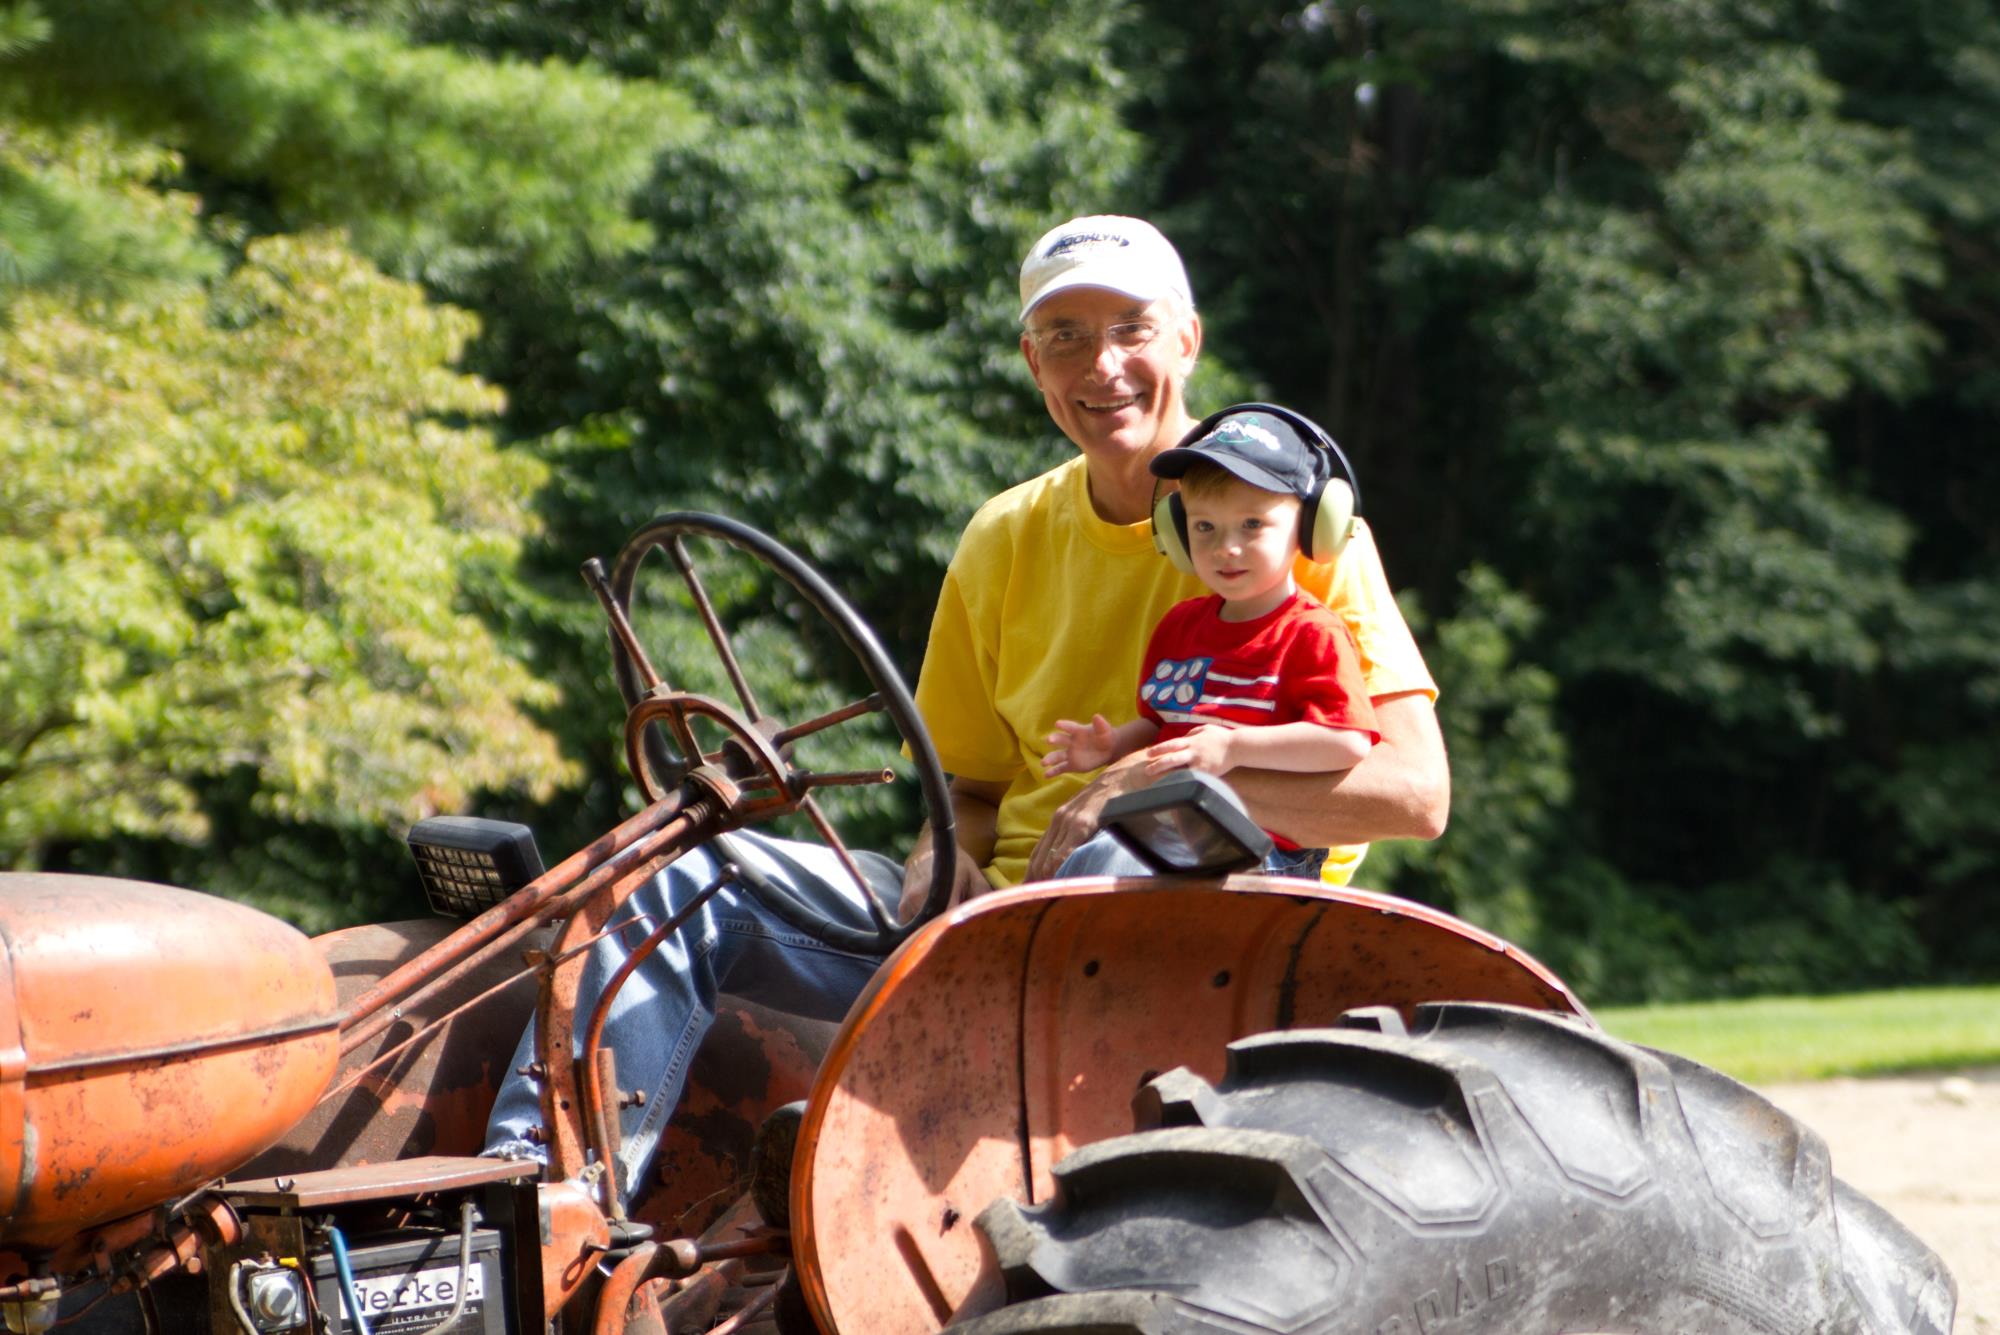
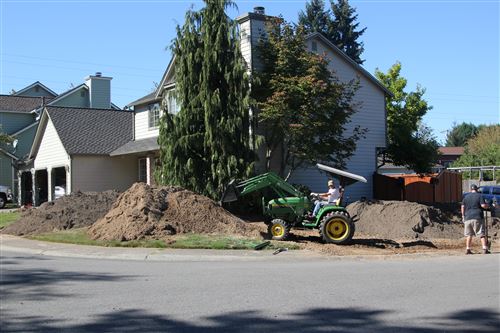
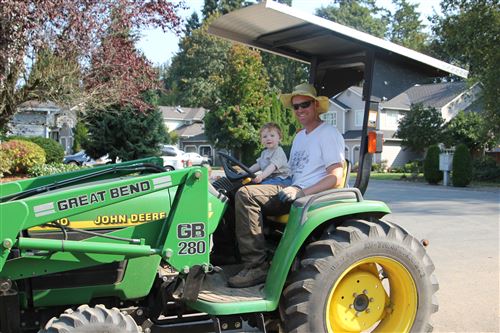
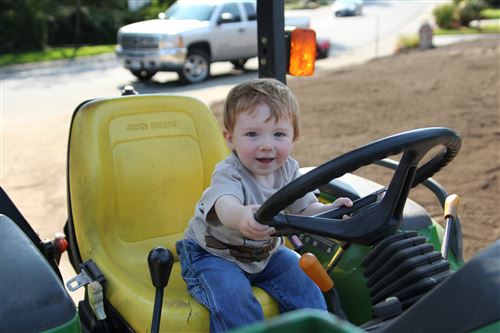
Elijah was in tractor heaven. Mom and Dad have three tractors: the big orange Allis Chalmers, a John Deere lawn and garden tractor that they got in 1981 and a newer John Deere mower that they got recently from GrandpaH. On top of that, a neighbor stopped by with his big John Deere 3320 tractor with a bucket on the front. That one came in really handy for getting material up to the roof. Elijah had a ball riding ALL of them multiple times. It was part of his daily routine and now that we’re home, he still talks about it and he uses a blanket to cover his tractors just like my Dad puts a tarp over some of his tractors.
Dad, Luke and I made great progress on the project. When I arrived, there was no roof. When I left, we had started the shingles. Dad and I both thought we’d have been farther along than that, but being novices meant that we did a lot of things twice. We kept joking that when we build the next garage, things will go a lot faster.
It was a great week. The weather mostly cooperated and nobody got hurt. Mom and Dad have continued the shingling work and are probably going to be done by the time you read this. That will be a huge step in the project. Next up will be finishing off the front wall and getting the windows and doors in. If Dad can get the building wrapped and the siding up before winter, that would be a huge win, but he’s just taking it as it comes. There’s a lot to learn along the way!
I set up the GoPro every single day and ran it all day long. I’ll do another post about how to handle these super long timelapses, but for now you can just enjoy the results.


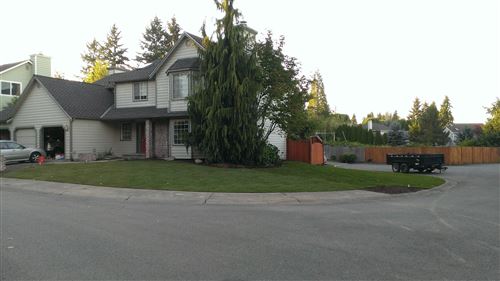
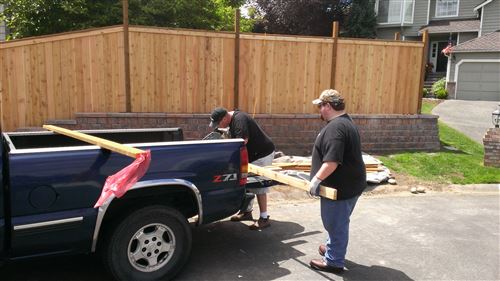
Front Yard Project Recap
It was a wild week, but 9 days was all it took to polish off the front yard. We had taken a break after finishing the back yard to recover and also because Tim was re-siding his house. Here’s a rough breakdown of the front yard project:
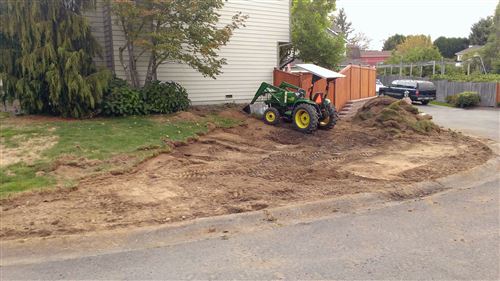
- Dad and I started on Friday the 19th by digging a trench under the sidewalk. We picked up the tractor, truck and trailer. Then we used the tractor to fill up the trailer, make a run to dump it, and then scraped off some more sod.
- On Saturday, Don, Logan and Tim joined in and we made huge progress. The trailer made non-stop runs all day long getting rid of the sod and the dirt that was being scraped off with the tractor. While that was happening, three dump trucks arrived with the new dirt that was replacing the old dirt.
- By the end of Sunday, all of the old dirt was gone and the new dirt was pretty much in place. We also rented a trencher and in just two hours, we had trenches for irrigation. It might seem silly to trench through new dirt, but we still had a couple more inches to go under the new dirt and it was almost like digging in concrete.
- Tim and I spent Monday through Thursday evenings out in the yard plumbing for irrigation. It was a wet, soggy mess as we got over 2 inches of rain. I bought a hand pump to help clear out the trenches but there were big sections of the yard that were just completely saturated.
- We took Friday off in hopes of letting it dry out just a little more. All I did was pick up a few more yards of dirt and left it sitting in the trailer for later.
- Saturday we started by spreading the remaining dirt to really level everything out. 2600 square feet of sod was delivered, and, with the help of two guys Tim knows, we had it almost all in by 2pm. We returned the tractor, spread one more truck load of dirt, finished off the sod, and then tested out the irrigation.
- I spent Sunday by myself cleaning up the yard, washing the truck, returning tools, etc.
It’s incredible how much work got done in such a short amount of time. Here are some stats:
- The front yard added up to 117 hours of labor (compared to 310 in the back yard.)
- Each load from our house to the spot where we dumped the sod took about 75 minutes round trip
- 14 trips with the dump trailer to remove the old sod, and there was 3-4 yards in each load
- 53 yards of beautiful new “supreme mix” dirt added, including three 15-yard deliveries via dump truck
- 500 miles on Don’s truck for this project
- 10.6mpg average for the truck while we were making the runs to dump the old sod
- 3.4 gallons of diesel used in the tractor over the many many hours that it was running
Because our scheduled was so compressed, I didn’t stop to take as many photos or do fancy timelapse videos. Thankfully Tyla and Mom snapped a bunch of photos and one of my security cameras caught some of the action.
THANK YOU once again to all of the friends and family that helped out! We had exactly the right amount of help to get this done. And a huge special thank you to Tim. Without you, this project would never have been attempted. We couldn’t have afforded to pay a contractor to do this, and I don’t know nearly enough to attempt something like this on my own. I loved learning about all this stuff and it was awesome to spend so much time out in the yard working with you. Thanks for putting up with all of my questions, my stress, and my mistakes!
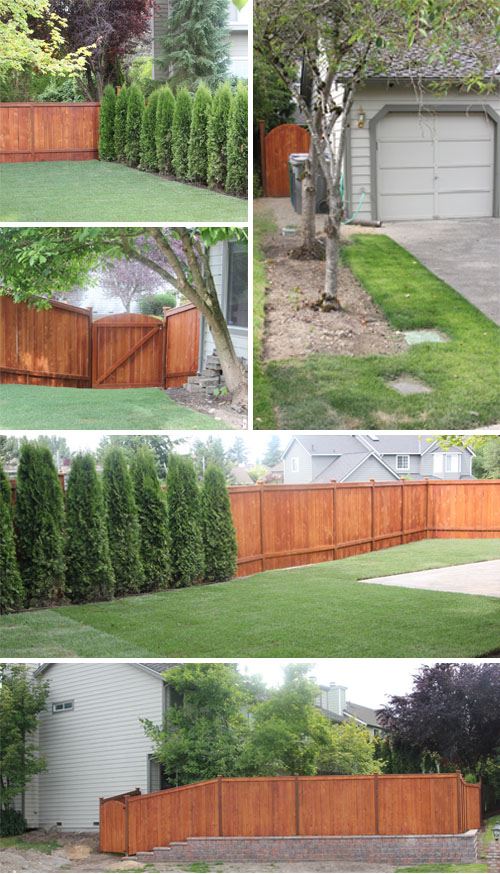
Backyard Completed!
It has been a long road and this will be a long post, but Tim and I are finally done with the back yard. I got the two gates built, installed and stained and on Saturday at noon, I declared the project done. “Done” here means that all the big pieces are completed and the yard can be locked up again. There are still plenty of smaller items like making one final dump run, adding bark chips, etc but those aren’t as urgent and I’ll just work them into my normal home improvement projects. The front yard is still a mess too, but that will sit for a couple months until Tim is available again. The front yard should be a lot smaller project too. So with all those caveats, I’m done!
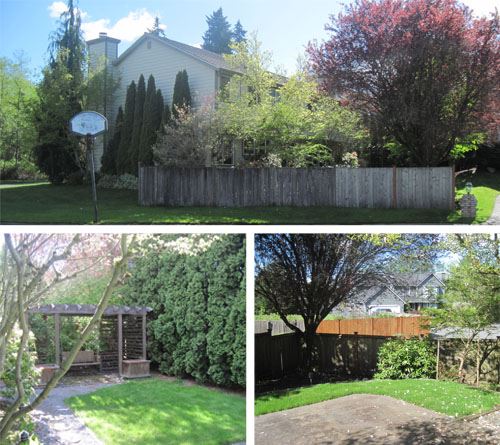
When I show people photos of the finished project, it’s kind of anti-climactic. They look at the before photo and wonder why we changed anything. So let me go back and list out the reasons why we weren’t thrilled with our old back yard:
- Any time it rained, the yard was muddy. Drainage was horrible/non-existent and water would sit in the yard for days after a heavy rain. From roughly November through May the grassy area was pretty much unusable.
- The cedar swing was nice but it took up a big chunk of our yard. We only used it once or twice for photos because it was a giant spider web. As I started tearing it down, I also learned that it was very rotten and probably would have caused some serious injury before too much longer.
- The fence was rotten and falling over. I had propped it up with some extra supports but those weren’t enough to hold it anymore.
- The pine trees (arbor vitae) along the fence were getting close to the end of their life and were starting to brown. The thundercloud plum in the corner was disaster. Please don’t ever plant one of these trees.
- Most of the bushes in the back yard were not pruned well by the previous owner and were overgrown.
- The “retaining wall” appeared to be constructed with old concrete from the patio that was there before the new one was put in. It was about two feet high and I can’t tell you how many times it crumbled underneath me. We would have constantly been pulling Elijah back from it as he toddled around (if he could even make it there in the mud.)
So yes, on the surface it looked ok, but as we got more familiar with the yard, we knew it’s time had come. Now we have a beautiful new yard!
 [UPDATE: These links are broken now, but I’ll leave the text] I made a Photosynth of the back yard in it’s current state. If you forgot what it looked like before, you can check out this previous Photosynth. Honestly I do like the way the old yard looked like it had been lived in and wasn’t brand new. This new one has so much more space though and it will grow in like the old one did (but without getting out of control!)
It should come as no surprise that I was collecting a lot of data about this project as we went. Here are some facts:
- Major features completed: French drains, irrigation, retaining wall, and fence
- Square feet of grass before: 475. Square feet of grass after: 1175
- Number of retaining wall blocks: 441
- Linear feet of fence: 152
- Gates: 2
- Posts: 21
- Cedar fence panels: 332
- Gallons of stain: 13.5
- Nails: 2200
- Yards of dirt added: 34
- Home Depot Transactions: 32
- Project calendar duration: 44 days
- Actual days spent working: 41 days (only 3 days with no progress!)
- Days affected by rain: 1
- Estimated savings by doing it ourselves1: 58%
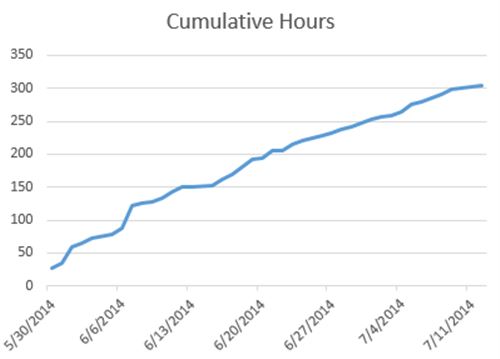
- Total Hours spent: 310
1 This calculation was done using a standard contractor markup for materials and then assuming that professional labor would work 30% faster than we did (except for Tim.)
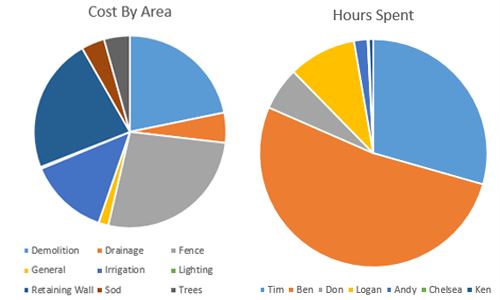
Here are a couple charts breaking down the cost by feature of the yard and then another one showing how much time each helper put into the yard. Thank you everyone! The cumulative hours chart shows that we kept the rapid pace up for the whole project. I don’t think we could have done it quicker without taking more vacation or hiring more help. Nearly every available hour was spent working on the yard.
And finally, here are some photos, starting with before:
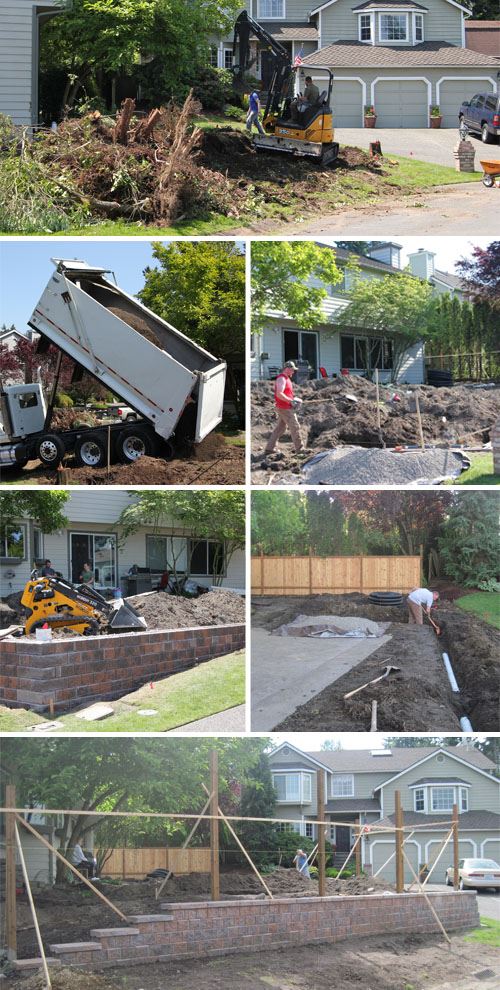
During:
After:
And finally, here’s a complete list of all the timelapses I made along the way.
- Tree Removal Timelapse
- Yard Demolition Timelapse
- Building A Fence Timelapse
- Fence Staining Timelapse
- Sod Timelapse
This is the last you’ll see of the yard updates for a couple months until we start on the front yard. Until then you’ll find me in the back yard admiring our work with meat on the grill and a beer in my hand.
Links to previous updates 1, 2 , 3, 4, 5, 6 and 7
UPDATE: The front yard is done now too!
Yard Project Update 6
Tim and I put 2 more yards of dirt and leveled out the yard. It’s sitting for about a week to compact and get ready for sod. I got the fence stained (see the timelapse below). Don and Logan came over on Saturday to help set the remaining three fence posts. There’s one short fence that sticks out from the east side of my house with a gate on the end and then the other post was for the gate on the west side of the house. I got the short fence built, posts cut off and capped and started building the first gate.
This is an exciting week as we’ll be putting in trees along the back fence between our house and the neighbors (same basic type that were there before) and then we’re going to put down sod! The original plan had been to seed but given the small size and our desire to be DONE we are just going with sod.
I did some calculations and we in more than doubling the amount of grass we have in the back yard! The new grass area will be about 250% of what we had before.
Yard Project Update 5
These updates are coming fast and furious now. Lots of items are getting crossed off the list which feels great! So much of the work up to this point has been digging and doing early stages of tasks.
The sod that Tim put in by the front cherry trees is looking really healthy. The irrigation was all connected so I went out morning and evening and turned the valve by hand to water that section. A few days later, we hooked up the irrigation controller so now it’s all done automatically on a timer. The back yard irrigation is done and wired too. All the nozzles are in. We tested to make sure coverage was good and it was such a joy to see the whole area get perfectly covered with water. I used to spend so much time dragging sprinklers around and trying to get it all aligned correctly!
I finished putting up the fence rails and most of the planks. There’s a timelapse of part of that work below. Then Ken and Logan came over on Saturday to help me cut the final boards and attach all the tops rails. I also got all the post tops chopped off and the caps put on. The next phase there is staining and hopefully I’ll be doing that this week. That’s a tricky proposition though because I have to be really careful about overspray. If it isn’t feasible then I’ll be hand rolling the fence which isn’t the end of the world.
A couple other smaller tasks got crossed off too. I connected the sump pump to the drainage system, installed metal flashing along the fence that borders the neighbors yard to keep their higher dirt/pine needs from coming in direct contact with the bottom ~8” of fence, and I dug out part of our old rock pathway where we will now have sod.
Remaining tasks are adding a few more pickup loads of dirt to level out the yard, planting trees, installing sod, and building the gates.

Christmas Timelapses
I took the GoPro along on our trip to Indiana and made a few timelapses. I thought they would be good for the video that I put together, but they ended up getting cut. They are still kind of fun to watch though so I uploaded them to YouTube. There’s a video of Dad, Mom, Luke and David walking back up the driveway toward the house, a video looking out the window from O’Hare (gate C17 I think?) and a long video of us unwrapping Christmas gifts.