
While we were in Indiana, we took a lot of video with the intention of making a Christmas movie. That’s all been edited up and is now ready. Dad’s tractor shows up a ton in this video, but it honestly did get used a lot during the trip: rides for the boys, rescuing the girls who got stuck in the car on the driveway in the snow/ice, plowing snow, and moving trees that had fallen during the storm. There’s also a clip of Dad putting the tractor into their brand new garage/shop for the first time! For 30 years he’s had to tarp and un-tarp the tractor before every use, deal with mice chewing cables and haul the tractor battery in and out of the house. It’s so much easier now!
Indiana Trip
Tyla, Elijah and I flew back to Indiana for Christmas this year. Leading up to the trip, we had visions of a relaxing white Christmas with lots of fun activities. It was definitely a memorable trip, but it was not what we had expected!
It was over 60 degrees the first day so there was no snow for Christmas. Soon after we arrived, Elijah started throwing up and that lasted a few days. And on the last days of our trip, we had a freezing rain/sleet/snow storm that knocked out power for 3 hours, snowed us in for an afternoon, and took down three trees on the driveway. We had to saw our way out.
Still, with all that going on, we had a great time. Elijah’s sickness had a pretty big effect on our activities and even going to church as a big group, but there were plenty of smiles to go around. I was very thankful that we were at Mom and Dad’s house for Elijah getting sick like that. I kept imagining how much harder it would have been if that had happened on our trip to San Diego or something like that.
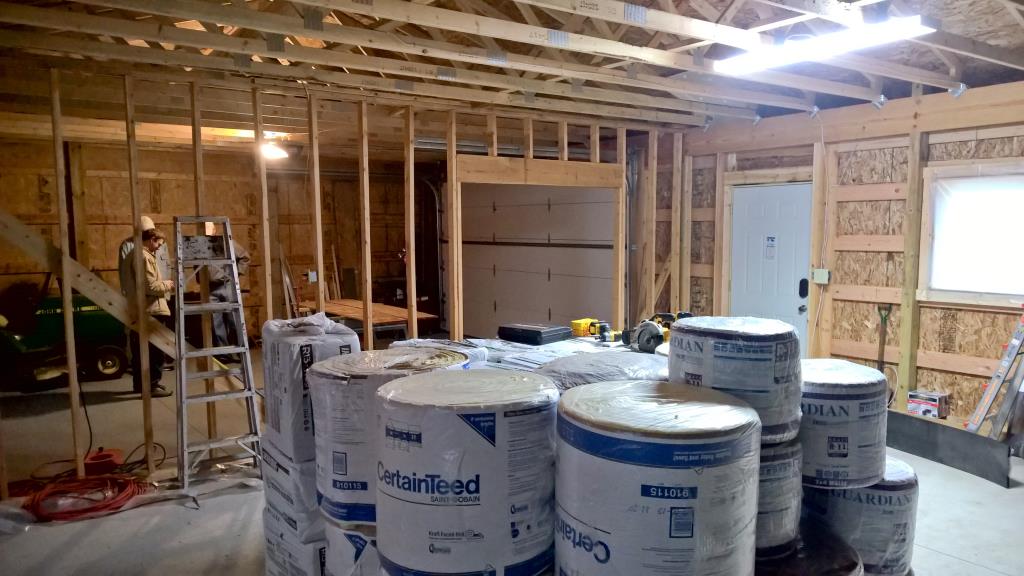
Dad has the new shop all buttoned up on the outside. The doors are in, the siding is up, and while we were there, he parked his Allis Chalmers in the garage for the first time! After 30 years of storing the battery inside and putting a tarp over the tractor every time he was done with it, this is really a game-changer! There’s still a lot of interior shop work to be done, but I’m glad he was able to get the exterior done before winter hit.
We took a lot of video while we were there with the intent of making another Christmas movie. That should be posted soon, but until then you can check out some photos.


Woodinville Christmas Lights
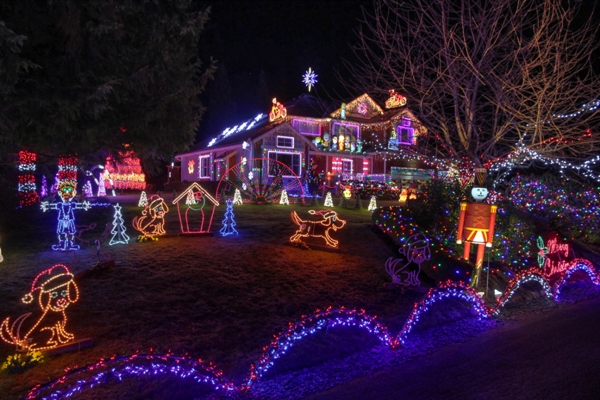
For quite a while, I’ve been hearing people talk about a home on the east side of town that has an incredible lighting display. It’s just a guy who decided he wanted a light display and it kind of got out of hand.
We finally went over this year to check it out and wow, it did not disappoint. There are just under 125,000 lights, 3.5 miles of extension cords, 13 miles of wiring and a computer to control it all in sync with the music. You can see it all at their website: http://www.woodinvillewonderland.com
It’s worth the trip if you have some time next year.
Upgrading Christmas Lights
I’m planning to slowly improve our Christmas lights from year to year. This year I’m going to put lights around each of the three garage doors. I’m trying to figure out if I should do the red/white pattern there too or if I should go all white. Here’s a reminder of what we had last year. This year there will be lights around the top, left and right of each of the three garage doors.

Vote in the poll below and share your opinion!
Fixing Christmas Lights
When I finally decided on Christmas lights last fall, I decided to go with the professional grade wires, sockets and bulbs so that I could have the bulbs be interchangeable. That worked well and allowed me to do alternating red and soft-white C9 bulbs. It looked great except for one bulb that didn’t work. Testing it with the multimeter showed that the socket itself was bad. With a normal set of lights, I’d either have to live with it or pay another ~$40 for another 100ft strand of wire with sockets. But what I bought was repairable! (Pro tip: put some tape on your strand to mark both ends and any of the dead sockets. It’s a lot easier to find them when you have it all balled up on your workbench.)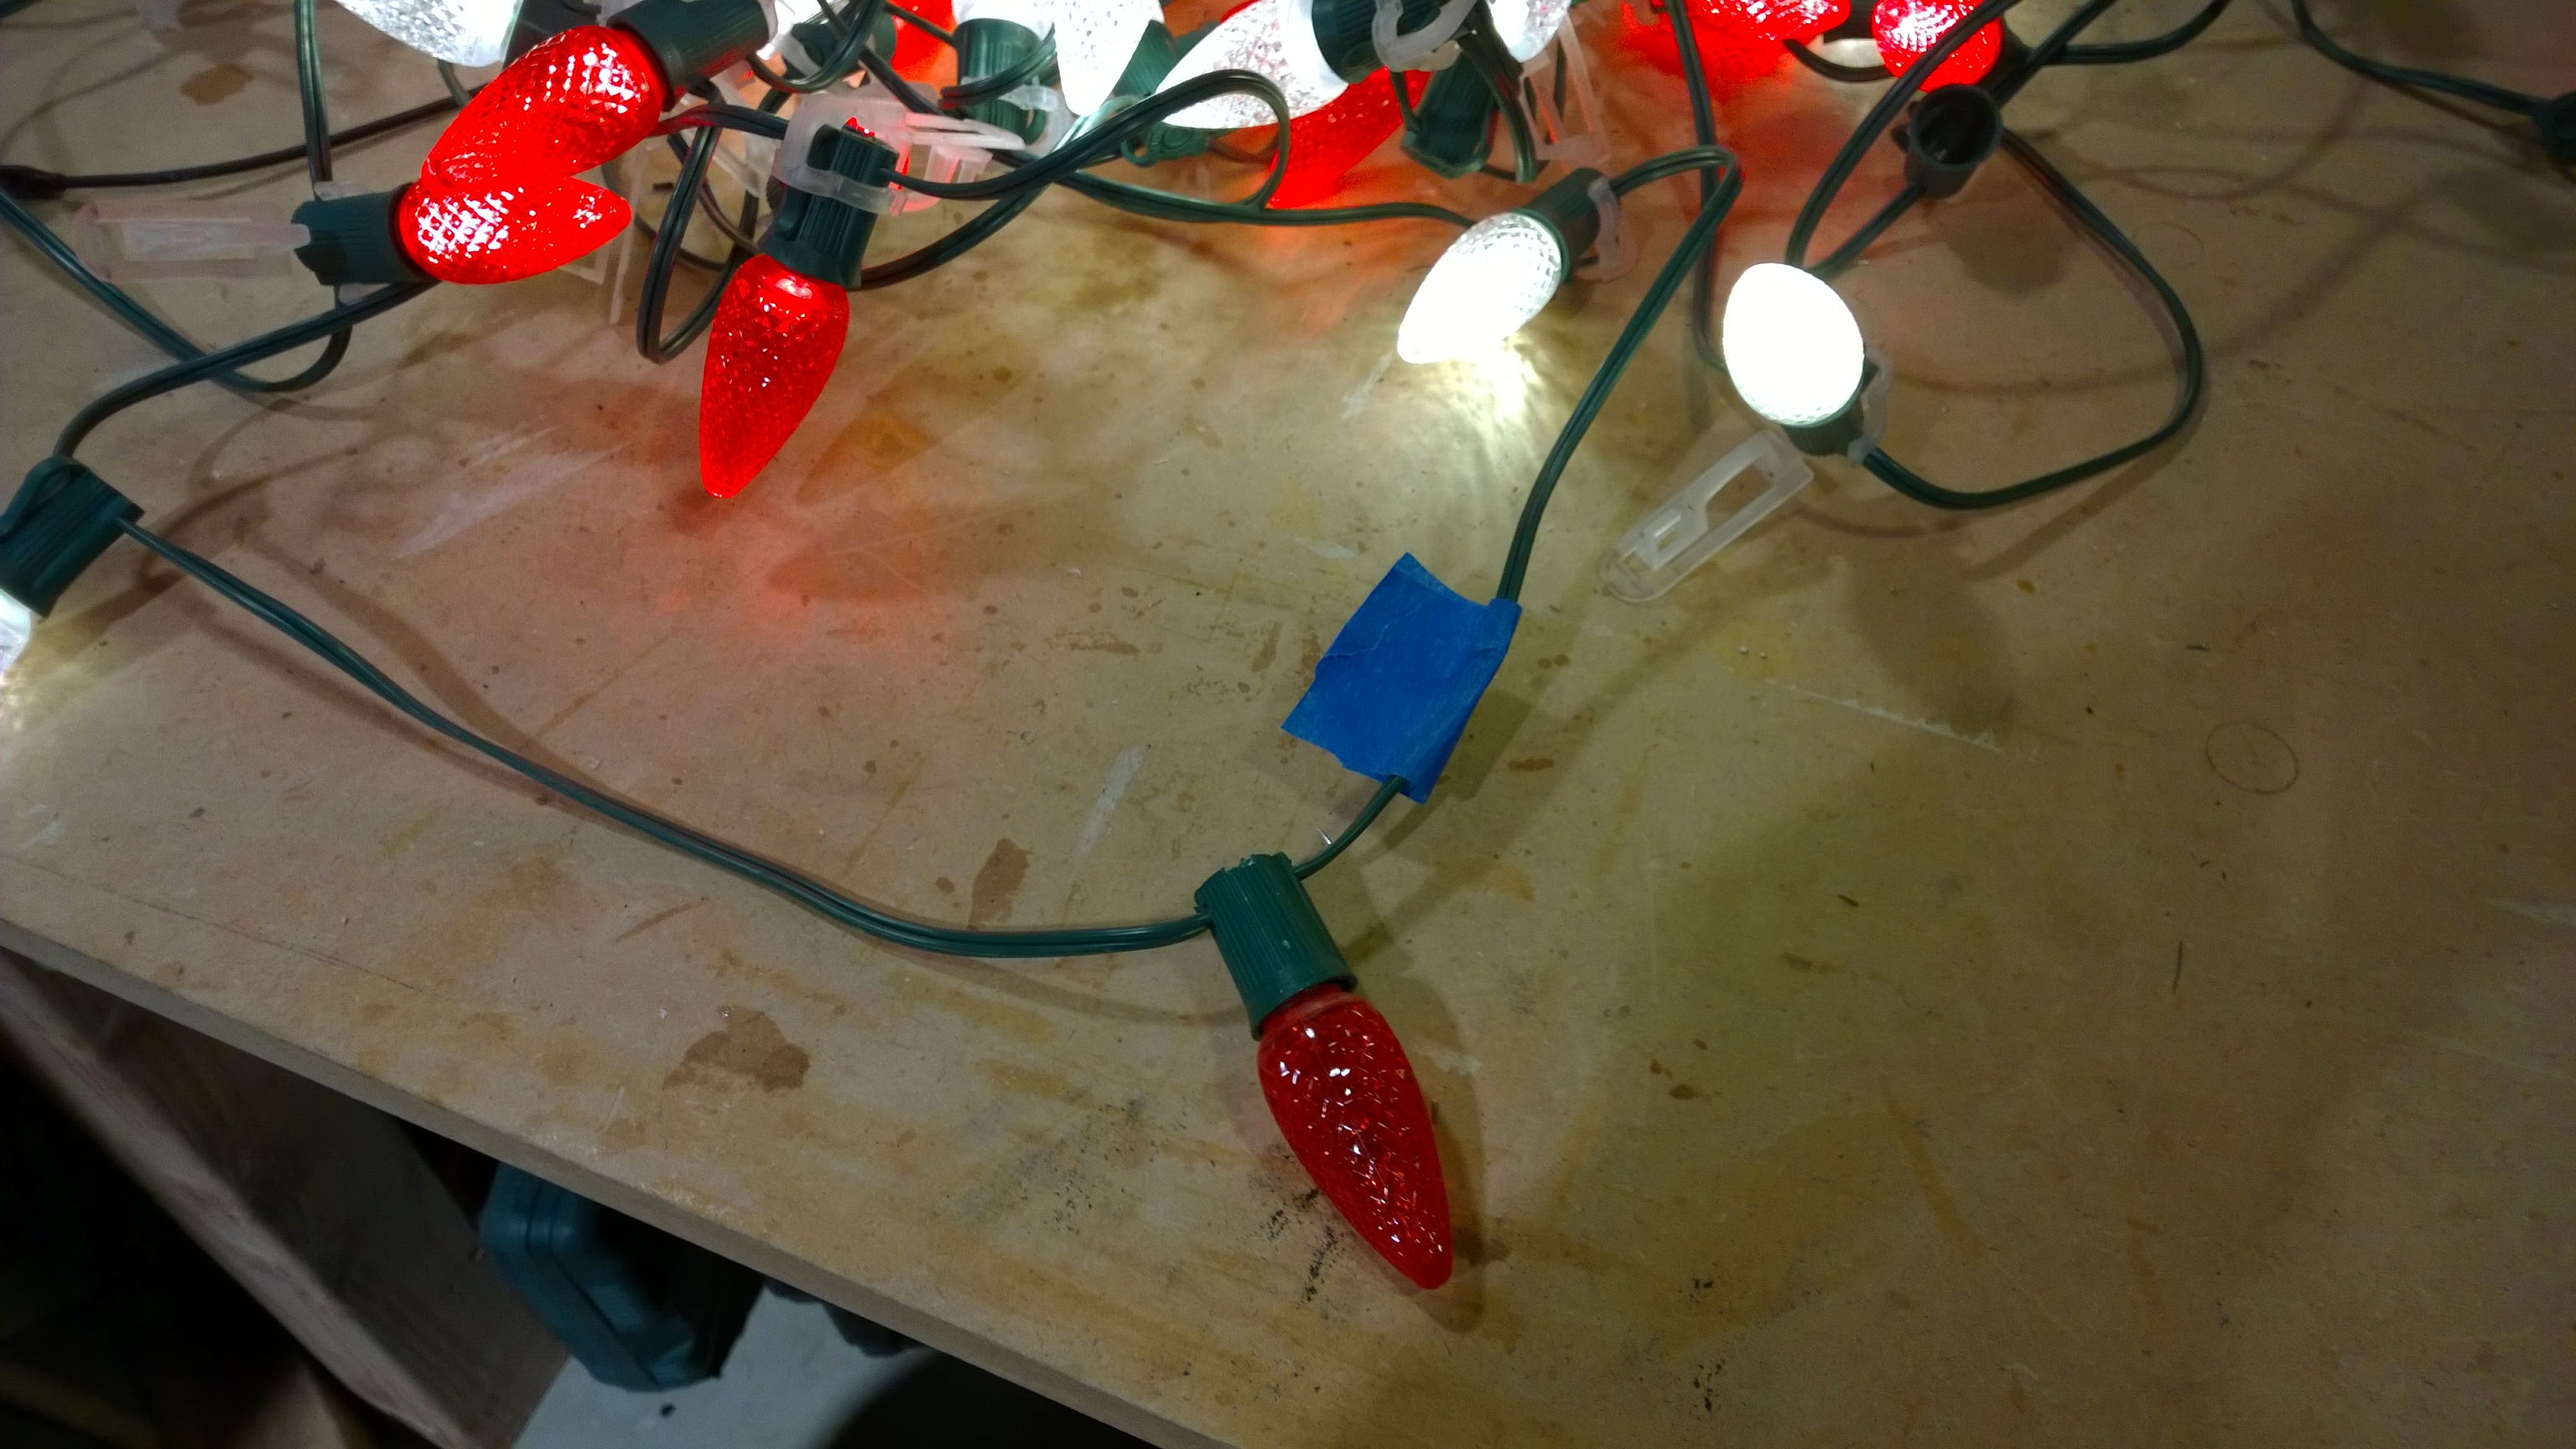 I ordered replacement sockets from Amazon. They come in pretty big quantities, but oh well, this will last me forever and I could use them to create my own custom strands if I wanted to. Make sure that you look to see if your light strand is SPT1 or SPT2. That notation specifies how thick the insulation is on the wire.
Doing the replacement is pretty straightforward except that getting the old socket off was tricky. I ended up just cutting and prying away on the old socket until it broke apart. Then I lined up the new socket and clamped it on. As usual, YouTube has a video to explain it.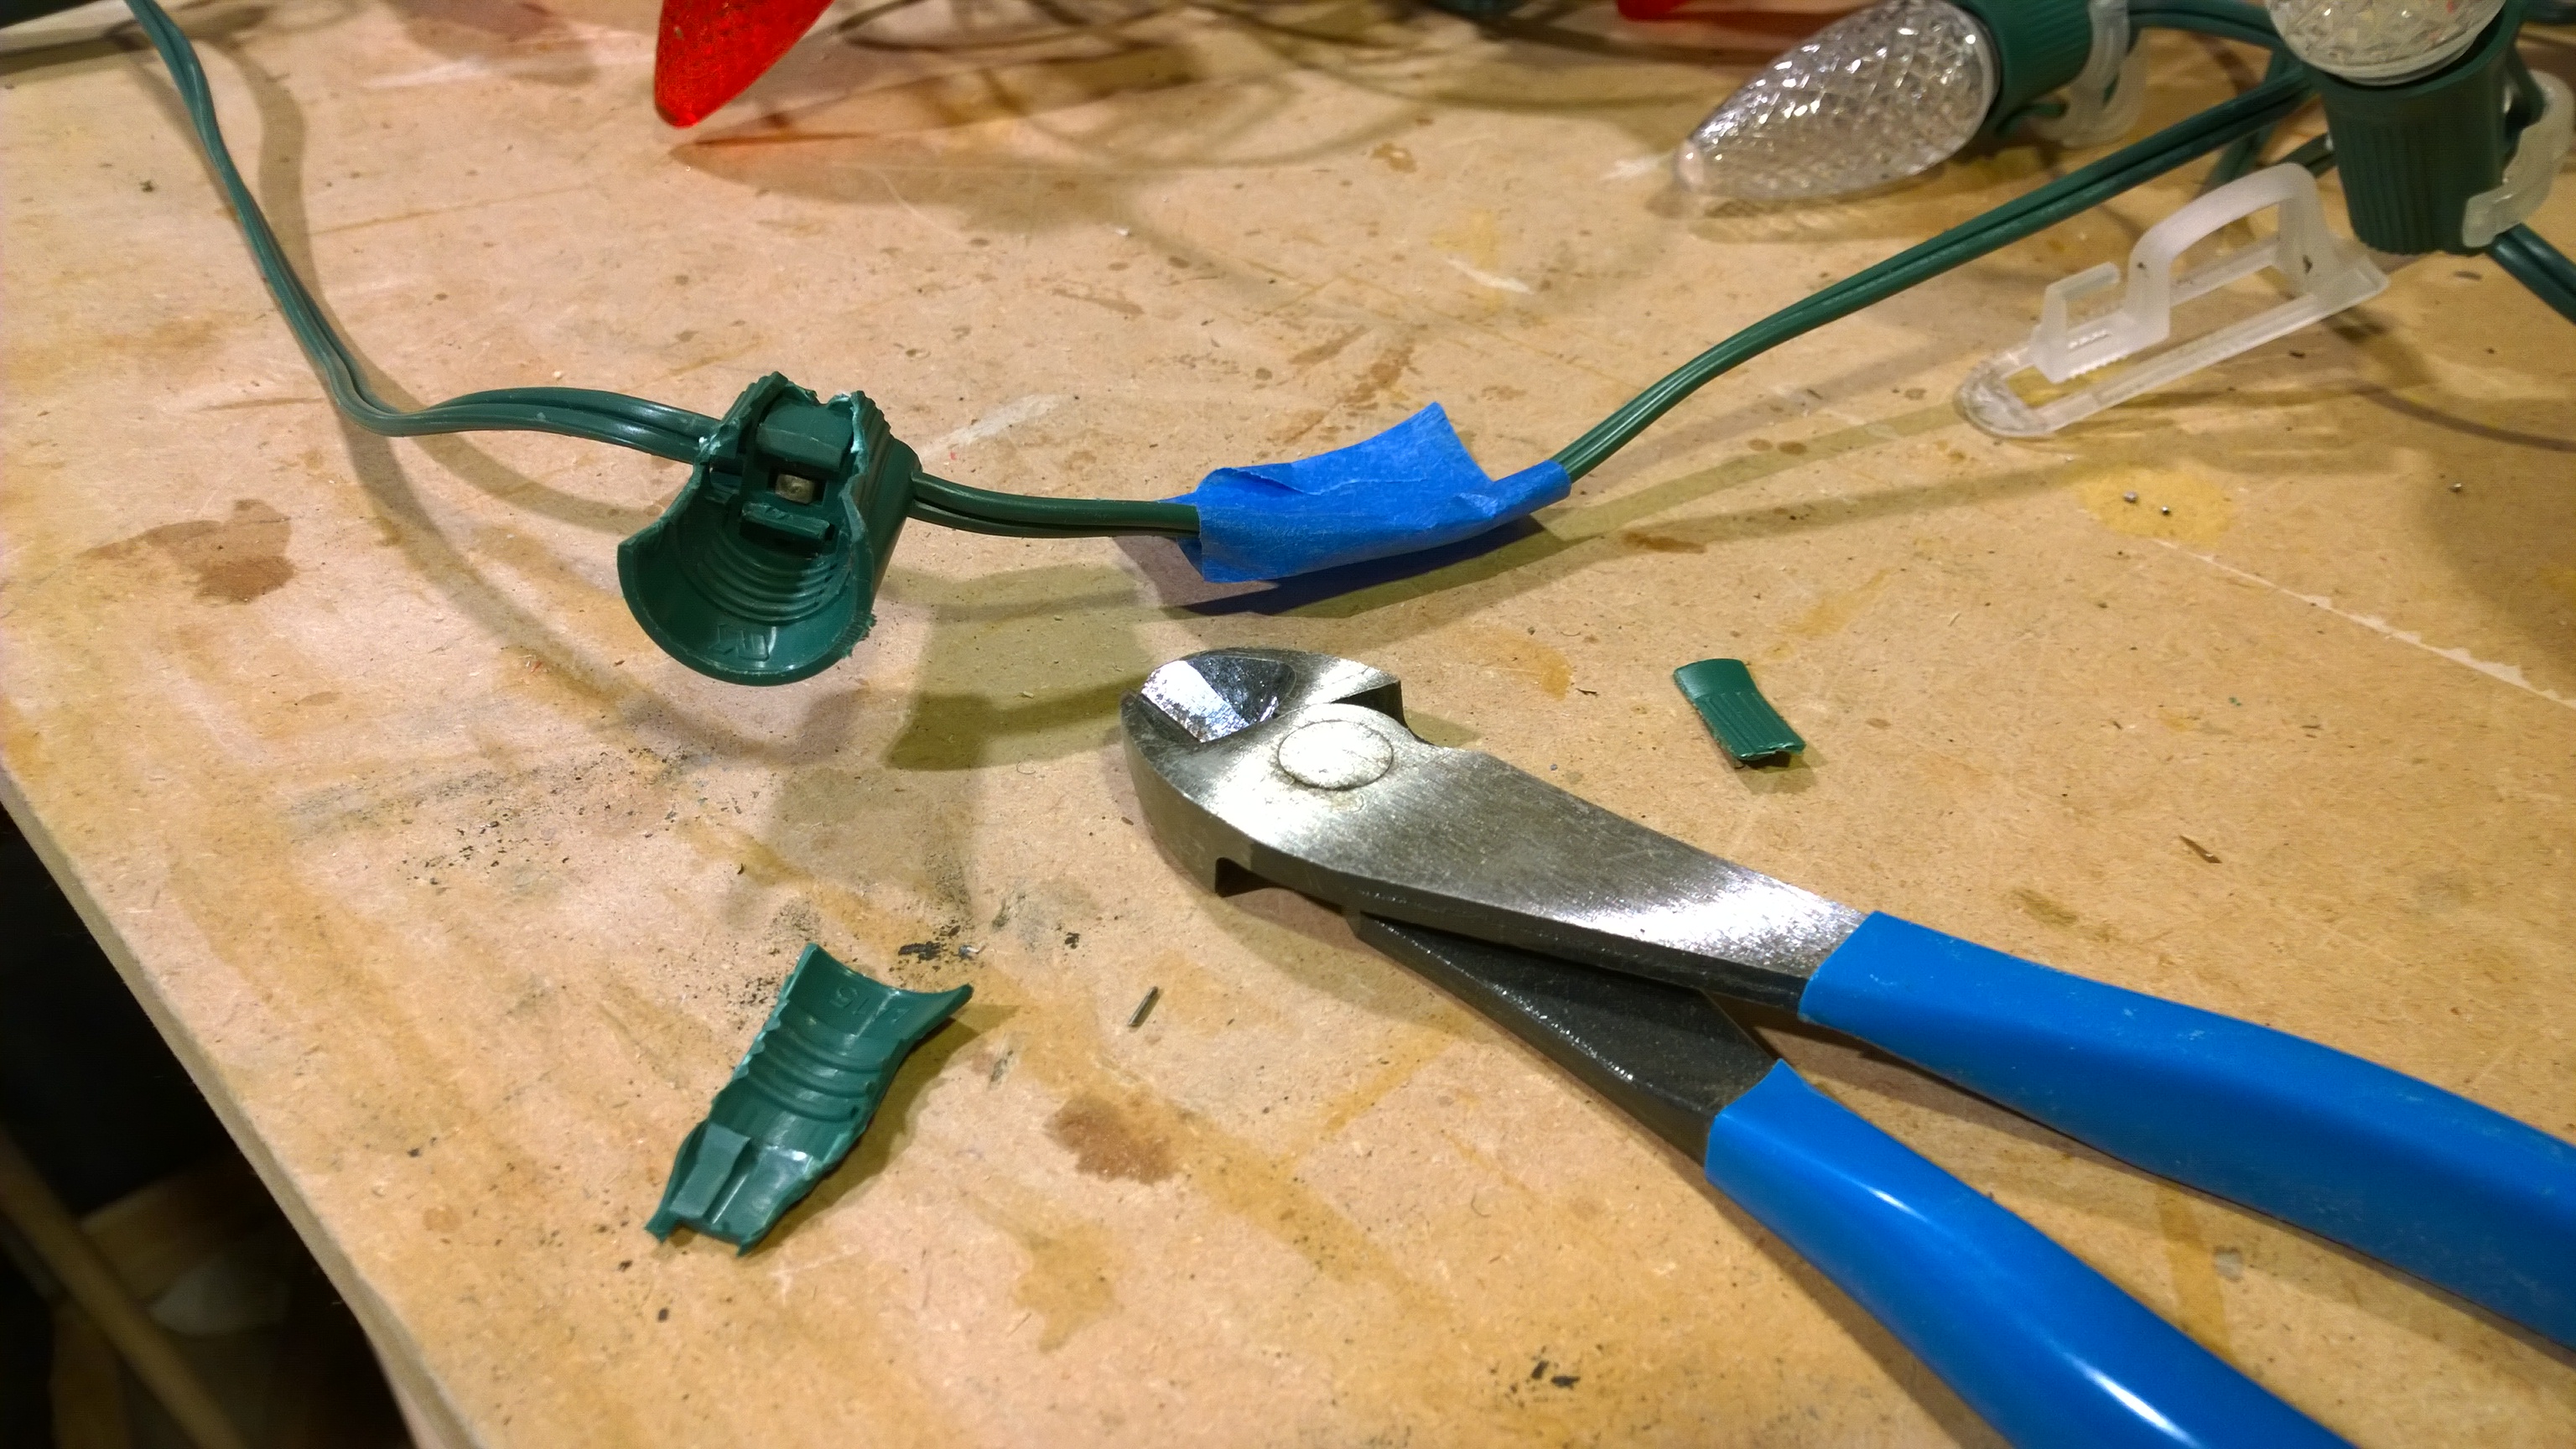 While I was doing all this, I figured I might as well make my strand be exactly the correct length. You can just clip the strand wherever you want and have it keep working, but be sure to clip the two wires at different lengths and then wrap them individually to make sure they don’t short out. Or you can add a new female plug to one end and a male plug to the other and bam, you now have two strings. I chose to add the new plugs. You can buy the male and female plugs on Amazon and learn how to properly install them via YouTube.
Sure this is a lot of trouble to go through for Christmas lights, but you know by now that I like things to work properly. This also makes me feel a LOT better about spending extra money on the professional grade lights. Every individual piece of this setup is replaceable. Whether sockets, plugs, bulbs, or even the wires go bad, I can replace just what’s needed. The worst (most expensive) thing that could happen would be if all of the LED bulbs broke but I’m storing them in a hard plastic container to help protect against that. Next year? MORE LIGHTS!
Christmas Lights
Do you remember voting for what color lights I should use around the garage doors this year? I took your advice and went all-white. You can see the end result below. I think it looks pretty nice. I might toy around with making the center door be all-red or something like that but for now, I’m happy. Next year I think I’ll focus on adding some smaller lights to the bushes and/or the little tree next to the driveway.