Studio711.com – Ben Martens

3dprinting

Top 3D Prints

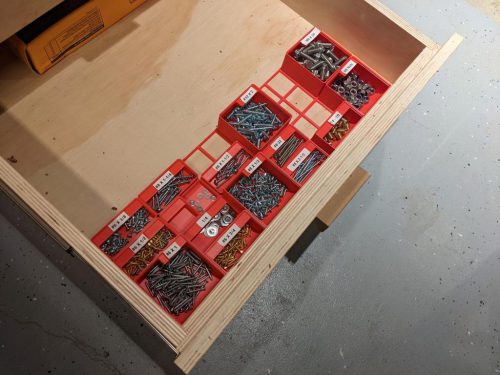
It took a while to convince myself to dive into the world of 3D printing. I wasn’t sure it would be worth it so I kept a list of every time I thought it would be nice to print something. Once I had a big enough list, I went for it. I quickly burned through that list and haven’t stopped! I surprise myself at how often it comes in handy, and how often I use it just to print something fun. Here are some of my favorite prints.

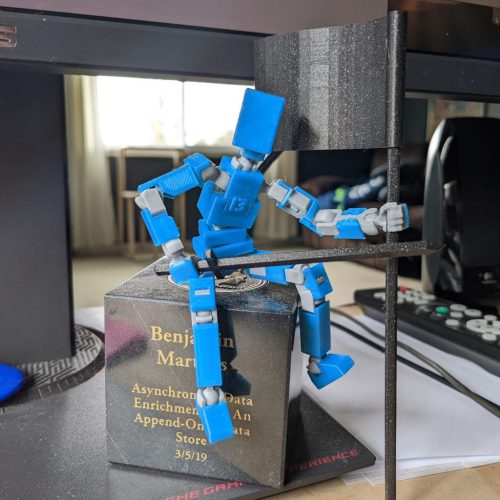
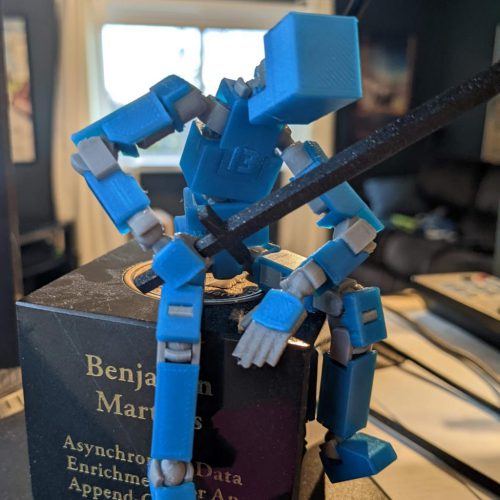
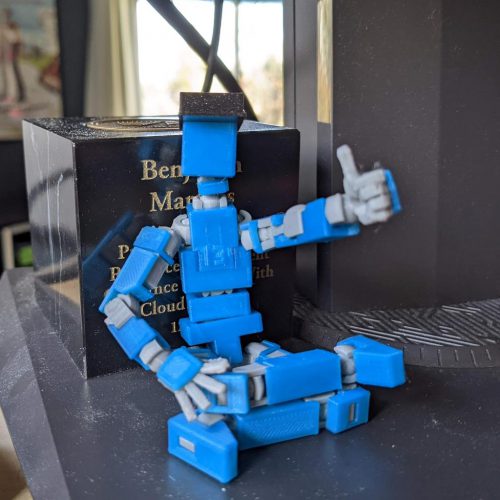
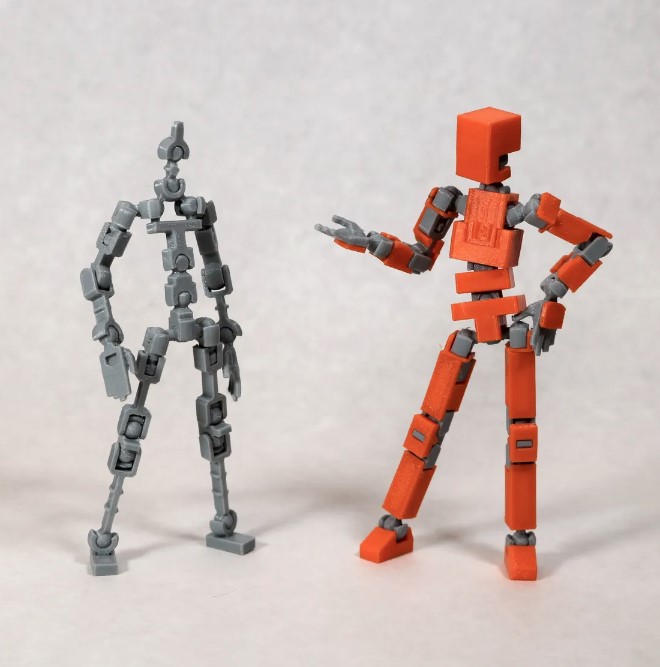
LUCKY 13 Printable Jointed Figure
This model prints in about 100 pieces and then has assembly instructions. The parts fit amazingly well and it’s a fun, poesable figure to have on my desk. There is a community of people that have made funny accessories for the figure too.
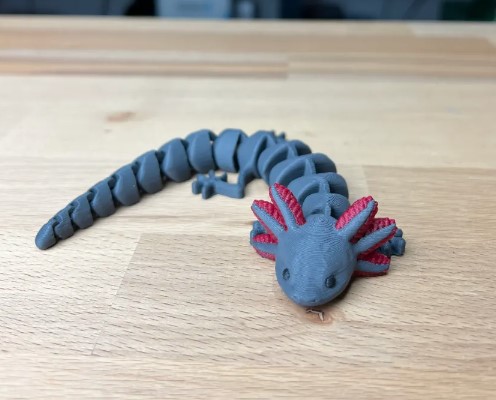
Articulated Axolotl
I didn’t know about axolotls when I was growing up, but they’re neat animals. Elijah loves to carry this one around the house and even takes it to school sometimes.
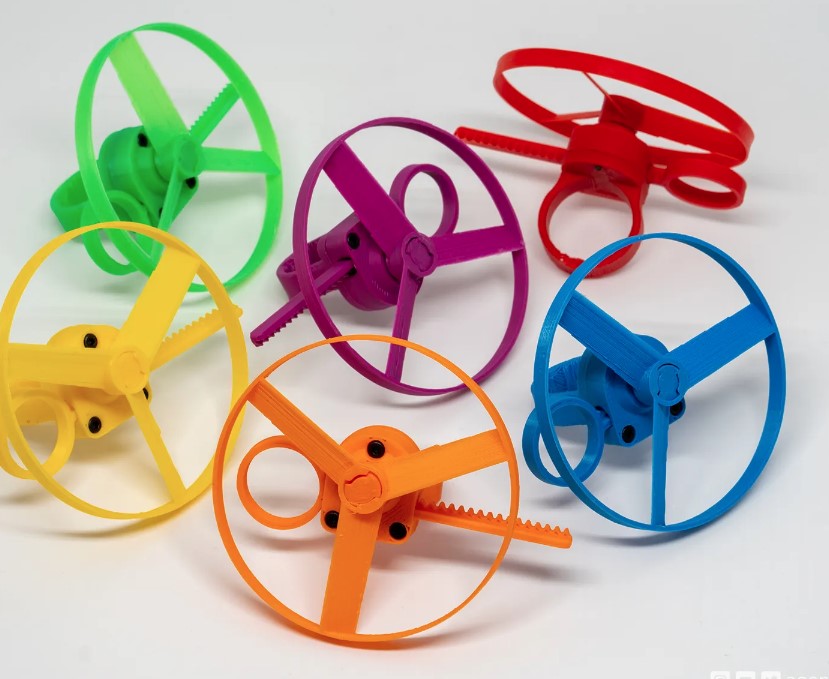
Pull Copter Finger Ring
I figured this would break pretty quickly, but they work amazingly well!
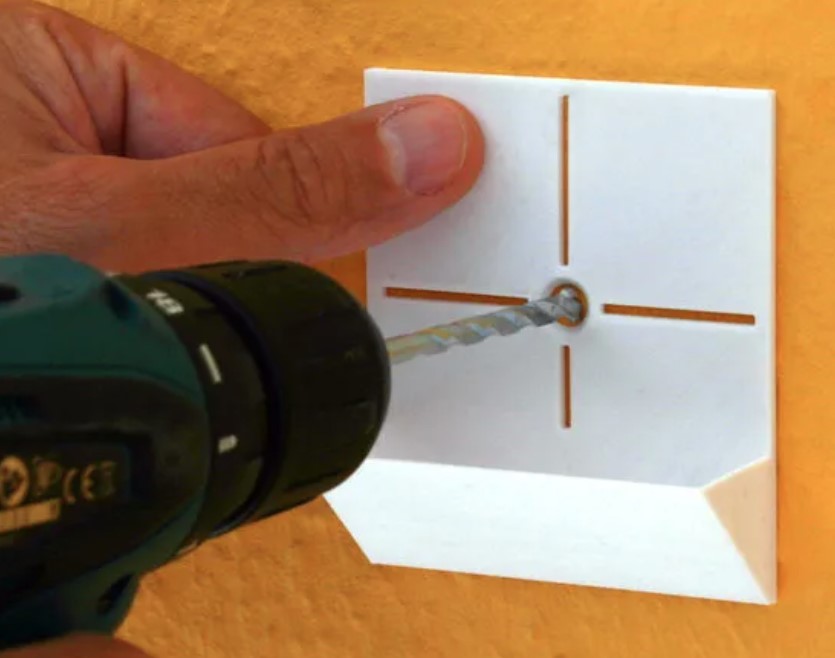
Drilling Tool and Dust Collector
I usually tape a paper lunch bag to the wall before I drill, but this is a lot easier to throw in my tool bag as I’m going around the house to do various jobs. I don’t waste time looking for paper bags and tape.
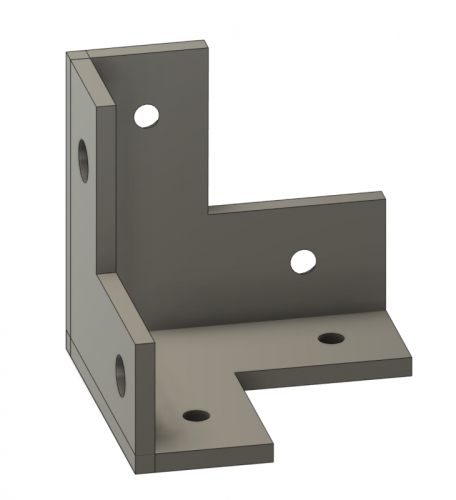
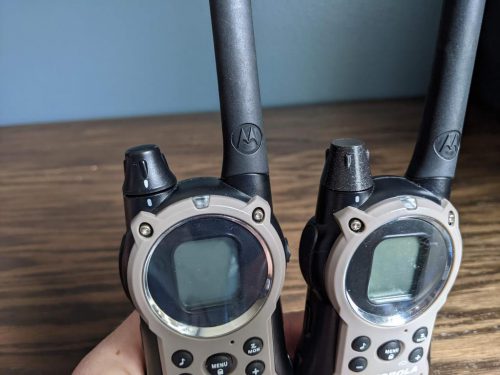
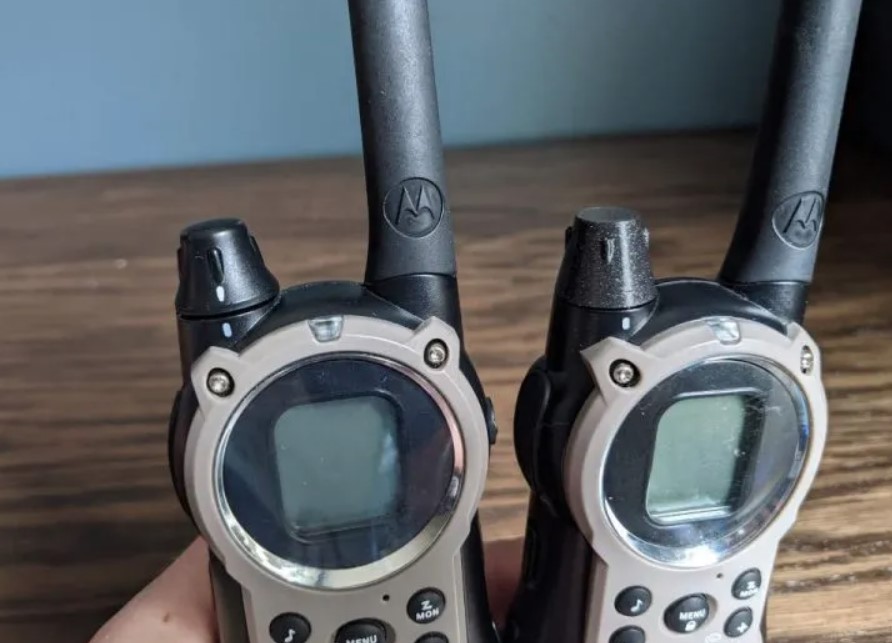
Motorola Two Way Radio Knob
This was one of my first custom designs to replace a cap that we lost. It looks great and sticks on so well that I took off the knob on the good radio and replaced that one too!
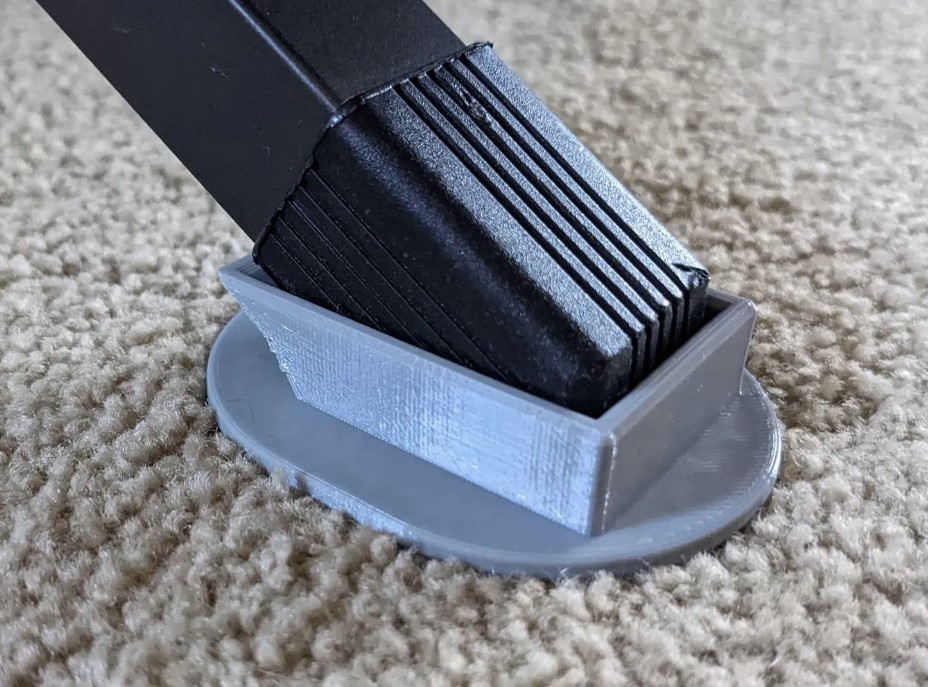
Camp Cot Foot Pads
I used to try and put cardboard under the cots in our tent to keep them from damaging the floor of the tent but these custom pads that I designed work a lot better!
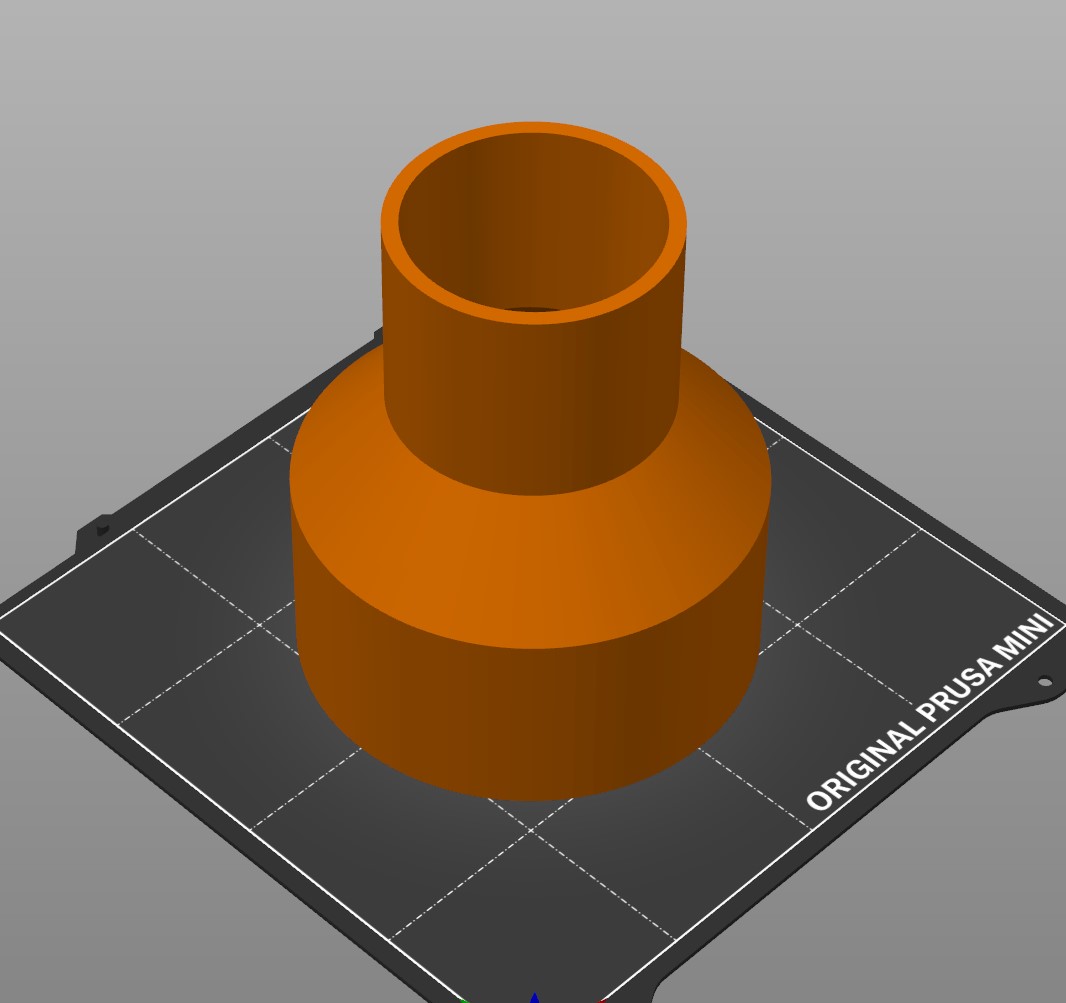
Bandsaw Dust Adapter
One of my favorite 3D printer uses is making custom connections for my dust hoses. So many tools have slightly different sizes of dust ports and they’re hard to connect to my shop vac. Now I can get a perfect fit on every tool.
Grenade MK2 WW2
This one turned out so much better than I expected! I filled it with sand to give it a good amount of weight, added a cotter pin, and included a spring so that when you pull the pin out, the top flies off. It’s a great desk toy.

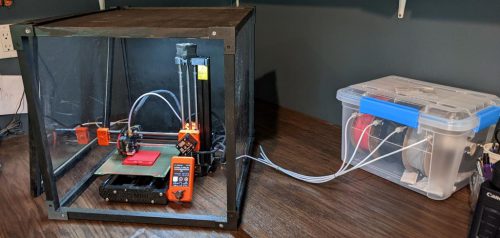
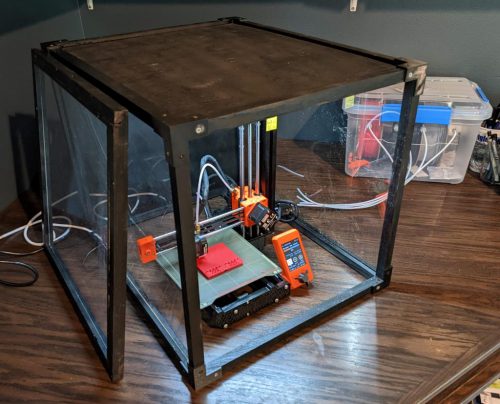
I’m not a 3D printing expert and there are a ton of options out there, but I’ve been very happy with my Prusa Mini. It’s a good entry level price and I just print and walk away. I think of all the prints I’ve done, I’ve maybe had one or two that didn’t come out correctly. It’s a quality product from a company with good customer support.

Gridfinity Organization System

I have a pile of random screws, nuts, bolts, and washers in my shop. I buy little bags or boxes of random sizes of things, use a third of them, and then the bags sit around forever because they are such a mess that I can never find them when I need them. The whole thing seemed so random that I never really put much time into looking for an organization system, but now that I have 3D printer, I have the ability to custom make exactly what I need!

A couple of months ago, Zack Freedman released his “Gridfinity” system. The system is based on a grid of baseplates and then each bin/holder can be easily stacked in various combinations. I was downloaded exactly the bins I wanted, customized his model to make some new bins, and made a series of prints that resulted in a lot more organization. This is a project that I’ll keep adding to, but for now it feels good to have brought some order to the chaos. Not bad for ~$10 in filament!

3D Printer Enclosure

Some people build elaborate 3D printer enclosures to do things like control temperature during prints. I haven’t done anything that complicated yet, but I do like keeping dust and cat hair off the printer. So when it’s not in use, I have been setting a cardboard box over the top of it. It works, but it looks ugly.

The other problem I needed to solve is that filament is hydroscopic. If it sucks up too much moisture from the air, it can cause print problems. I’ve been storing the filament rolls in Ziploc bags with desiccant packs in them. Again, this works fine, but it looks messy and when I want to print, I have to pull the roll out of the bag and get it set into the rollers so it will feed into the printer, etc.

I set out to make an enclosure and dry box that would solve these problems. I’m not sure I’m there yet, but I’m at least at a stopping point for now.

For the enclosure, I decided to go with a minimalistic design. I just wanted to have sticks making a cube and then fill in the panels with either plywood or plexiglass. I modeled up corner brackets in Fusion360 and 3D printed them.

Acrylic seemed a bit expensive, and I thought I could save myself some money by purchasing cheap poster frames. That choice ended up making this a very frustrating project. The plastic frames technically did work but they were extremely thin and difficult to work with. They got scratched up and cracked during the project.

I further complicated the box by making it the wrong size the first time. I forgot how much the bed of the printer slides back and forth so I had to take it apart, cut some of my extra plastic, and try again.

The door was the last piece of the puzzle and by that point, I was tired of the project so I made a frame to hold a plastic sheet and then used rare earth magnets so that it would stick to the face of the enclosure but be easily removable.

Next up was the dry box for the filament. That part went much smoother because Becky Stern has an excellent Instructable article. I 3D printed my own nuts and bolts (with a hole down the middle for filament to feed through) and also printed hangers for the PVC pipe that the filament rolls sit on.

After what seemed like forever, I attached a battery powered LED light to the roof of the enclosure and called it good for now. Maybe this will last me for years, but I could also see getting frustrated with it and wanted to redo it. The basic design is ok but I do want to change the plastic panels, the way the door works, and give it a better paint job. I do really like that I can just leave the filament in the machine instead of unloading it and storing it away every time though.

Printable Posable Figure

Getting a 3D printer while working from home has been a great combination as I can easily have prints going throughout the day. I’ve done a lot of “for fun” prints and a couple useful prints, but the one that impresses me most is LUCKY 13.

Before I could ge started with the print, I had to buy some PETG filament. Printed PETG is tougher than the PLA I had been using so far, but it can be a bit more finnicky to print well. My first, and so far only, roll of PLA filament came from Prusa and it has worked marvelously, but since they’re located in Europe, shipping a roll or two of filament is cost prohibitive. I waded into the endless options for filament and ended up choosing Polymaker PETG. It took a few test prints to get it dialed in, but it worked very well on my Prusa Mini.

The downloaded model files for this print were meticulously laid out and they all printed great the first time. I used the gray PETG for the skeleton and blue PLA for the outer skin and face. There were some accessories too which I did in black PLA.

Having done little to no calibration on my printer out of the box, I didn’t know what to expect, but everything snapped together with almost perfect tolerances! The only sanding I had to do was to remove some little fuzzies that were leftover after printing. This figure now sits on my desk and gets repositioned every once in a while using the plethora of different hand shapes and accessories. I got some red PLA and I think I might need to print him a sparring partner!

3D Printed Volume Knob

We still have a set of Motorola FRS radios that I got about 15 years ago. Elijah and his friends like to play with them, but the volume knob comes off easily. Sure enough, one of the knobs got lost last summer. When it happened, I thought, “If I had a 3D printer, I could make a new one.” Well now I have a 3D printer so I decided to give it a shot. There was an existing model on Thingiverse, but it was the wrong shape for my radio.

I’m a Fusion 360 newbie but I’ve been through I Like To Make Stuff’s excellent Fusion 360 For Makers class twice. It was time to try a design from scratch with no tutorial. It took me about 45 minutes and I’m sure that I did a lot of things the “wrong” way, but in the end, I had a model that looked pretty close to the original. I set everything up with parameters using measurements from my calipers so that if it didn’t fit quite right, I could just adjust the parameters and quickly change the model. The image below is an upside down view since that’s the part that actual matters the most. The only thing that I didn’t match from the original was the curved slope as it rises from the base to the top. I tried to do that a few different ways but gave up for now as it doesn’t make any functional difference.

It took about 25 minutes to print and I figured I’d have to go through a few iterations to get it to fit correctly, but to my shock, it fit perfectly the first time! It is very snug so it won’t be coming off by accident. In fact, it was so good that I printed a second one to replace the knob on the other radio too.

That image shows the original knob on the left and the printed knob on the right. It felt so good to go from idea to physical object in an hour or two! I even uploaded the model to Thingiverse: https://www.thingiverse.com/thing:5316963. I’ve found so many fun things to use there, I feel good contributing a bit too.