
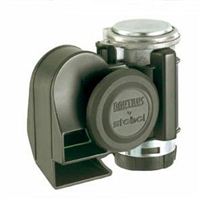
 I received a Stebel Nautilus Compact Horn (ST-100) as a birthday gift from Mom and Dad. It’s a nice upgrade to the stock horn on my 2009 Kawasaki Concours 14 ABS. If you ride a motorcycle, you probably the feeling when somebody merges into you with their windows up and the radio blasting. You’re lucky if they can hear their horn. Now I won’t have that problem.
If I add up the entire project time, it is about 12 hours spread over two days. If I did it again I think I could pull it off in less than two hours. Much of the time was sucked up with 3 trips each to Home Depot and Radio Shack. This whole project was a bit over my head, but I’m very happy with how it turned out.
The step that took the longest was figuring out how to activate the horn. I wanted to replace the stock horn, but I couldn’t find a way to tie into the stock horn button without cutting the wiring harness. I finally gave in and did it, but it took a lot of time to convince myself it was the right move. I’m glad I did.
I’ve posted a series of photos showing the main steps to document the effort, but I’m not responsible if you use these to try it yourself. It’s important to note that I also had the wiring harness from Murphs’ Kits, but it’s not necessary, and if I was doing it again, I’d probably build my own. I would have used a bit thicker wire (is that “lower” gauge?) and shorter wires. But then again, if I didn’t have that harness I would have had a harder time knowing what I needed to do.
If my instructions don’t do it for you, check out the installation instructions for a different the Stebel HF-80/2 on the same bike. It’s smaller though so it gets mounted where the stock horn is. I couldn’t mount this one there because it would have hit the front fender if I compressed the front forks over a bump.
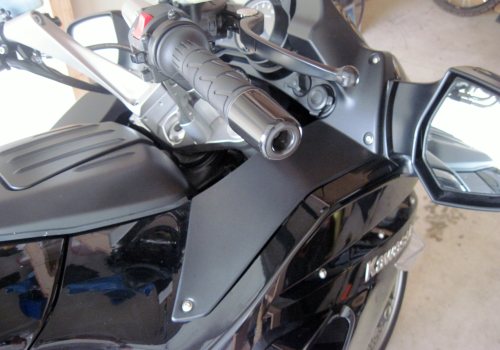
This first picture is the bike before any modifications. I installed the horn right below the flat lighter black plastic piece in this photo.
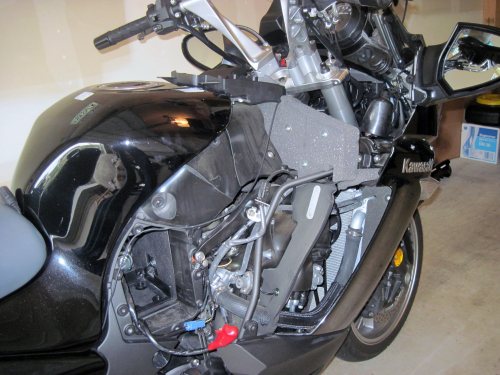
I’m not going to cover how to remove all the plastic bits. I relied heavily on a set of nine DVDs tailored for my bike. I can’t recommend these AngelRideVideos.com discs enough! This next shot shows all the plastics removed. Note that I also took the battery out since I’m messing with the electronics.
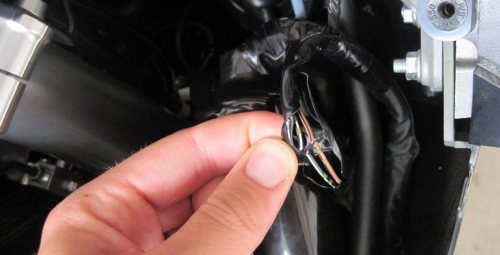
Follow the wire up from the stock horn and find where it goes into the main wiring harness. Take the plunge and snip the two wires. I made sure I had snipped the right wires by reconnecting the battery, firing it up and pressing the horn button. No noise. perfect.
The next two shots show the horn mounted in position. I’ve placed spade connectors onto the bare ends of the wiring harness and plugged into the harness from Murphs’ Kits. I got a strip of aluminum from Home Depot, drilled bigger holes, bent it, and cut it to hold the horn. I later added some zip ties to secure it even more.
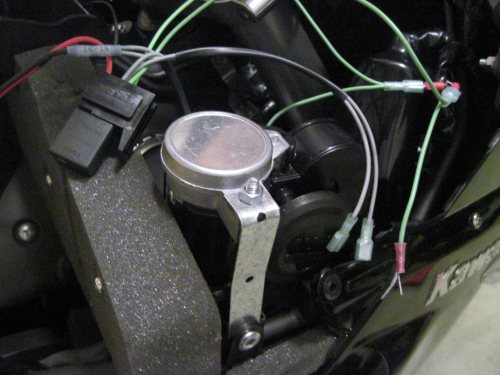
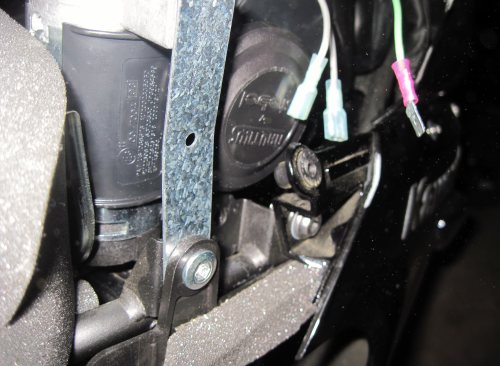
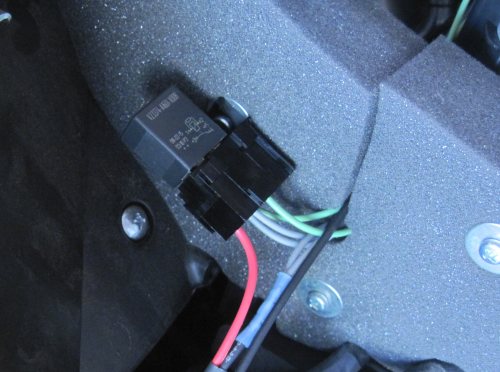
The horn requires a relay since it draws so much power. I mounted that on the other side of the foam onto an existing bolt. Very convenient.
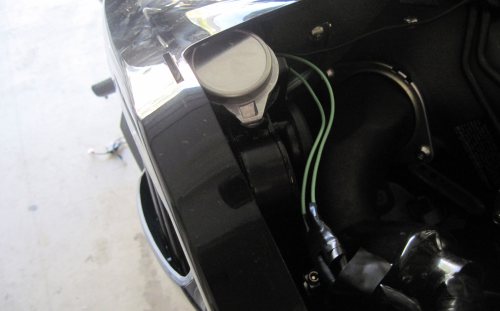
This shows the install location with the right fairing replaced. Once the top piece is in place, you can’t see the horn at all. I suppose there are other places that you could mount this for a slightly louder sound, but this is plenty good and it is easy to access.
The end result is impressive! I had no idea what to expect, and honestly, it’s not quite as ear bustingly loud as I thought it might be, but that’s probably good considering that my wife works at a hearing clinic. With a helmet on, it’s no problem to honk the horn, but working the garage right next the horn I put in ear plugs during testing. The real shock is hearing an air horn coming from a motorcycle. I took before and after video to show the difference, but you really have to hear it in person to appreciate it.