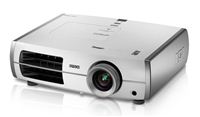
 I’ve gotten a few questions about my theater room and how much it costs to put something like this together. I know it’s impolite to talk about stuff like this in public, but on the flip side, I also want to point out that this might not be nearly as expensive as you think. Plus when I was putting this together, it was very helpful to read through other people’s build list. So I’ll just list out all the gear that I used and you can click the links if you want to look into buying it for yourself. I did this almost as cheaply as I could except that I splurged and spent a couple hundred extra to get a slightly better projector that had a lot of lens shift. That makes it a lot easier to mount it wherever is convenient and adjust the lens to hit the screen. And I suppose you could save some more money if you go for a 720p projector instead of 1080p, but if you can afford it at all, go for 1080p. At this size of a screen, you’ll notice the difference.
- Projector: Epson 8350
- Screen: 120” Elite Screens Sable Fixed Frame
- Audio Receiver and 5.1 speakers: Sony STR DG710 (already own this)
- Furniture: Reclining sofa and matching recliner/rocker from Underhills
- Paint: 3 gallons of Behr Ultra
- Cables: 2 – 35ft HDMI cables, numerous CAT6 cables and in-wall speaker wire all from MonoPrice.com
- Battery backup: CyberPower 1500AVR (already owned this)
- Running cables to projector: PowerBridge Total Solution In-Wall Power and Cable Management Kit
- Projector mount: Homemade with two shelf brackets and some MDF, painted white with spraypaint
- Speaker mounts: Speaker Wall Mounting Brackets from Monoprice, center channel was custom built with MDF and black spray paint
- Cable runs along baseboards: Channel Raceway with Endcaps
- Xbox360 to connect to Media Center PC and for gaming
- WDTV Live to stream videos that the Xbox360 won’t play
- Samsung BD-P1600 BluRay player
- TV trays from Target
I think that about covers it. I still want to buy some curtains to hang over the windows. There are blinds on the windows already but now that the days are getting longer, we find ourselves watching the projector more when it’s not completely dark outside. A little extra darkening would help.
The bottom line is, if you’re interested in a project like this, take a peak at the costs first. A projector isn’t much more expensive than a good quality TV. Yes you have to replace the bulb every once in a while for $200-300 but at the rate I’m using this (and it seems pretty heavy) my bulb will last for 3-4 years with no problem. By then I might be interested in upgrading to a new projector anyway. The rest of the room can be as fancy or simple as you want. In Jersey we just had it projecting on a blank white wall and it was still a lot of fun!
If I had money to upgrade a single piece in the room, I’d go for a nicer screen. I’m learning to live with the hot spots and a bit of streakiness because it was 1/2 to 1/3 of the cost of a good screen, but I think that improvement would give me the most bang for my buck.
[UPDATE] Thanks to Nancy for reminding me about the rope lighting. We found it was sometimes difficult to see our food when we were eating and watching a movie. I added some rope lighting behind the couch. It provides a nice light distribution and the color of white is good. I added a dimmer switch to the outlet where the lights are plugged in and the switch has an infrared remote control. I was able to program the Harmony One Remote to control the rope lights.
