
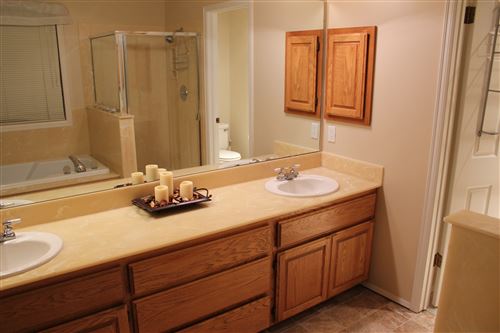
When I wrote the “before” post for our bathroom remodel, I said I’d have finished pictures in a couple weeks. That was being very generous in case there were mistakes that I found to have them clean up, etc. I’m happy to report that the job is finished and I will make the final payment tomorrow. This room is perfect! As a reminder, here’s the before photo:
And here’s what it looks like now!
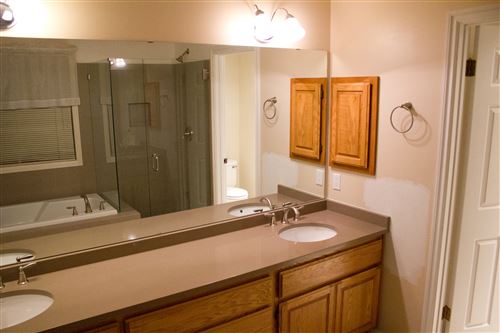
It’s difficult to get good photos in such a small space but hopefully you get a decent idea of what it looks like now. Everything is in the same place and the cabinets are the same, but everything else is new. You’ll notice that we didn’t pay the contractor to paint for us. We’ll do that ourselves later. Tyla also wants me to point out that the “ugly curtains” are being replaced too. Here’s a list of some of the more visible changes:
- We had a half wall between the shower and the tub. That’s gone now.
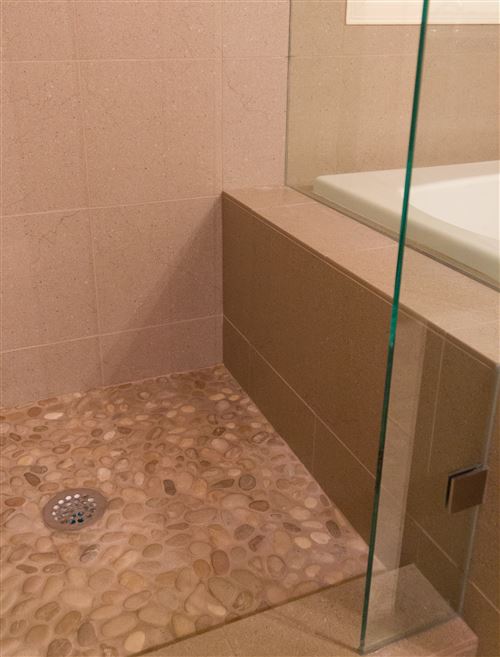
- The tub deck juts into the shower creating a little ledge for bottles or to help Tyla shave her legs. That’s actually where the wall used to be but now it’s even with the top of the tub so the shower floor is the same height. That extra ~6” of space makes the shower feel quite a bit bigger.
- The frameless shower glass is probably my favorite feature and one of the bigger splurges in the project. Three brackets and two hinges hold the hole thing together! The door swings both ways and auto-centers when it’s within 20 degrees of center.
- You already know the story behind the tile. I’m thrilled with the way this looks. I was really trusting the designer on the first round of tile, but I love what we ended up with and I feel much more confident that it will still look nice in 15-20 years.
- The countertop was another good score. The original plan was to use a product called Caesarstone but the counter guy suggested another product that was half the price and about the same. (The difference is that it’s not from Italy and it’s not as eco-friendly.) Because of the size of our counter, we had to buy a full slab so the cost savings was enormous.
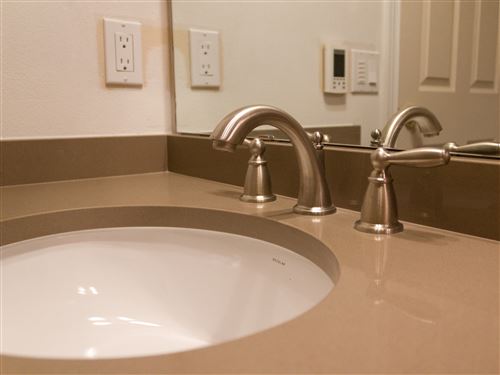
- We went with undermount sinks. Tim and Chelsea put those in their bathroom and I love the look. They should be easy to clean too.
- All of the plumbing fixtures and towel bars are new. They are the Moen Brantford line in brushed nickel. Tim suggested that we wide mount the sink faucets given the length of our counter and they look great.
- There’s a door to the bathroom! It’s one of the changes that’s easy to overlook because it seems like it should have been there all along, but it’s new.
There are also some great changes that aren’t quite as obvious:
- The shower uses a Moen Posi-Temp pressure-balancing valve. They say that it won’t let the water temp vary more than 3 degrees if someone turns on a sink or flushes a toilet. From our limited testing so far it seems to work very well.
- The shower is built for a big man! In almost every shower I use, I have to duck to wash my hair, but not in this one! The bottom of the shower head is 6’6” off the shower floor and the shower glass is extra tall too so I don’t splash over the top.
- We swapped out our noisy 50 CFM vent fan for a super quiet Panasonic 110 CFM model. It’s so good that it makes me want to replace our other fans with this model.
- Our other big splurge on this project was a heated floor. It’s on a 7 day programmable timer and feels wonderful.
The project all went remarkably according to plan. They finished a couple days before planned and our total overrun was less than 2%. The only surprises in the project were:
- The vent pipe for our fan was a smaller diameter than normal and just ran to a soffit vent instead of going through the roof. I kept this one simple by having them put on a reducer and leave the pipe as it was. I can fix that separately if needed, but it will probably be fine the way it is. Since I kept that simple, it didn’t cost any extra.
- The old shower head was never lined up with the shower drain and the new shower pan made that even more obvious. Of course there was a stud in the way so they had to carefully remove it and do some new framing.
- When they plumbed the supply lines to the tub, they went from 1/2” to 3/8” and back to 1/2”. The plumber fixed that up. The tub was also not set in mortar or framed in. It was simply hanging about 3” off the ground. I can’t believe it never cracked! The nice part was that we were able to reuse the tub since it just pulled right out. The next people who remodel won’t be so lucky because it’s now set in a mortar bed.
Now that the project is done, I can give a 100% recommendation for Ron Palmer Construction. He was not the cheapest bid, but he was super detailed. The other contractors gave one page bids. Ron’s was 9 pages with only one page of boilerplate content. Everything was completely broken down so I could see exactly what he was charging for each task. We had a schedule listing what they would be doing every single day. His whole team was very professional and friendly. We had no problem leaving them a key to work in our house each day. From day 1 until they end, they did a marvelous job of protecting the rest of our house and cleaning up after themselves. They had plastic down on the carpet all the way out to the front door, padding on the hardwood floors, and even a huge plastic sheet with a zipper door separating our bed area from the bathroom dust. And as I said before, he was almost spot on with his cost estimate and beat his schedule. Once we save up our pennies for the next remodel, I’ll have a hard time picking anyone but Ron.
So there you have it. The project we talked about the very first time we saw the house is done! Given the same budget, there’s nothing I’d do differently.