
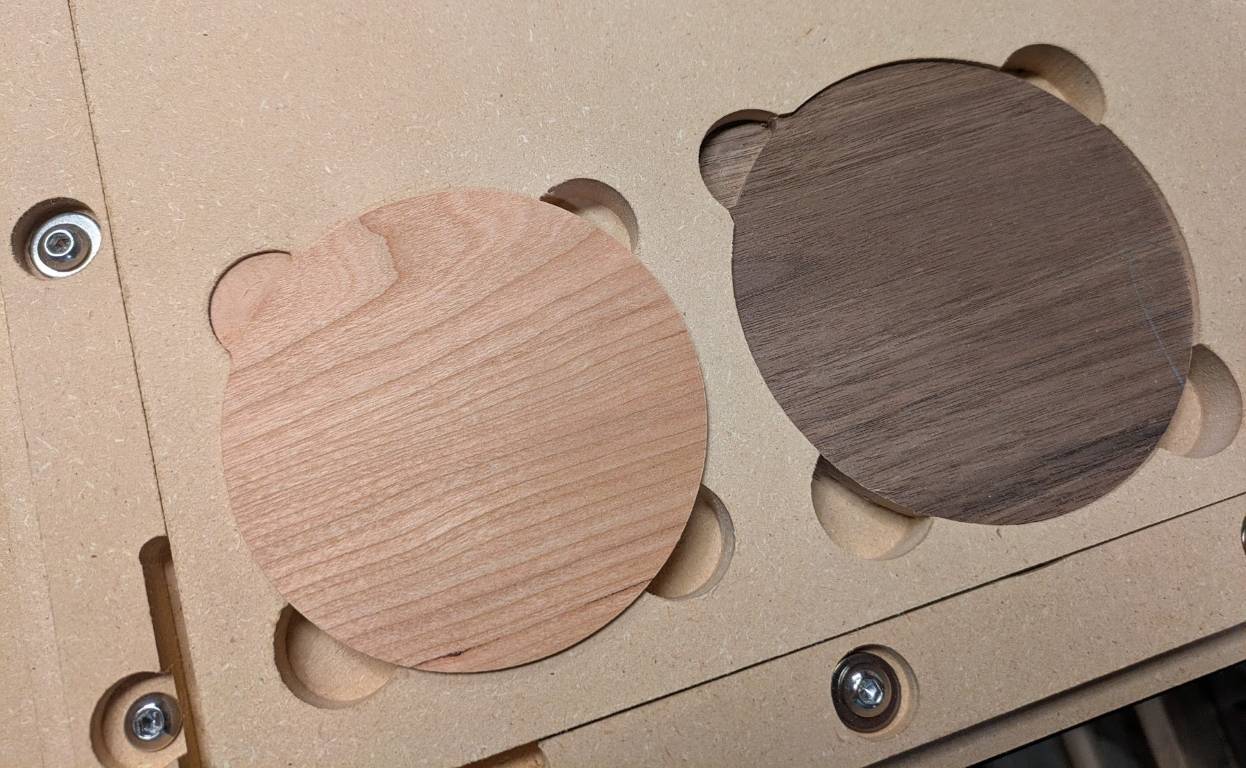
I’ve always been intrigued by wood inlays on the CNC. I’ve tried a few times in the past but I could neve get the precision I needed to make it happen. For Christmas, I received a BitSetter for my CNC which lets me change bits in the middle of the job and zero the height of the new bit to exactly the same as the previous one. When doing inlays, you need to first use a regular bit with a flat end to carve out the big areas and then you use a “v bit” to make the angled sides. If those two bits aren’t zeroed exactly the same, you won’t end up with a precise piece. After that you have to cut the plug to fit into it going through the same bit change process.
I chose to use the Martin Luther College logo since Tyla and I have been doing some much work with them and because it seemed like a good medium-detail goal to shoot for. And I’ve been shooting for that goal for months and months. Granted this is very much a start/stop project as I try to find 30 minutes here and there throughout the week or on the weekend to make progress.
I learned so many things along the way. This post would be absurdly long if I wrote it all out in detail but here is a quick summary of the learnings and improvements I made in the process:
- Holding the work pieces down is difficult when making coasters. Pretty early on, I made a jig out of MDF that would perfectly hold the coaster but still have finger holes on the outside so I could extract the coaster.
- The jig worked well but the coasters would spin so then I started cutting my coaster blanks with a little nub that fit into one of the finger holes so that it wouldn’t spin. I could easily cut that off at the end.
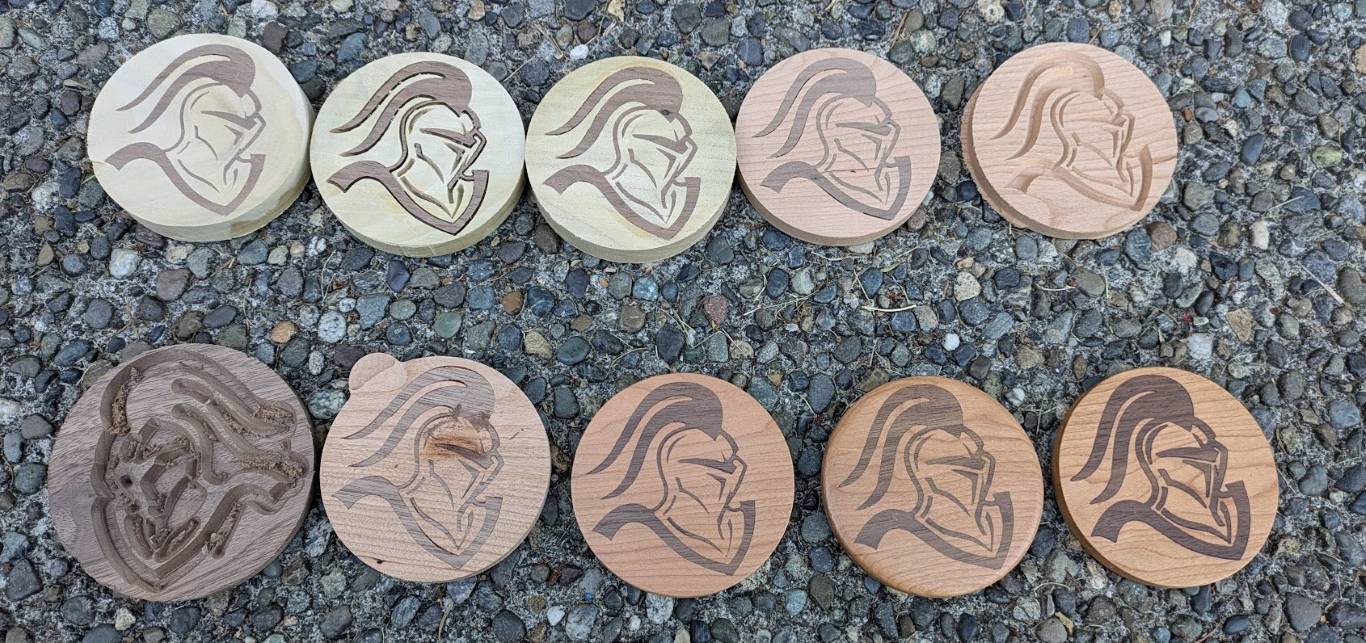
- I messed around with different angles of bits: 60, 30, and 11. The sharpest bit didn’t work because the remaining slivers of wood were too fragile. The 60 degree bit was ok, but ultimately I liked the 30 degree best because it let me cut deeper even in areas of fine detail.
- To remove any inconsistencies, I would spend time running a program to face each piece before cutting it to make sure it was perfectly level.
- You have to glue EVERYTHING when you’re putting the plug into the base. I would use a tiny brush to carefully get glue everywhere on both faces but going fast so the glue didn’t start to set up.
- I thought of various ways to remove the extra part of the plug, but eventually I just put it back on the CNC in my jig and let the CNC cut it off.
- Glue would inevitably seep into the fibers in the top of the wood so I expanded my cut path just a tiny bit. Since I was make an angled cut, this meant I could remove the top couple hundredths of the coaster to perfectly remove any extra glue marks.
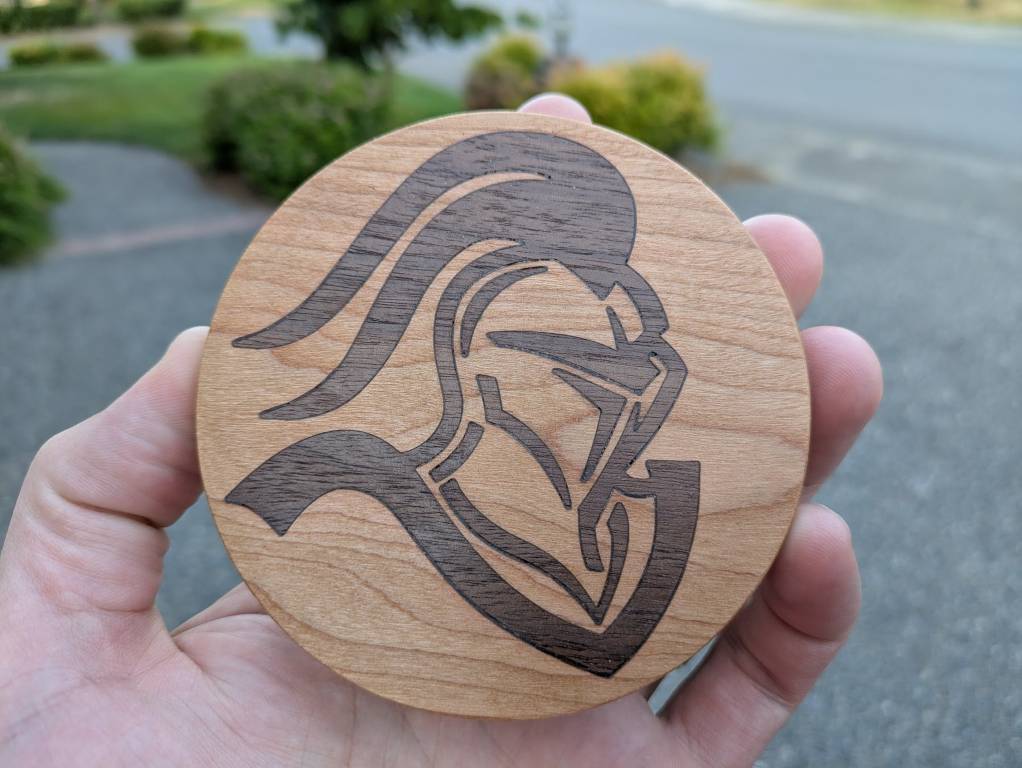
I had about 12 steps to the process of making a single coaster and it took me hours to complete one. And in the end… I could never get it good enough to satisfy me. There were always some little gaps between various parts of the logo. I tried using brown glue to make the gaps less obvious and I tried filling them with superglue and then jamming sawdust into the cracks. The superglue trick got me the closest but it’s still not something I’m proud of. So I did something I rarely do: I gave up on it. For now. Below you can see all of my numerous attempts as well as a solo shot of the closest I could get.
But I didn’t totally give up. I decided to scale back my dreams and instead of inlaying one type of wood into another, I would pour tinted epoxy resin into the logo that I had carved out. Despite being the first time I had ever worked with epoxy, this was almost an instant success! Not only did it look amazing but it also took me only about a third of the time (except for the 24 hours of cure time.)
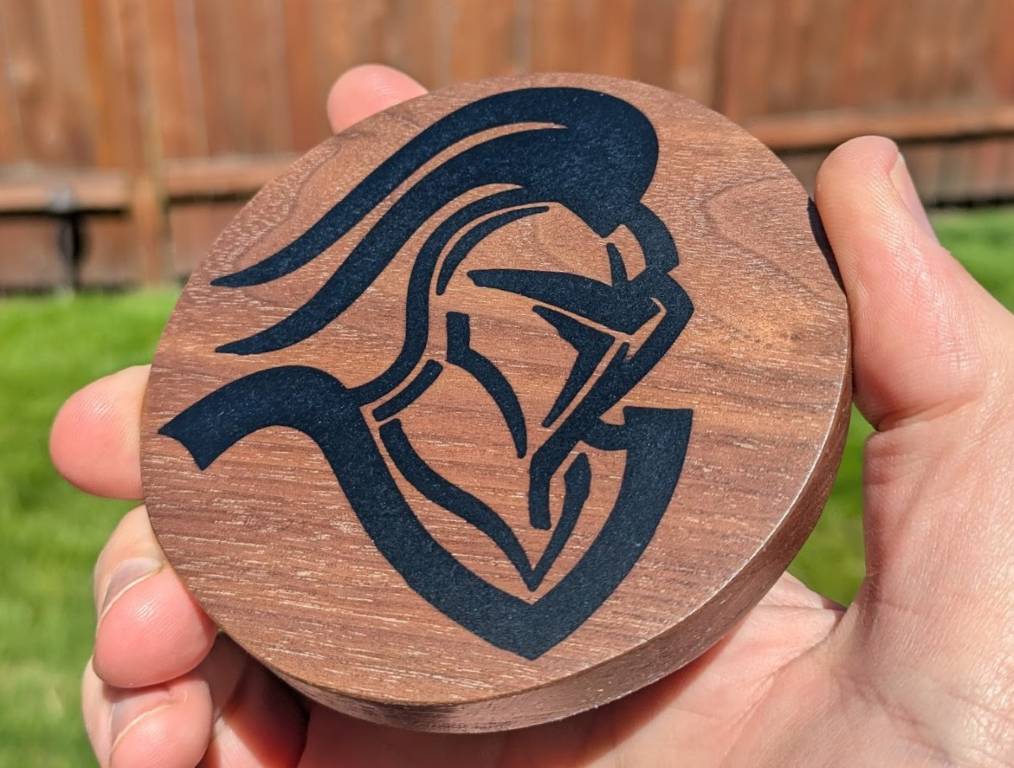
There were still learnings to go through with the epoxy like dealing with bubbles that come to the surface as it cures, figuring out how the walnut soaks up extra epoxy around the logo pocket, keeping sawdust out as it cures, etc, but those were much simpler and I’m very happy with the result. I was even able to switch the logo and get a decent coaster on my first attempt.
After working on this so long, I’m kind of stuck in this mindset so I think I’m going to make a bigger jig and try to batch some of these out. They will make nice gifts and I’m sure I’ll experiment with other woods and other logos. I’m also interested to try doing a multi color pour. That would involve cutting part of the logo, pouring a color, cutting another part of the logo, pouring another color, etc. It feels a little silly to spend so much of my year on this one project, but I’ll keep going as long as I’m enjoying it.
Greetings – just stumbled upon your post from last summer relating to the song “come to the wels” theme song. I can give you what little information my aging memory can provide. I believe i had the pleasure of participating in a unique experience when that song was first introduced to the synod.