 We gave nephew David a kid sized Camelbak for his 6th birthday, and it reminded me of a post I’ve been meaning to do for a while on how to properly clean a hydration pack. Before I met Tyla, I don’t know if I cleaned mine more than once or twice. Turns out she doesn’t like drinking moldy water. Who knew? We now have quite a few of these bladders and I’ve gotten a lot better at keeping them sanitary.
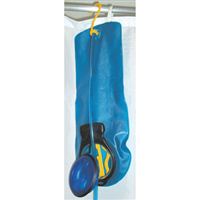
The big problem with these things is that if you crumple them up and throw them in a dark spot, they’re never going to dry out. It’s a petri dish. So the number one task after you use your Camelbak is to get it dried out. You can try sticking something inside like tongs to keep it propped open, but make sure you wrap paper towels around any metal so you don’t get rust inside. You can also break one leg off a plastic hanger and attempt to hang the bladder sideways. I ended up purchasing the hanger that you see in the photo. The hardest part is figuring out how to use it! I haven’t found anything better for getting it completely dry in a fairly short amount of time.
Camelbak officially recommends that if you’re using it regularly, you can just keep water in it, or you can get most of the water out and throw it in the freezer. That should keep you free from most bacteria. It looks like some of their new hydration packs even come with built in hangers!
You can also buy cleaning tablet and brushes specially made for cleaning out the main compartment. Camelbak also sells a lot of replacement parts so you if something gets too damaged or dirty, you can just replace it.
I feel like there are probably better hydration systems out there, but so far I’ve been content with our Camelbaks and we own a bunch of them. If you’re looking to save some money, there are a lot of websites and YouTube videos about alternative ways to dry and clean these things.
