 A few months ago, I bought new wireless microphones for church. They’re simple but they work well. The old ones were dying so it’s nice to have some that work well. The only downside is that the old ones had a nice flip switch on the top so you could tell by feeling the box whether the mic was on or off. These new mics have a button that you press once to turn on and another to turn off. Pastor turns his mic on and off throughout the service and it’s really easy to get mixed around with the on/off state.
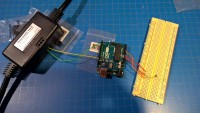
After thinking about this for quite a while, I decided I could turn this into a project. There is a light on the mic receiver up in the balcony that goes on when his mic is on. I taped a light sensor on top of that and ran that to one of the analog input pins on an Arduino. If the light is off (meaning his mic is off), the Arduino sends a signal to a relay to let power flow to a light bulb. The bulb is red so if Pastor sees a red light, he knows his mic is off. I’ve only been testing it for a couple Sundays but so far, it works great!
This was the first time that I’ve ordered from AdaFruit.com but I was really impressed. Each product page has lots of examples and documentation to get you going. I also really liked their “Power Tail 2” product. It has all the relay stuff built into a short extension cord so you can skip all of those pieces. It’s way more expensive than doing it yourself, but “it just works.” And obviously I didn’t need an Arduino to do this simple logic, but again, it was easier.
This was a fun project to research and build. I love these Arduino projects, but I don’t have a lot projects on my list that require one.


