Studio711.com – Ben Martens

Garmin Fenix 3

I pulled out my GPS watch for a hike and while it was charging, I was surprised to find out that I’ve never done a blog post on it. So here’s a “long term update” on the watch even though it doesn’t get used a lot.

Last fall I picked up a Garmin Fenix 3. It’s a ridiculously fancy watch. The key features that I use are hooking it to my phone for text message and phone call notifications, GPS tracking of my hikes, and tracking my skiing. It also has some cool golf features (distance to hole, etc) but I haven’t played golf in a long time.

It’s expensive. It was around $500 when I got it, but thanks to a health benefits program at work, I sort of got it for free. But if you are really active and like to have a great GPS tracker with you at all times, this seems like a pretty good fit.

Last weekend, Logan, Elijah and I hiked up Little Mt. Si and I used the watch for that hike. It was really nice to have a good feeling for how far along in the hike we were (I knew the total distance and the total elevation) and then watch us follow the track back.

When it’s all done, you get a website showing all the data from the hike and you can share that with other people. Here’s a link if you want to see it: https://connect.garmin.com/modern/activity/1776138597

So yeah it’s cool. It’s fun to put random watch faces and different apps on the watch. Would I ever pay for it? Nope. I don’t wear a watch day to day and I don’t do enough activity stuff to justify it. But is it fun to use? Yep!

Discovery Bay

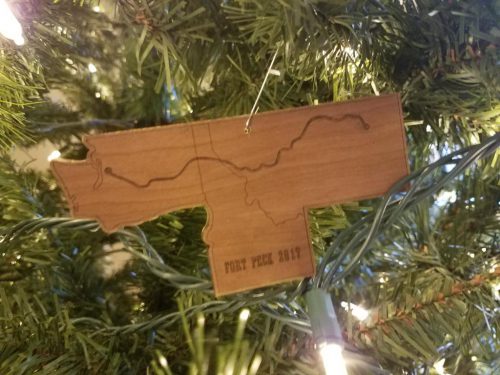
For Memorial Day weekend, we packed up the car and headed west with Tyla’s family to stay in a condo on Discovery Bay. It was great to get away for a while and we had a couple fun day trips to Fort Worden State Park and Hurricane Ridge. In the evenings we filled our time with board games, including our first attempts at 7 Wonders which quickly jumped near the top of my favorites list. The weather was beautiful for the entire trip!

Does Bacon Make You Rich?

A lunch question ended up posing the question in the title. We were talking about which countries ate bacon and which ones didn’t. Then we had a hunch that the US and European countries near the top of the list so you could probably make a clickbait news story about how countries that eat more bacon make more money.

When we got back to our desks, Durmus had actually run the numbers. Unfortunately there’s only a 0.43 coefficient of correlation between per capita bacon consumption and per capita GDP. It was worth a shot though. And I had no idea that the Chinese ate more bacon than Americans! Step up your game people!

Country Weight per Capita (lbs) GDP per Capita
China 90.1 $15,400
Montenegro 88.6 $17,000
Taiwan 87.5 $47,800
Korea, South 81.4 $37,900
Serbia 81.4 $14,200
Belarus 73.8 $17,500
United States 64.3 $57,300
Vietnam 56.3 $6,400
Norway 55.4 $69,300
Canada 55 $46,200
Australia 54.4 $48,800
Singapore 50.5 $87,100
Chile 49.5 $24,000
New Zealand 49.2 $37,100
Russia 46.7 $26,100
Japan 44.6 $38,900
Bahamas, The 40.7 $24,600
Uruguay 40.2 $21,600
Mexico 39.4 $18,900
Ukraine 34.7 $8,200
Philippines 33.7 $7,700
Panama 32.5 $22,800
Ecuador 31.5 $11,000
Brazil 31.2 $15,200
Cuba 26.6 $11,600
Macedonia 26.3 $14,500
Argentina 24.9 $20,200
Dominican Republic 21 $15,900
Angola 18.3 $6,800
Colombia 17.2 $14,200
Croatia 16.8 $22,400
Bosnia and Herzegovina 13.7 $11,000
Kazakhstan 12 $25,700
Guatemala 11.5 $7,900
South Africa 10.8 $13,200
Armenia 10.8 $8,900
Honduras 10.1 $5,300
Venezuela 9.8 $15,100
Haiti 9.2 $1,800

Vinyl Cutter

“The Garage” at work is like Willy Wonka’s chocolate factory for makers. There are lots of different tools that you can use for free (after you take a training course and usually provide your own materials.) I’ve been having lots of fun with the laser cutters, but recently I got trained on the vinyl cutter.

Our vinyl cutter is kind of like a huge (~36″ wide) ink jet printer that has a knife on the end instead of ink. You “print” on rolls of vinyl that are sticky on one side. When you cut the sheet, you’re just cutting through the vinyl but not the paper that covers the sticky side. You then apply another piece of sticky paper to the top of the vinyl. Peel off one side of your sandwhich and leave either the positive or negative space that you cut out. That made no sense because I don’t know what most of the things are called.

But blah blah blah, it’s fun! The computer side of things is roughly the same as the laser cutter. Files need to be in vector format and I can easily reuse most of the drawings that I did for the laser cutter. The first project was the sign for Tyla’s Mother’s Day gift. I headed back and did a couple more.

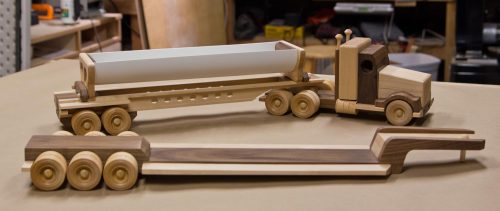
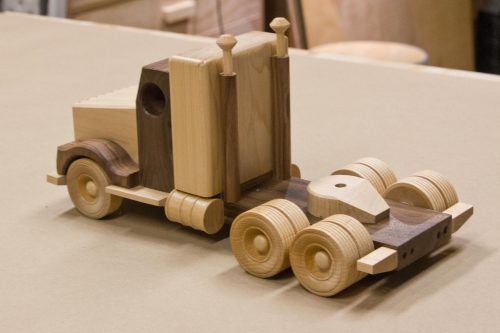
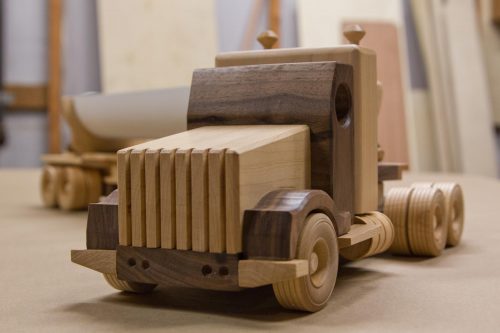
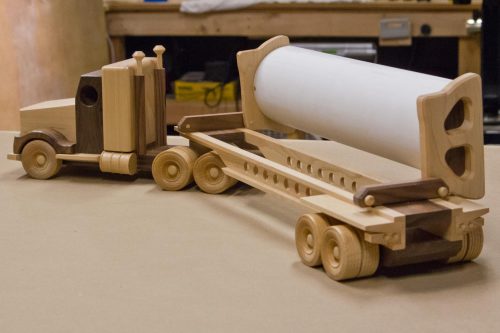
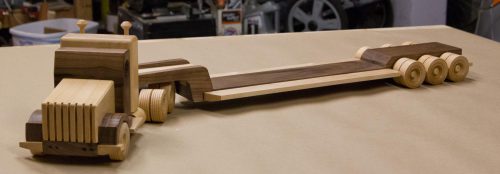
The first was vinyl for both sides of one of Ellijah’s toys. He now has a custom semi trailer!

I also printed a “No soliciting” sign for our front door. We get a LOT of door to door sales people and I have a standard policy of never buying or signing anything at the door. I used to have a dinky little piece of paper taped to the door but this looks a little nicer. It’s not quite as obvious, but some people ignored the old sign anyway.

I’m looking forward to spending some more time on the vinyl cutter. It opens up a whole new set of project possibilities.

Taking A Breather

How many things have you done every single week day since July, 2002? Aside from things like breathing, eating and putting on clothes (maybe that doesn’t even hold true for everyone), I’m hard pressed to come up with a list.

There is one big one though: blogging. I’ve consistently put up a new blog post at least once per weekday for the last 14 years and 10 months. To my knowledge, I’ve never duplicated a topic. That’s a lot of unique content. A LOT. Like six Moby Dicks. Except six Moby Dicks wouldn’t be unique. The printed version of my blog takes up a lot of space on my bookshelf and I haven’t even done books for the last 2.5 years.

I’ve been diligent in not missing even one day of the schedule because people are a lot more likely to stay engaged when the schedule is consistent. And while I do this mainly for myself, it’s a lot more fun knowing that there are people reading my ramblings.

Along the way, I often wondered when it would end. I came very close many times along the journey, but then I’d get a flood of new ideas and the posts would continue. These last couple months have been a slog though. I sit there a couple hours before the normal post time with a blank cursor trying to think of something to write. I’m not usually very proud of the posts when I am scrambling at the last minute to come up with a topic. Is it really keeping the streak alive if I’m just writing a filler post to keep the streak alive?

So, what does this mean for the site? I’m not naive. I know that once people stop a regular writing schedule, it very often devolves into a dead blog, but I’ve got almost 15 years of momentum behind me so I’m hoping I can keep it going, but I’m not going to hold myself to a daily schedule. I think that some weeks I might have one post and other weeks I’ll have 5. I’m just not going to force myself to put something up every single day. Hopefully when you do find a post here, you’ll find something that you have a higher likelihood of enjoying. If you want to get notified of new posts instead of coming to the website to check, you can subscribe via RSS or follow the Studio711 Facebook page.

Also, please consider following me on Instagram. I’m really enjoying that platform and I post a lot of content that ends up there and nowhere else. I have two accounts: @benwmartens for daily life and @martenswoodworks for woodworking posts.

It’s hard to click the publish button on this one. It’s such a long streak, but keeping it alive for the sake of the streak doesn’t seem like a good use of my time at this point. I guess we’ll have to wait until tomorrow to find out if I really let a day lapse without a blog post…

Aviation Day 5K

Tyla, Megan and Logan decided to run a 5K together and they picked the Aviation Day 5k. Logan finished in just over 25 minutes (his first ever 5k!) and all three had a good time. I went along to snap pictures and join them for the aviation display after. There were a bunch of planes on display as well as some historic planes that took to the air throughout the day.

I feel silly at events like this because I love to snap photos but i know there are plenty of better photos available online of the same planes. Oh well, it’s still fun to try and get a great shot.

Instagram Photo Frame

A while back I stumbled across a coupon for 100 free 4″x4″ prints. I’ve had a project in the back of my mind that involved something about displaying a bunch of Instagram photos. This seemed like a good match so I ordered them. (By the way, I later discovered that if you use the Shutterfly app on your phone, you get unlimited free prints so this wasn’t much of a coupon.)

The 100 photos arrived and sat around for a while as I thought about how to do this. My initial thought was to get a ton of practice making frames and pump out 100 identical simple frames. That sounds painful, but what stopped me was realizing that I had no good way to attach them all to the wall without making at least 100 holes in the wall. Then I thought about making a single frame that could hold 100 photos. I’ll take you along the project in more detail that I have in the past. If you follow my woodworking Instagram account, some of these pictures will look familiar.

The first step was to figure out how big to make this and what aspect ratio it should have. I started laying them out on my table and quickly realized that a 10×10 grid of 4″x4″ prints was going to monstrous. I settled on a 6×6 grid.

Also sitting on the table in that picture, you can see a jig for making photo splines. I made that jig as well as a miter jig. Both came from David Picciuto over at makesomething.tv.

I figured out the spacing between the pictures and the resulting dimension of the frame and started milling up the walnut to make the outer frame. I cut a rabbet in the back to hold the glass and the plywood backer and then did a very slight chamfer on the inside of the frame. Then it was time to cut up the walnut into the individual frame pieces.

I thought I had nailed the miter jig, but with a frame this big and wide, even the tiniest error was amplified. My frame wasn’t even close to fitting.

I almost threw in the towel at this point, but ehh, it was already kind of ruined so why not try to fix it? I basically free handed the miters and nibbled away with tiny increments to all the corners until somehow it all came together! If you look closely, you can tell that I’m still off by the tiniest of margins, but hey, it’s not bad considering how I got there. I used blue painters tape for clamps and glued the pieces together.

The next step was to try out my spline jig. It looked pretty wild, but in reality, I felt like the whole setup was pretty safe. Everything was clamped on place and all I had to do was move the sled through the blade. But if I was going to do frames this big on a regular basis, I might make a bigger jig.

I then used a bunch of trial and error to cut splines that were exactly the right thickness. Those got glued into place, trimmed with a flush cut saw and sanded smooth.

At this point, I felt like the project was really going to work so I headed to TAP Plastics and had them cut a piece of 5/64″ P99 non-glare acrylic. They can cut very precisely there and when I brought it home, it was a perfect fit. I left the protective paper on until the end though.

The “only” thing left was to cut a grid of very thin maple strips to hide the seems between the pictures when I put them down in a grid pattern. <insert tire screeching sound> How was that actually going to happen? When I originally thought this up, I envisioned a system of interlocking tiny dado cuts, but I had also planned for these pieces to be 1/8″ thick. Have you ever tried to cut 1/16″ deep dados that are perfectly positioned? My tests were not promising so it was back to the drawing board.

As I lay in the dark waiting for my son to fall asleep one night, it dawned on me that I could double up the grid pieces. So imagine a grid made out of 1/8″ thick by 1/4″ wide pieces of maple. Then make another grid and rotate it 90 degrees. Glue the two grids together and it should hold together pretty well.

That plan worked but wow, there were a LOT of extremely precise cuts to make. Thankfully my wonderful new table saw was able to slice consistent 1/8″ thick pieces off of a 2″ thick block of maple, rip them down to 1/4″ wide and then, with a crosscut sled, make all of those tiny little pieces to fit together. Any gap at all was very noticeable so I took my time and did it right. Now comes a long montage of 4 or 5 nights and voila! The grid was done.

As I assembled the grid, I used a combination of CA glue and wood glue. The CA glue acted like a clamp and the wood glue gave it strength. I also used a couple pin nails to hold it in place against the walnut.

At this point, I finished the frame with a 50/50 mixture of boiled linseed oil and mineral spirits. I wiped on the finish, waited about 10 minutes and then wiped off the excess. I let it dry for 1 day between coats and I applied four coats. The final step in the finishing process was to apply clear Briwax and then buff it out. (This photo was taken before the wax was applied.)

I cut a 1/4″ sheet of plywood to size and used spray adhesive to attach 36 pictures. To align them, I first placed the plywood under the grid and used a pencil to trace out all the boxes where the pictures should go. This process went pretty quickly and I took extra care (and lots of changes of disposable latex gloves) to make sure I didn’t get any adhesive on the pictures.

I put all the pieces together and then secured it all in place with a new point driver tool. That thing was a joy to use, but I feel like I need to make some more frames to make it worth the cost.

For the final step, I rolled out some fresh brown paper, traced out my frame, sprayed adhesive down on the paper and then set the frame on top of it. I cut around the frame with a knife and voila, I had a nice dust shield on the back. I have a couple very nice frames and I always wondered how and why they added that paper. Now I know. Thank you, again, David Picciuto for teaching me that trick!

The back of the frame also got a wire picture frame hanger and little rubber bumpers on the bottom of the frame so that it would sit straight on the wall.

I don’t know yet exactly where this will end up in our house, but for how many times I thought the project was doomed, it turned out great! At some point I feel like we’ll want to replace the pictures, but all I have to do is cut out another piece of plywood and glue on some more pictures. I think next time, I’d probably do the collage on the computer and then print off a single large photo. That would be a lot easier to align.

Best Of YouTube

I posted about this one before, but I’m loving “The Q” YouTube channel. He is making loads of interesting stuff out of cardboard and cheap materials. This is an awesome channel for kids of all ages to watch and try at home. The latest video really caught my attention. He makes a digital microscope out of a cheap webcam, a cheap light and some cardboard.

The “This Old House” YouTube channel is kind of hit or miss for me, but their recent video about diagnosing a plumbing problem was pretty enlightening.

And for the third video, let’s stay with This Old House because if you ever need to paint a window, you’re going to want to know about this trick for masking off the glass.

CLPAK End Of Year Program

Last night was the end of year program for Elijah’s school. The kids sang some songs, Pastor shared a devotion, and there was a graduation ceremony for the two kindergartners. It’s always fun to see the church so full of people who don’t normally attend! The program went well. A huge thanks goes to Mandy, Grace and Linda for all their hard work preparing the kids for the program and to the parents who helped with the rest of the night too.