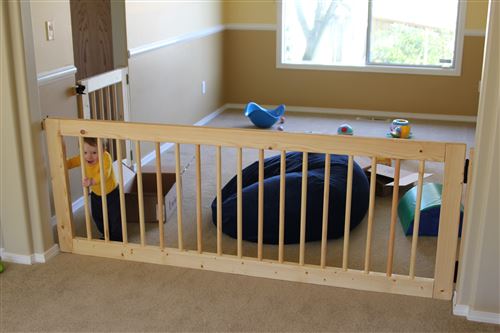
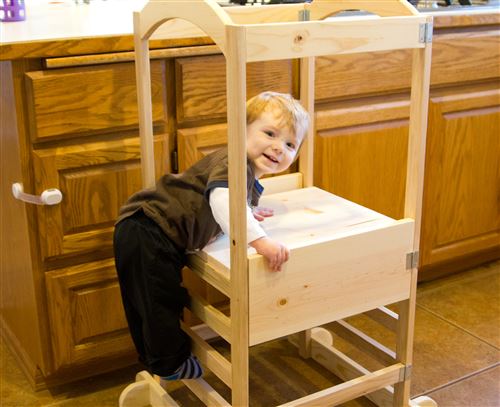
Tyla and I have been thinking about building a “baby jail” for Elijah. The idea is that it’s a blocked off area with toys in it where there isn’t anything terribly awful for him to hurt himself. He can play in there safely while we turn our backs for a couple minutes here and there. Since our dining room isn’t in use, we decided to block off the two entries there and just use the whole room.
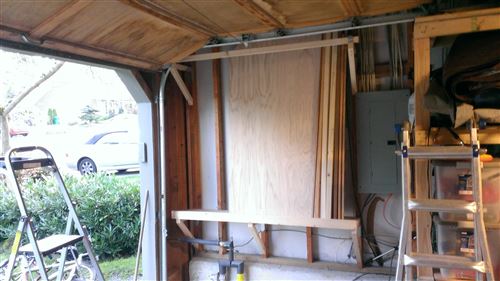
The doorway to the kitchen is a normal size and there are plenty of gate options for that in the $50-60 range. The other entry to that room is 7 feet long and there isn’t much available to fit that well. I did find a couple options that were about $120-140, but I didn’t love them. So instead of spending close to $200 on baby gates, I decided to build them myself!
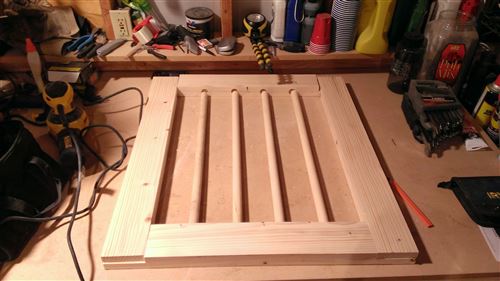
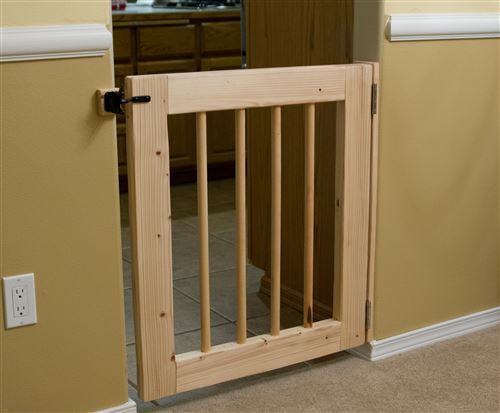
I built the smaller one first. It’s pictured below. I based it loosely on this plan from diynetwork. The frame is made up of 1×4 mixed whitewood (super cheap) boards glued together to make a 2×4. Dowel rods are spaced to create no more than 4” gaps. By choosing my measurements carefully, I was able to not have much waste wood and this whole gate only cost $32 including the hinges and latch. I sanded the whole gate quite thoroughly with the random orbital sander that I picked up for my last project, and then I covered it all with two coats of oil-based polyurethane. Yes, that’s safe for kids to suck on once it cures.
I think the longer gate will cost about $70 when I’m done. It’s not a huge savings but we end up with something that exactly fits our needs and looks pretty good.
So I’m saving money right? Well… sort of. I quickly realized that drilling ~60 perfectly perpendicular 1/2” deep 7/8” diameter holes for the dowel rods was going to be a tedious task with a normal drill. So I bought a brand new drill press to help. Ha! In fairness, I tried to buy a couple used ones on Craigslist and failed. The drill press worked wonderfully and will come in handy for lots of future projects.
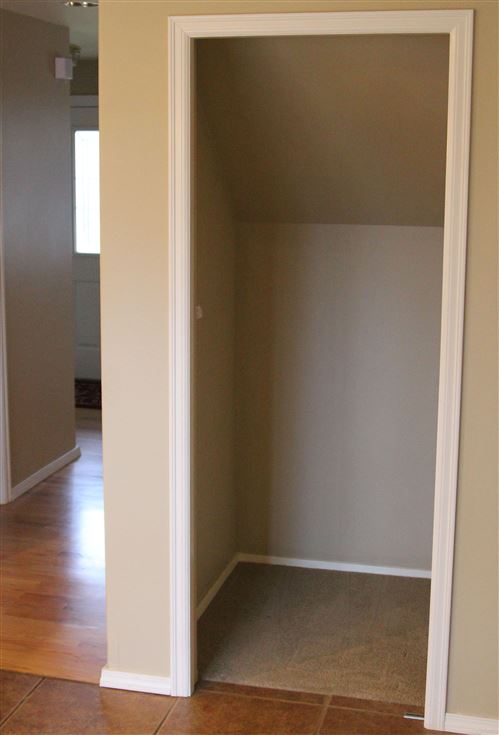
P.S. We did NOT choose the paint colors for that room! Once it’s done being a baby jail, it’s on my list of rooms to redo. I’m thinking that we’ll have wainscoting along the bottom and then choose a better color for the top. The previous owners had almost the whole house coated in a hundred shades of yellow.

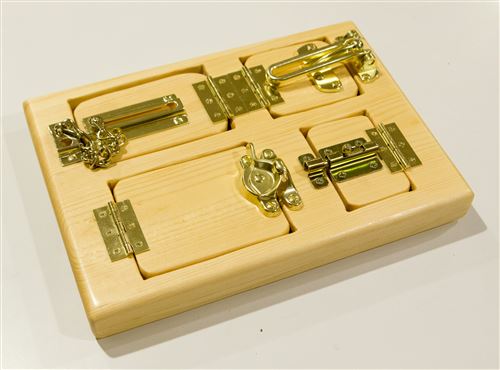
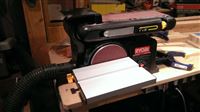 There’s a new tool in my workshop and it has already been extremely useful. It’s a bench-sized combination belt and disc sander. There are a LOT of companies that sell the exact same product (with their own color scheme and logo), but I got a Ryobi. One of my favorite features is that it has a built-in dust collection port which is perfectly sized to accept a shop vac hose. Collecting dust from a sanding tool is pretty tricky, but even if it gets some of the dust it will be helpful.
 For this latest
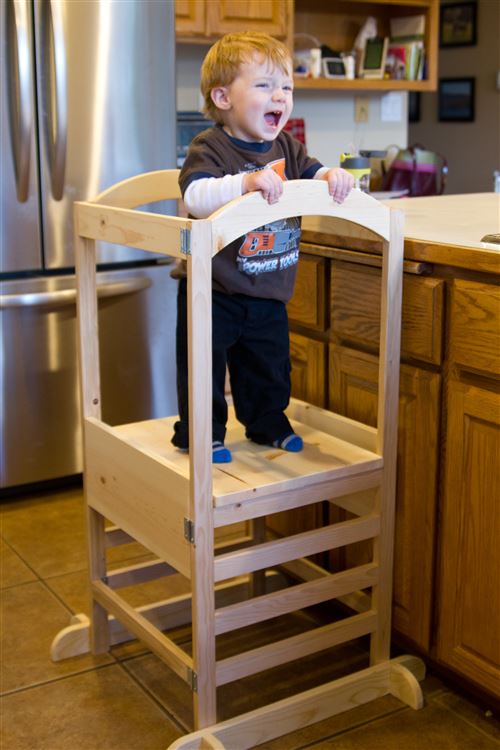
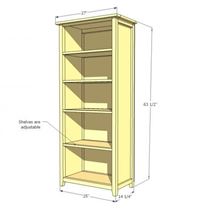 A while back I wrote a post wondering why there were no good sites with woodworking plans that were nicely categorized and reviewed. Most of my requirements in that post have been met at