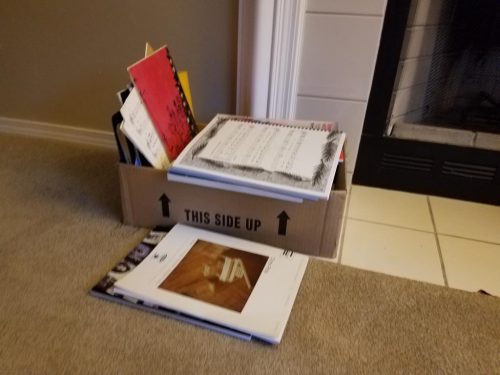
We’ve lived in this house for 6.5 years. For that entire time, our piano books have sat on the floor in the box that they were packed in (or scattered messily around the box.)
I decided this would be a good wood working project to tackle so I flipped through a bunch of plans and settled on the tower bookshelves from Wood Magazine, partially because I previously purchased the digital back catalog of the magazine so the plans were “free.” The plans recommend oak or maple but I thought I’d go for cherry.
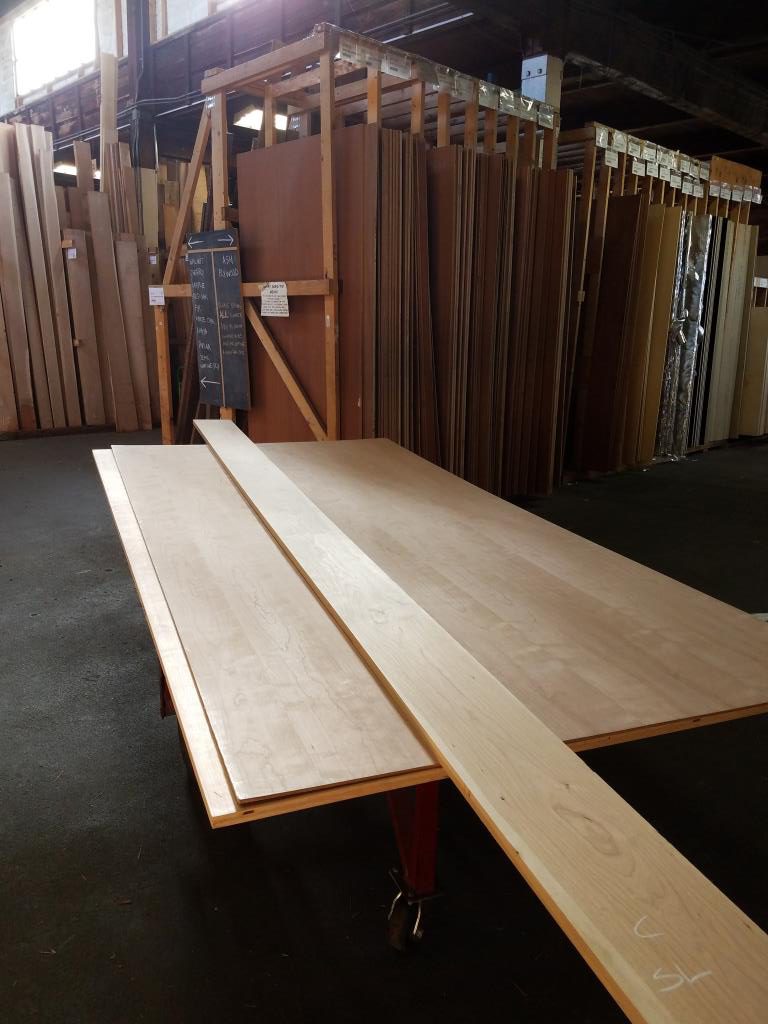
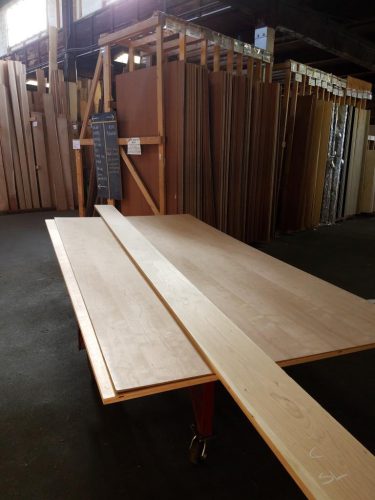
The project began with a trip to Crosscut Hardwoods to buy the most expensive piece of plywood that I’ve ever purchased (though it can get much more expensive than this!) I got a 3/4″ piece of cherry plywood that was nice on both sides, a 1/4″ piece that was nice on only one side, and a 1″ thick board.
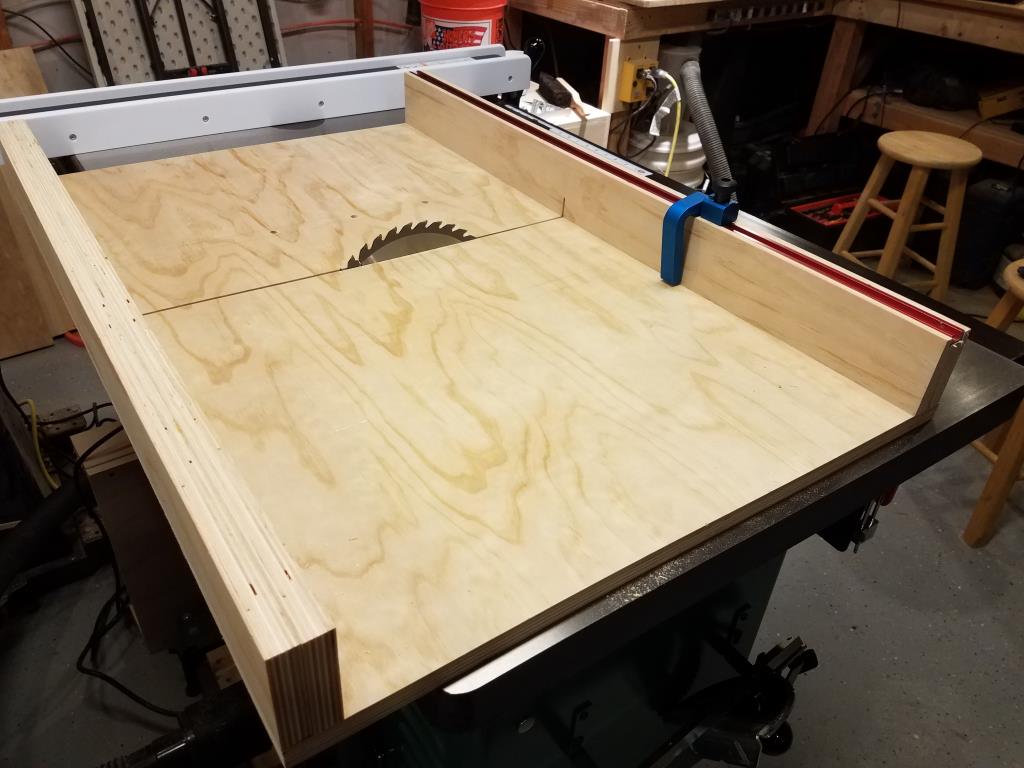
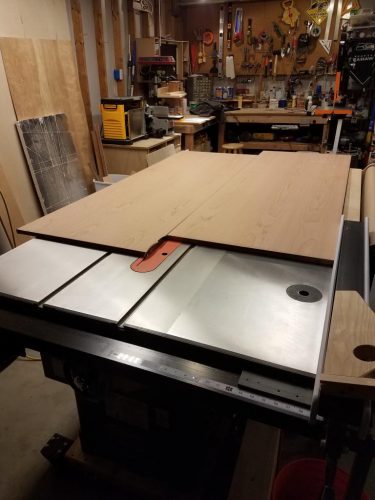
I was pretty nervous about cutting into the plywood, but I was also excited to use my new table saw with a big sheet of plywood. My old saw was too wimpy and too unsafe to do big pieces. I cut about 25″ off one end and then ran the rest through the saw. The saw ran like a champ, and combined with the assembly/outfeed table, it never felt unsafe.
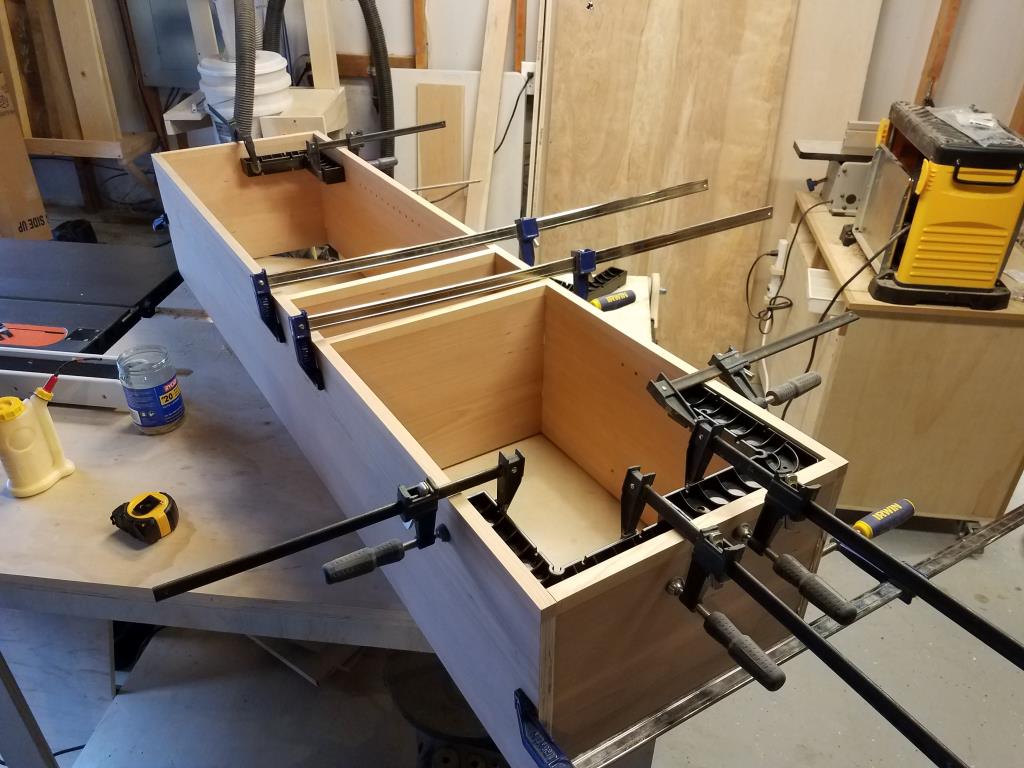
After cutting some strips of hardwood and using it as edge banding on the plywood, the main joinery is done using biscuits. I’ve done a little bit of work with the biscuit joiner before but never this much. It really is simple and makes quick work of some of these bigger glue ups.

Next up was the base and the top trim pieces. Those were a little tricky as the plans recommended biscuit joints on the mitered angles to hold the joints together. That worked but I think I’d probably choose a different method next time because it took forever to get my cheapo biscuit joiner dialed in for that fancy cut. In the photo below you see a scrap piece filling in the empty back so that the band clamp can squeeze evenly all the way around.

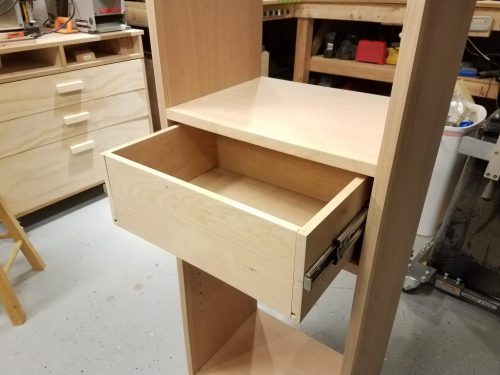
The final construction step was to build the drawer, install the drawer slides, and then cut/attach the drawer front.
For a finish, I chose to keep it simple and went with a wipe on polyurethane. It does give a bit of a plasticy finish but that build-up is also extra protection for the books that will be sliding in and out fairly regularly. After the coats of finish were done, I put on the 1/4″ back and reinstalled the drawer.
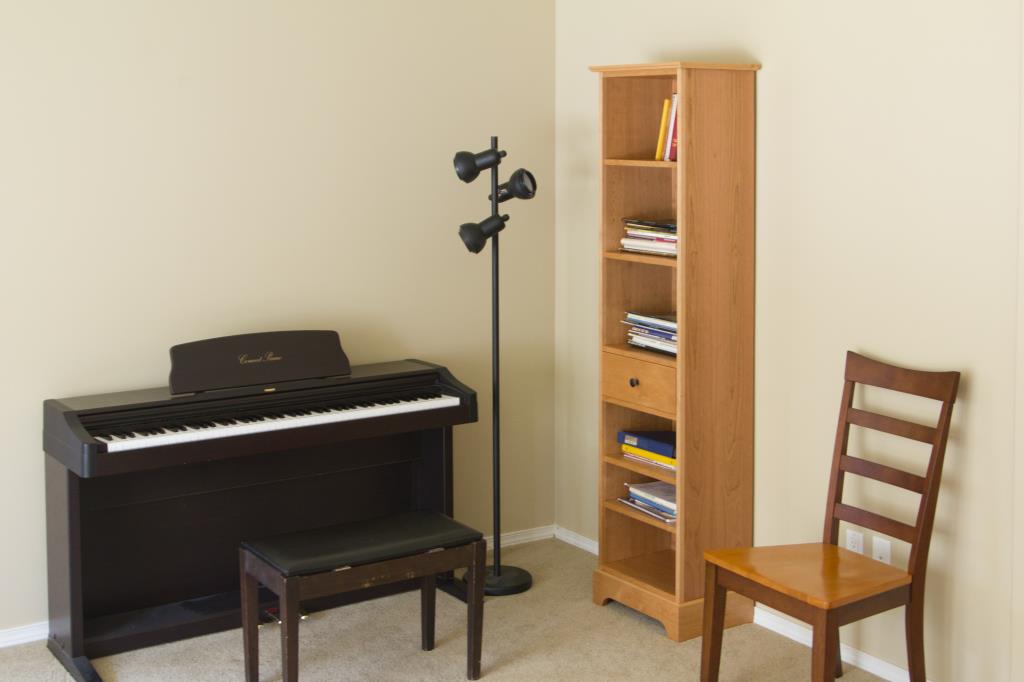
Once we figured out where to place it in the room, I took the time to attach the top to a stud with a strap. It’s very easy to tip over and with a three year old running around, it wouldn’t take long for it to topple over.
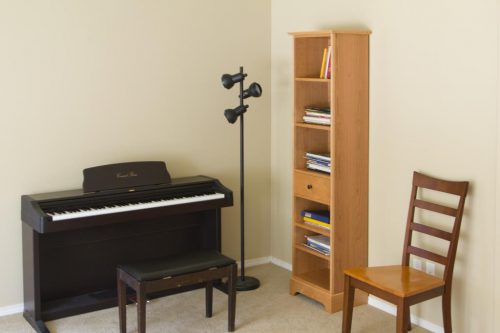
This project was a nice way to dabble in some nicer furniture. This was about the biggest thing I can comfortably handle in my shop so I won’t be tackling a dining table anytime soon, but I’m happy I did this one.
It’s pretty easy to see the different colors of cherry woods, but I’m hopeful that as time goes on, the cherry will all darken up to the same color. But even as it is now, I’m very happy with it and admit to walking into that room just to check out the bookshelves. It’s a nice step up from the cardboard box mess on the floor.

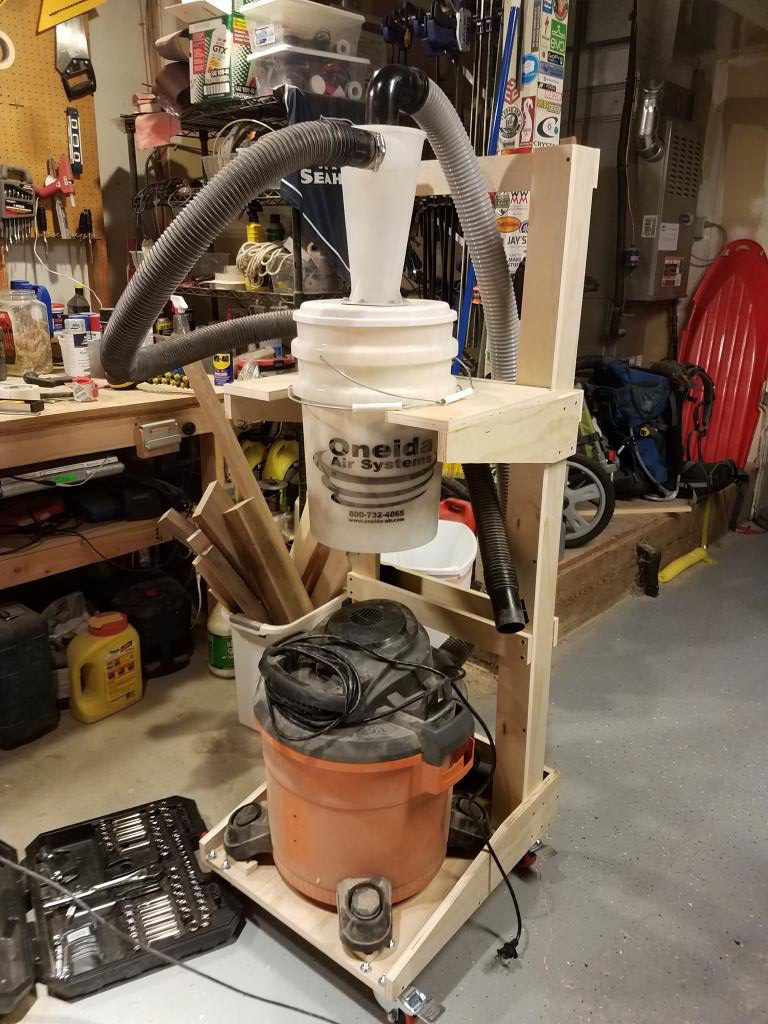
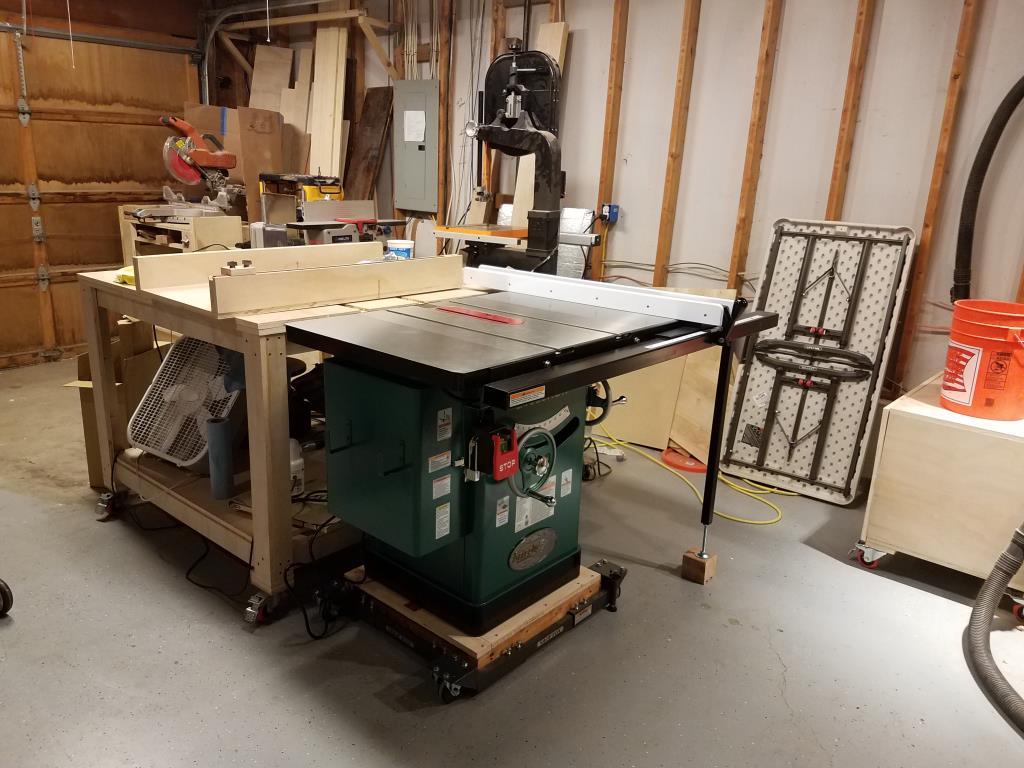
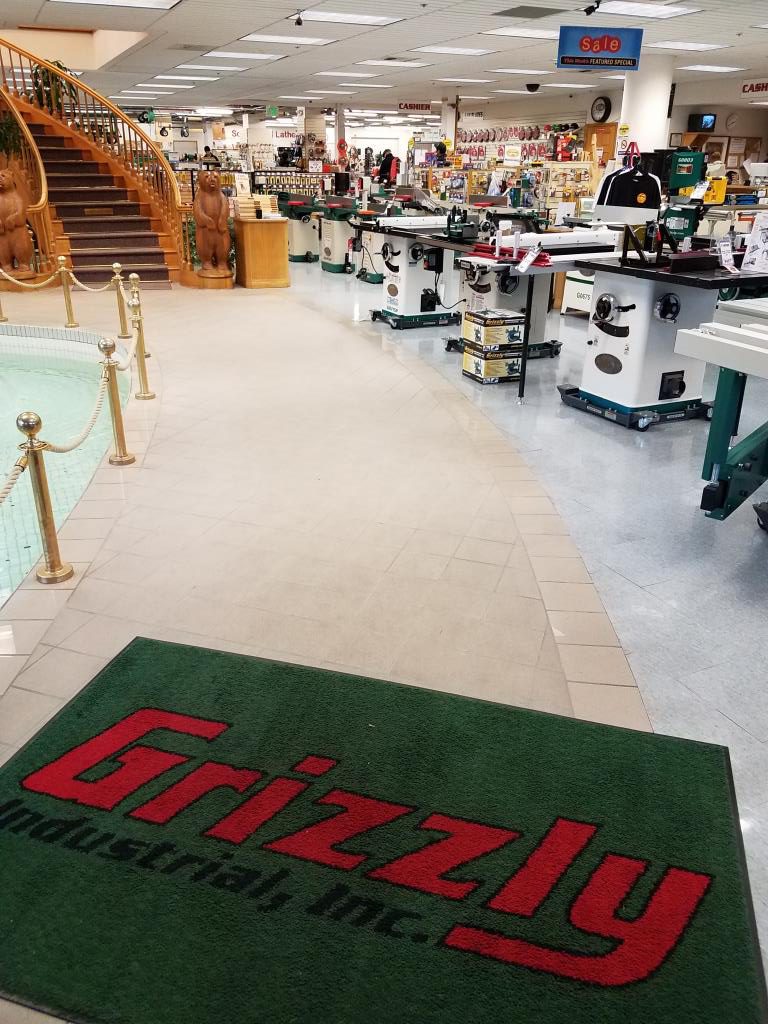
 As you already surmised from the title of this post, I’ve had my new table saw (a Grizzly G1023RLW) for three months. It was a huge splurge and way more than I needed, so I was curious how I’d feel after a few months. Would I regret going big?