

Some of you have been hearing about this project for almost a year. For a long time, I’ve wanted to build my own arcade machine. Only this arcade machine is a little different than the one you’ll find at your local bowling alley. This one will play over 2000 different arcade games and Nintendo games!
January 23, 2004
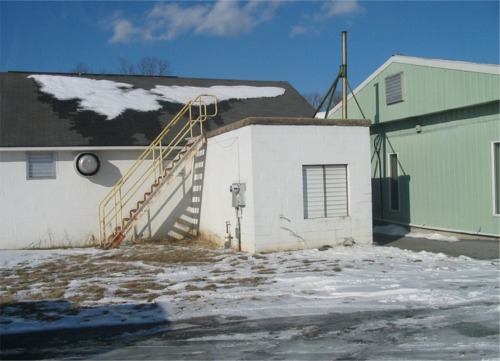
Swarna and I took a road trip out to Rheems, PA (about 100 miles away) to pick up an arcade cabinet from Discount Blowouts (www.discountblowouts.com). I found them on EBay and found out that they had a couple old cabinets they would sell me for pretty cheap. I rented a minivan and we were off. The journey was quite an adventure. We headed deep into farm country and finally found the buildings in the middle of a farm down a dirt road. Unfortunately I didn’t get any pictures of the inside of the buildings, but here are a few of the outside and the surrounding area:

January 24, 2004
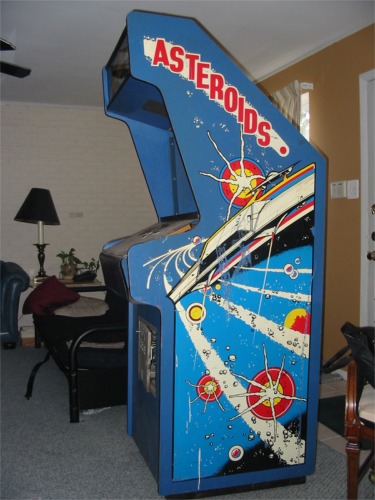
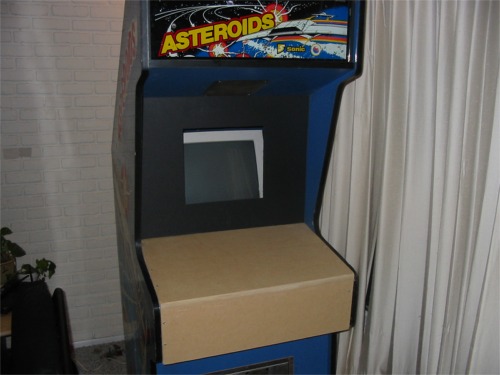
This morning, Tyler and I dragged the arcade machine into the house. You want old school? How’s this for old school… Asteroids! It doesn’t get much better than that!
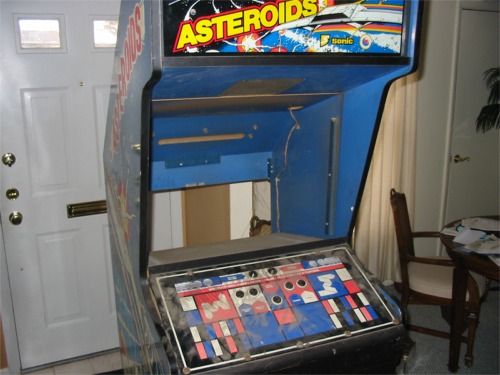
I spent the rest of the day cleaning 24 years of dirt off the machine. I also went to Home Depot and picked up a new fluorescent light to put behind the marquee.
January 26, 2004
Tonight I mounted the power strip inside the coin door. Now I can just open the coin door, reach inside, flip the switch, and everything turns on. Right now “everything” is the marquee light, but eventually that switch will trigger the whole system. In other news, the I-PAC keyboard emulator shipped from England today.
January 27, 2004
There’s not much I can do until my two packages arrive. One is the keyboard encoder from England. That made it to NYC today so maybe I’ll get it tomorrow or Thursday. I was concerned about the joysticks and buttons I ordered from Happ Controls because I never received an order confirmation. But thanks to their website (big ups to retailers that allow you to check the status of recent orders), I found that my package had been shipped and got the tracking number. It’s currently in Addison, IL. UPS predicts a Friday delivery for that one. This means that I might be able to start hooking stuff up this weekend!
January 30, 2004
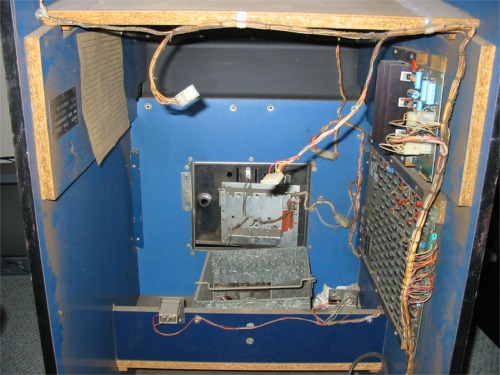
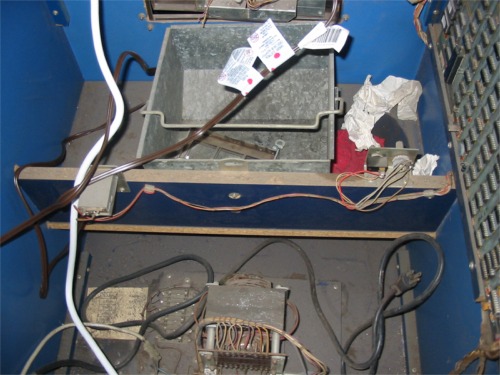
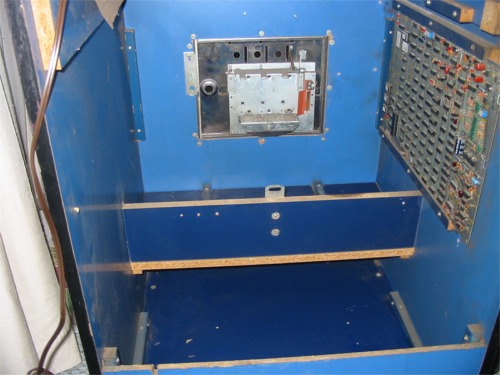
After two trips to Home Depot (and one to Top Dog), I ended up getting a lot done on the arcade machine. The buttons, joysticks, and keyboard encoder all got delivered. As you can see from the pictures, I did a lot of cleaning on the inside. I left one of the big circuit boards up on the side wall just for looks. While I was cleaning it out, I found a counter that read over 39,000. I’m hoping to find some way to hook it up to the start button. I also mounted a power strip just inside the coin door for easy access to the switch.


February 01, 2004
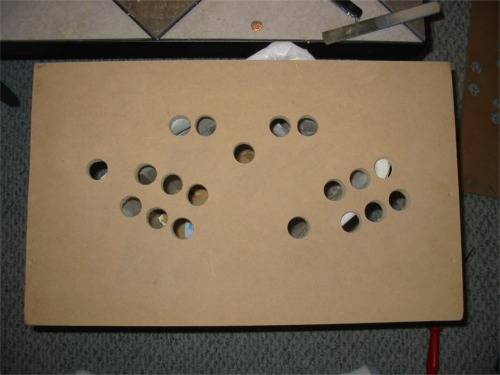
The project has hit a snag. I was hoping to drill new holes in the metal control surface for the new buttons and joysticks. Unfortunately, I can’t get through that metal with any of the tools I have. So I’m moving to plan B. I’m going to make the control surface out of MDF. I’ll paint it black and it should look almost as good. It would have been nice to have the more retro look of the original control surface, but at least this will work and look good.
February 03, 2004
After finishing my homework (like a good boy), I did a little more on the arcade machine. I cut and sanded the MDF to fit into the area for the controls. I got the screws in and countersunk them so they are flush. Hopefully tomorrow I can get the holes drilled and get the first layer of paint on it.
February 04, 2004
I got the new control surface drilled with the holes for the buttons and joysticks. I also got the first coat of paint on. Tomorrow I’ll decide if I’m going to put another coat on or start putting on the polyurethane. It’s hard to wait for all this stuff to dry when I know I could be done with a couple hours of wiring! I was thinking that the house was going to smell really bad in the morning since I had the drying paint in the dining room, but Tyler’s dad (on the phone) suggested that we put it in the bathroom and leave the fan on. Hopefully that will help out a little.
February 05, 2004
Not much going on tonight. I just put another layer of black paint on. I was debating whether or not it needed it, but now I’m glad I did it. It looks much better. Tomorrow I’ll start the polyurethane.
February 06, 2004
I put on two coats of polyurethane on today and it looked fairly nice. After plans for the evening got cancelled, I decided to spend the night soldering. Seemed like a logical alternative to me. I started by putting all the buttons and joysticks on as well as the I-Pac keyboard encoder.


After that it was time to solder. One lead from each microswitch goes to the corresponding hole on the I-Pac. It really doesn’t matter where you put the wires on the I-Pac because it is reprogrammable, but if you follow the default markings it will work on MAME without reprogramming it. I used CAT5 network cable for the wires and it ended up being pretty slick. I used the leftover sheathing to clean up some of the cable mess and the color coding made it a little easier to keep the wires straight. The last step was running two common ground wires through all the microswitches. For that, I stripped long pieces of wire and then used CAT5 sheathing to keep it from shorting on other switches. (See Dad? I was paying attention after all. Ha ha) Here are is a shot of me in action and of the board all wired up.


Finally it was time for some testing to make sure it was all wired correctly. I’m not sure what Cory is testing. Below that, Tyler is pressing the buttons as they show up in notepad on the laptop.


Finally it was time to plug it all in and play some games!

It works great! I have some finishing touches to perform such as installing the 80 watt subwoofer and probably reprogramming some keys to make it a little easier to navigate windows. (You can also just pull the keyboard and mouse out through the coin door.) One other thing that is a little annoying is that the left joystick records a right movement very easily. I took it all apart and I know why it’s doing that, but I’m not sure how best to fix it yet. Eventually I’ll probably try to throw a larger monitor in as well. But for now, it works! It’s done! After a year of talk, I finally came through. The only thing left that I need are people to come over and play it. So what are you waiting for? Stop by and check it out!
