
 At our last homeowner’s association, a Woodinville police offer was a guest speaker. She talked about the types of calls that came from our area (there aren’t many), and the size of the Woodinville police force (only 1 or 2 officers on patrol at any given time.) At the end of the talk, she offered to come by our houses and talk about security. Most people seemed to ignore this line, but I got her card and a few days later, we set up a meeting.
When she got to the door, she said, “I’ve been in this house before.” “I hope it was for something good!” “Oh yes, the original owners were the neighborhood watch captains.” Phew!
She walked around inside and outside and gave me some tips. Overall she said we were doing really well. Obviously I’m not going into detail about what she suggested we improve, but here are some general things she talked about that she sees:
- Don’t put big bushes in front of your windows. This gives burglers a place to hide while they peek in. Keep them trimmed down below the bottom of the windows and the bottom of the bush should be 1-2 feet off the ground.
- Make sure all your windows are locked or have dowels in the track to avoid them being forced open.
- Where can someone hide outside your front door? You want to be safe if you step outside at night.
- Which entries are the least visible from the street and your neighbor’s houses? Those are the most enticing.
- What electronics can you see if you look in from the windows?
- What kinds of friends do your kids have? Kids talk and if you have cool stuff in your house and an easy way to break in, word is going to get around.
I’ve made it a point to get to know as many of my neighbors as possible so hopefully they’ll notice if anything odd is going on. While there’s not any special history of burglaries in this area, there’s no reason not to take some simple precautions. A lot of this is common sense, but the trick is to make your house harder to break into than your neighbors’.
 If you don’t think that your physics classes were very interesting, hop on a motorcycle and whip through a corner or two. You’ll probably start thinking about those few square inches of rubber that are touching the pavement and somehow holding you in place. How does that really work?
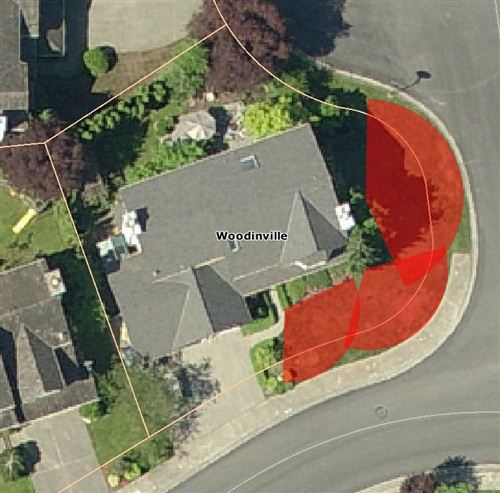
 This setup fulfills my requirements of not having to move sprinklers around and I can leave it set up semi-permanently. The downside is that since each sprinkler is covering a different span, the yard isn’t watered evenly. Also, when we had a plumber add a pressure regulator valve to help with the water hammer in the house, he turned down our water pressure to 40psi. Now that I’ve installed arrestors on every termination point in the house, I was able to crank that up to 50psi. 40 wasn’t enough to power all three sprinklers but 50 is just enough.
  There have been a lot of conversations directed at me lately implying that my choice of motorcycle was ridiculous. This comes mostly from pure sport bike riders claiming that my bike is “slow.” However, a couple of the questions have been honest questions from new riders so I’ll give a little spiel about why I love my bike in hopes that it will help some of you decide what you want to buy.
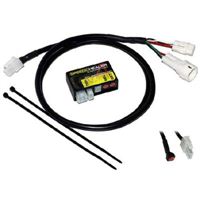 If you’ve used a GPS in your car, you may have noticed that it doesn’t match your speedometer and odometer. Just about every car on the market has about a 3% difference between your actual speed and the displayed speed. (You’re really going slower than you think.) Imagine the lawsuits if people were getting pulled over because their speedometer reported that they were going slower than they really were. The difference can vary by car, tire size, etc.
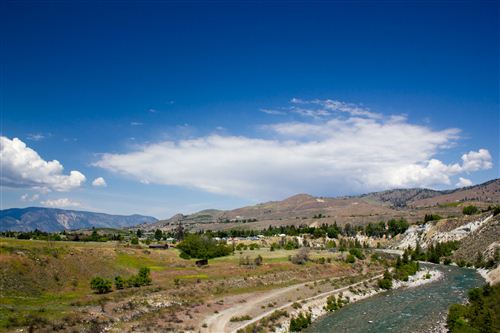
 On Memorial Day weekend, Tyla and I headed over to Lake Chelan State Park with her family. It’s on the east side of the mountains, so if you remember your Washington geography, you’ll know that it’s in the desert.
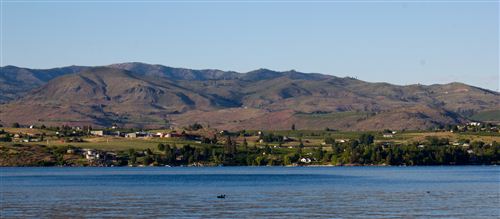

 The front tire on my 2009 Kawasaki Concours has been wearing out and after 9700 miles, I no longer had much confidence in it. The back tire still looked pretty good, but I shopped around and decided to pull the trigger on new tires. The tech at Waldron Kawasaki suggested that I take the old rear tire home as a spare in case something happens to this new one and I don’t feel like shelling out the money for another tire right away. 10,000 miles isn’t a lot, but it’s not too low for a sport bike or a “super sport touring” bike which is what the classification of this bike.
 It’s been almost four years since I wrote a post called “
 When I moved out on my own, my parents got me a 9V cordless Makita drill. It served me well through a ton of projects, but after 10 years, the batteries are worn out. It was either buy some new batteries or upgrade. After looking at the prices, I went with the latter and decided to keep the old drill around for smaller projects around the house.
Church Work Day
I wrote a couple months ago about the renovation I oversaw of the house on the church property. The final step in that project was fixing up the landscaping, but we wanted to wait for nicer weather. The big day arrived a couple weeks ago and Tim had a great plan laid out for us and a bunch of nice plants picked out. The main projects were taking down two small trees, removing a bunch of bushes, taking out a huge out-of-control rhododendron, and moving a LOT of rock from the planter area to the church driveway. We rented a Dingo to help move all the rock and rip out the stumps and that ended up being the best decision of the day. There’s no way the work would have been finished with out it! I posted a bunch of photos at the end of this Facebook photo album but here is a before and after photo that shows part of the area we worked on.