Studio711.com – Ben Martens

Gadgets

DataVac Duster

datavacdusterI used to keep a couple cans of compressed air around the house. They’re handy for cleaning out computers and keyboards. When I discovered that they were handy in the shop too, I started going through them pretty quickly and that gets pricey at $4+ per can.

That’s when I found out about the DataVac Duster. At $60, it’s pricey, but I still recommend it. After 15 cans of compressed air, you’d break even, but in reality, since I know it’s basically free to use, I use it a lot more. I keep it on my work bench, and with the extra long cord, I can easily blow off tools, projects, etc. Don’t let the “vac” part of the name fool you. This thing only blows air and it does it very well. There are a couple extra nozzles you can attach to get even narrower streams of air.

When I bought it, it was a few dollars cheaper for whatever reason, but this is still a good tool to have around the house.

Bluetooth Actually Works

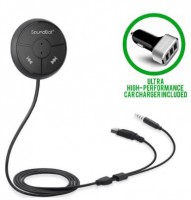
bluetooth_logoFew technologies have caused me as much pain as wireless. That’s why we paid an electrician to hardwire Ethernet to every room in our house. If a device doesn’t move, it gets hardwired. No exceptions. So you can understand why I have avoided Bluetooth over the years.

When I asked for some new headphones at work, I was given a set of Bluetooth wireless headphones. They have a flip down microphone so I can take calls though I don’t use that feature too much. The revelation to me was that they actually work and they are pretty convenient. I can either connect to my computer or my phone and stream audio from them. It’s nice to not have any wires and it’s super nice to be able to tap the buttons on the headphones to adjust the volume, pause the music, or skip to the next track.

I wear headphones a lot when I’m doing yard work or working in the garage. Up to this point, I’ve worn regular earbuds and I run the cord down inside my shirt so that it doesn’t get snagged. I’m thinking that I might switch to using Bluetooth headphones instead because they have the added advantage of letting me adjust the playback without pulling my phone out of my pocket. Do you use small Bluetooth headphones? Any recommendations for me?

Apple Watch

applewatchThe new Apple Watch launched recently with the usual media frenzy. They sold out almost immediately though it’s anyone’s guess what that actually means in terms of the number of units sold. Personally, I’m a bit uninterested in the whole smart watch thing. Some day we might get there, but the tech is pretty infantile at this point. I haven’t worn a watch since college which was about the time I started carrying a cell phone. At this point, wearing anything on my wrist drives me bonkers and would take quite a while to get used to.

The Apple Watch will be the first time a lot of people have seen a smart watch, but rest assured that there are lots of them on the market that do pretty much exactly the same thing as the Apple product. Apple isn’t really inventing anything here, but they don’t have to invent to make money.

If you really want to dip your toe into the smart watch world, I’d point you to the Pebble. It has been around for a long time, does the core things that you really care about (seeing notifications at a glance), and because of the screen technology, the battery lasts for a week instead of lasting for a day… or less.

Open Sprinkler Review

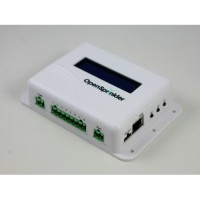
opensprinkler_v20s_5-500x500When Tim installed my irrigation system, he was kind enough to throw in a free irrigation clock that he had sitting around. It’s a standard Hunter model (probably $75-100) and it worked great, but every time I looked at it, I thought about how simple the device really was and that I should be able to control it from my computer. Standard industry offerings are hundreds or thousands of dollars with monthly fees. They’re mostly intended for commercial use.

After a little searching, I found opensprinkler.com. Somebody else had the same idea and made such a nice package that he is able to sell it. The basic model is Arduino based but there are Raspberry Pi and Beagle Bone versions too. I chose the standard model for $155.

Installation was a snap. I labeled all the wires from the existing clock and transferred them over to the Open Sprinkler unit. I also ran an Ethernet cord from the clock in the corner of my garage up into the network closet. (It is SO convenient having the network closet share a wall with the garage!) I turned the unit on and very quickly was turning the sprinklers on and off from my computer. With a little extra configuration I was able to do it from my phone.

Why? Well yes, it’s a toy, but it also makes it very easy to walk around the yard testing zones or turning them on to blow out the line. Also, last summer I’d wake up to hear the rain and realize that my irrigation was scheduled to run in the morning. To avoid wasting water, I had to turn off the house alarm, go out in the garage, turn the program off, come back in, turn the alarm back on, and go back to bed. Now I can just reach for my phone and adjust it… if I even need to (more on that below.)

Aside form the convenience factor, here are some other features that I love:

  • I can completely manage the system from the comfort of my couch instead of standing in the garage.
  • Programs can be set to start based on sunrise or sunset. General recommendations for lawn watering are to do it a little bit before the sun comes up to avoid the hot sun burning off the water but also not let give moss a wet, dark place to thrive. This setting makes that super easy.
  • By checking the weather online, the system can automatically adjust the programs based on the humidity, temperature and precipitation from the previous days. This either means skipping an entire program or just running it for fewer minutes.
  • Programs can be set to run every N days instead of on specific days of the week.
  • You can view a log of when each zone was on. This will be nice when I try to track water usage and also to evaluate how well the Open Sprinkler system is performing.
  • As the software gets updated and perfected, I can update my unit with the click of a button.

All in all, I highly recommend this product so far. As long as it actually does the job of controlling the irrigation system without ever crashing, I’ll be very happy!

Epson 8350 Projector Repair

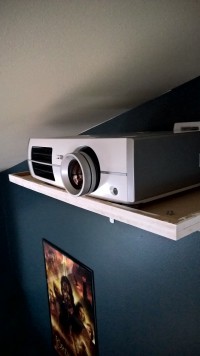
WP_20150329_17_15_04_RawAfter 3.5 years of faithful service and 1100 of operation, my Epson 8350 suddenly decided that it had an internal fault. The symptom was a red flashing temperature light. A quick call to Epson verified that I was way out of my warranty period. The closest official repair place was down in Vancouver, WA. I chatted with a local (unofficial) place too but didn’t get a warm and fuzzy so I shipped my projector down to Compass Micro down in Vancouver. Thankfully I had stored the original box and foam up in the rafters in the garage so I wasn’t too concerned about damage in transit.

Shipping only took a day and was about $20 (each way.) The gang at Compass Micro diagnosed it the same day it arrived. The lamp fan was dead and the part was $29. Tack on their $60 minimum labor charge for the first hour and I was back in action. The part took a few days to arrive and then they quickly shipped it back to me.

So while it would have been nice to not have this problem at all, I was very happy with the service and the total bill was a lot less than buying a new projector. If I have something like this happen again, I might be inclined to open up the projector myself and see if I can tell that a fan obviously isn’t spinning.

Pedometer Phone

motiondatalumiaWith one of the latest updates to my Nokia Lumia Icon, I now have a pedometer with me at all times and I don’t even have to carry a Fitbit! Newer Lumias have a motion sensor in them and one of the features is a step counter. (The steps show up in the Health and Fitness app.) You can also get some pretty cool data about your location and motion in the motion data settings section. WPCentral has a good rundown of the new features there.

As long as this doesn’t drain my battery too much, it makes a lot of sense to have it integrated into the phone. I almost always have it in my pocket anyway so why should I carry a separate device?

WiFi Access Points

unifinetworksOn January 1, I took over as the IT guy at church. We had a pretty bare bones set up and I was given the funds to spruce things up a bit. Once I got our internet speed upgraded from 1.5Mbps to 20Mbps (for the same price with some billing fixup) and got new computers installed, the next task was to get better WiFi coverage.

A bit of searching around led me to these UniFi Access Points. They’re simple looking devices that can be managed from a central server app. These are slightly more complicated than your typical home networking gear but well within the reach of any aspiring nerd.

There are tons of complex features that you can enable like zero handoff switching between access points so your VOIP calls don’t stutter, but even just setting it up with the defaults gives you a great experience. I need to do some more testing, but it appeared that my devices were automatically connecting to the strongest signal instead of waiting until the first signal completely died out to grab a new one. The range was good and now with three access points, we can cover all of the buildings with a strong signal.

I’m tempted to install these at home too. Our house is just big/complex enough that we get a pretty weak signal in some parts. Two or three of these would make a big difference.

Sling Television

Sling-TV-logoOne of the major things that held me back from cutting back on cable last year was the loss of ESPN. Turns out, it wasn’t that big of a deal. If I had it, I probably would have watched it, but I guess I don’t really miss it at this point.

That being said, there will come a point where I really want to watch ESPN or some other channel that I lost access to. There’s now an awesome online solution for this and it’s called Sling Television (no relation to the Sling Box.) It’s basically an online cable subscription. For $20/month you get ESPN, ESPN2, TNT, TBS, Food, HGTV, Travel, Cartoon Network, Disney, ABC Family, CNN, and a couple others. There are a few $5 add-on packs if you want more sports, etc. Notably the ESPN package includes access to WatchESPN.com. The best part is that it’s super easy to sign up and super easy to cancel and it comes with a free 7 day trial.

If you’re a cord cutter but can’t give up access to live TV and some of these channels then this could be a great solution. The major drawback at this point is that only some of the channels have any type of DVR functionality (they store ~3 days of content) but stations like ESPN don’t enable this. And only some of the stations allow you to watch On Demand back episodes. If you’re looking for live TV, this is the way to go, but if you want to time shift your TV, you’ll want to pay more attention to what you actually get during the trial period.

While this might not be the perfect service for all circumstances, it’s still fantastic to see us getting closer to the dream of watching what we want, when we want, where we want, on whatever device we want.

Wall Mount

Lots of kids are injured every year from falling TVs. The number is increasing rapidly as people have moved from big heavy CRTs to light LCD TVs. The best number I could find was 12,000/year back in 2011. That’s not a huge number. There are plenty of riskier things to worry about first, but wall mounting the TV is something I’ve wanted to do anyway so this was a good excuse.

I picked up one of the more popular models from Monoprice for only $37. And I know some of you are content to leave your cables dangling down the walls, but that would drive me nuts in my own house. Running them through the wall is pretty simple with a kit like this for $40 from Amazon. It complies with code by splitting the box for the power and the low voltage cables.

Installation was pretty quick and simple: find two studs, drill the holes, and attach the mount to the wall. The laser level was a big help for this. That’s a paper bag you see taped to the wall to catch some of the dust.

wallmount1Next I used the included templates to trace out the holes for the power extension kit and cut holes in the drywall. Yes, I could have just added a new outlet here, but doing it this way means that I can connect this outlet to my battery backup and add some extra protection for the TV.wallmount2The final step was attaching the mounting brackets to the back of the TV, removing the old base, and then hanging it on the wall. The mount pulls out pretty far from the wall so that the TV can swivel 90 degrees in each direction (nice if we are watching from the kitchen), and it also tilts in the other two directions. My mount is really level, but the 5 degrees of tilt would help you correct most mistakes.wallmount3I’m very happy with how this all turned out. It was pretty cheap and only took about 2 hours to finish. If you’re comfortable wiring an outlet and operating a drill, this is something you can accomplish. Just make sure you’re in the center of those studs! I used a stud finder and then pounded a small nail in multiple times across the entire face of the stud to find both edges. It’s all covered by the mount anyway so the extra holes don’t matter (and they are easily patched if needed.)

I’m still debating if this is a little too high. There’s plenty of adjustment in the mount that screws to the back of the TV so I might lower it just a bit.

Amazon Fire TV Review

topgearworkbenchAfter Ken gave me a 32″ TV for the garage, I decided to pick up an Amazon Fire TV to go with it. Yes, I have a Chromecast sitting on a shelf already, but the Fire TV has a remote which is a big win. I don’t really like the idea of leaving my phone sitting out on my workbench to control the TV.

I started with the Amazon Fire TV Stick since it’s cheaper and takes up less space. Unfortunately, the Wi-Fi signal isn’t strong enough in my garage. I even added a second access point right across the wall in the living room, but it still wasn’t enough to hold a steady stream. I suspect there is some sort of barrier between the house and the garage.

By that point, my long-lived hatred of Wi-Fi for stationary devices had boiled over so I took back the stick and ordered an Amazon Fire TV box.

That arrived and … it was a brick. I had ordered a refurbished model to save $20, but it still should have worked. A quick call to a very nice tech support lady got me a new one shipped out.

The replacement unit worked fine. I ran a cable from my network closet to the workbench and voila, I have TV out in the garage.

The Fire TV is a slick little device. It’s a lot like a Roku device if the Roku device first booted into the Amazon app. The other bonus feature is that the remote lets you do voice search. That’s a lot faster than typing character by character with a D-pad on the remote.

You can load other apps onto it. The main excuse for doing this was so that I could have YouTube up showing an instructional video for whatever I’m working on. While there isn’t a dedicated YouTube app for the Fire TV, they do have a simple app that opens up YouTube in it’s big screen experience mode. You can pair the website with your phone and then control it from your phone (similar to a Chromecast but more generic.) Then you can use the remote to pause, rewind, etc.

If you’re looking for a box to add smarts to your TV, this is a solid choice if you’re an Amazon Prime member. If you’re not, then I’d probably go with the Roku.