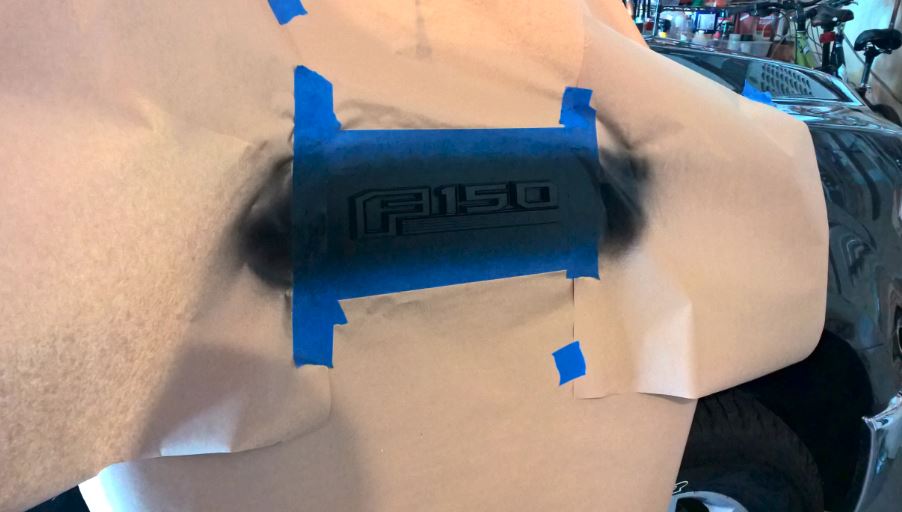
I liked the way the Plasti Dip looked on the back of my truck so I decided to do it on the F150 logos on the sides too. It was a quick job and I actually was able to do it in the garage. My truck barely fits in with the mirrors folded and there’s a small chance that if I was creative I could even close the garage door.
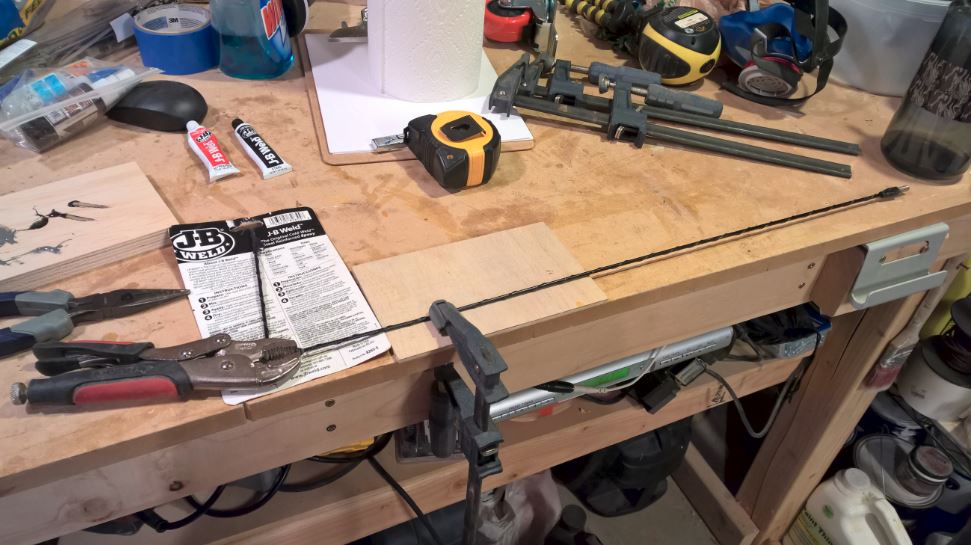
The other small tweak I made was to my antenna. It stuck up probably 8-10 inches above the top of the truck. I like the idea of it hitting a garage roof to give me warning, but that’s way too much warning. Since I regularly park in garages at work, it was pretty annoying. The solution? Cut it shorter. There’s really nothing too fancy about it. Antennas just unscrew and then you can cut them with a hacksaw. I tried to use some JB Weld to put the ball back on top of the antenna, but I couldn’t get it to stick on solidly so I just left it off. Who cares? I suppose I damaged my radio reception a little, but I almost never use the radio and it worked fine even with the antenna completely unscrewed.
Chris and Nikki replaced the fridge in their house when they moved in so they were looking to get rid of the one that was in the house. (They already had another fridge in their garage.) This was right after I had gotten the truck so picking up their fridge seemed like a good excuse to take a drive.
It has been sitting in our garage unplugged since then, but now that I’ve got the garage more arranged, it was time to find a home for the fridge. I tore down the shelves and coat rack that I had built near the door. That was one of the first projects I built after moving into this house. It was done with a miter saw, circular saw and a drill. You don’t need much to get started building stuff!
The fridge went up against that wall and I decided to build two vertical shelves to go on each side. They’re pretty simple construction. I used 3/4″ plywood and used my router with a straight edge and a 3/4″ bit to cut dadoes to hold the shelves. I cut the dadoes before cutting the board into two pieces for each side of hte shelves. That guaranteed that the shelves would be perfectly flat. After that I glued everything together and nailed it in place. They aren’t fancy but they should work well. The next step will be building cabinets to go along the wall above the fridge.
My parents have been building a fantastic new garage at their house. I thought it would look good with a new sign in it. I found some inspiration online, drew it in Inkscape and then took it to the laser cutter at work. The sign is made out of two sheets of 1/4″ MDF. The bottom is just a circle and the top has all the shapes cut out of it. I also cut the white portions out of 1/8″ plywood and put that under each of the white pieces. That gave it a raised look which I really like. After I got it all done, I realized I probably should have put “Martens Garage” instead of just my Dad’s name because Mom uses it for her project too but, oh well. Maybe I’ll have to come up with something else that has Mom’s name on it.
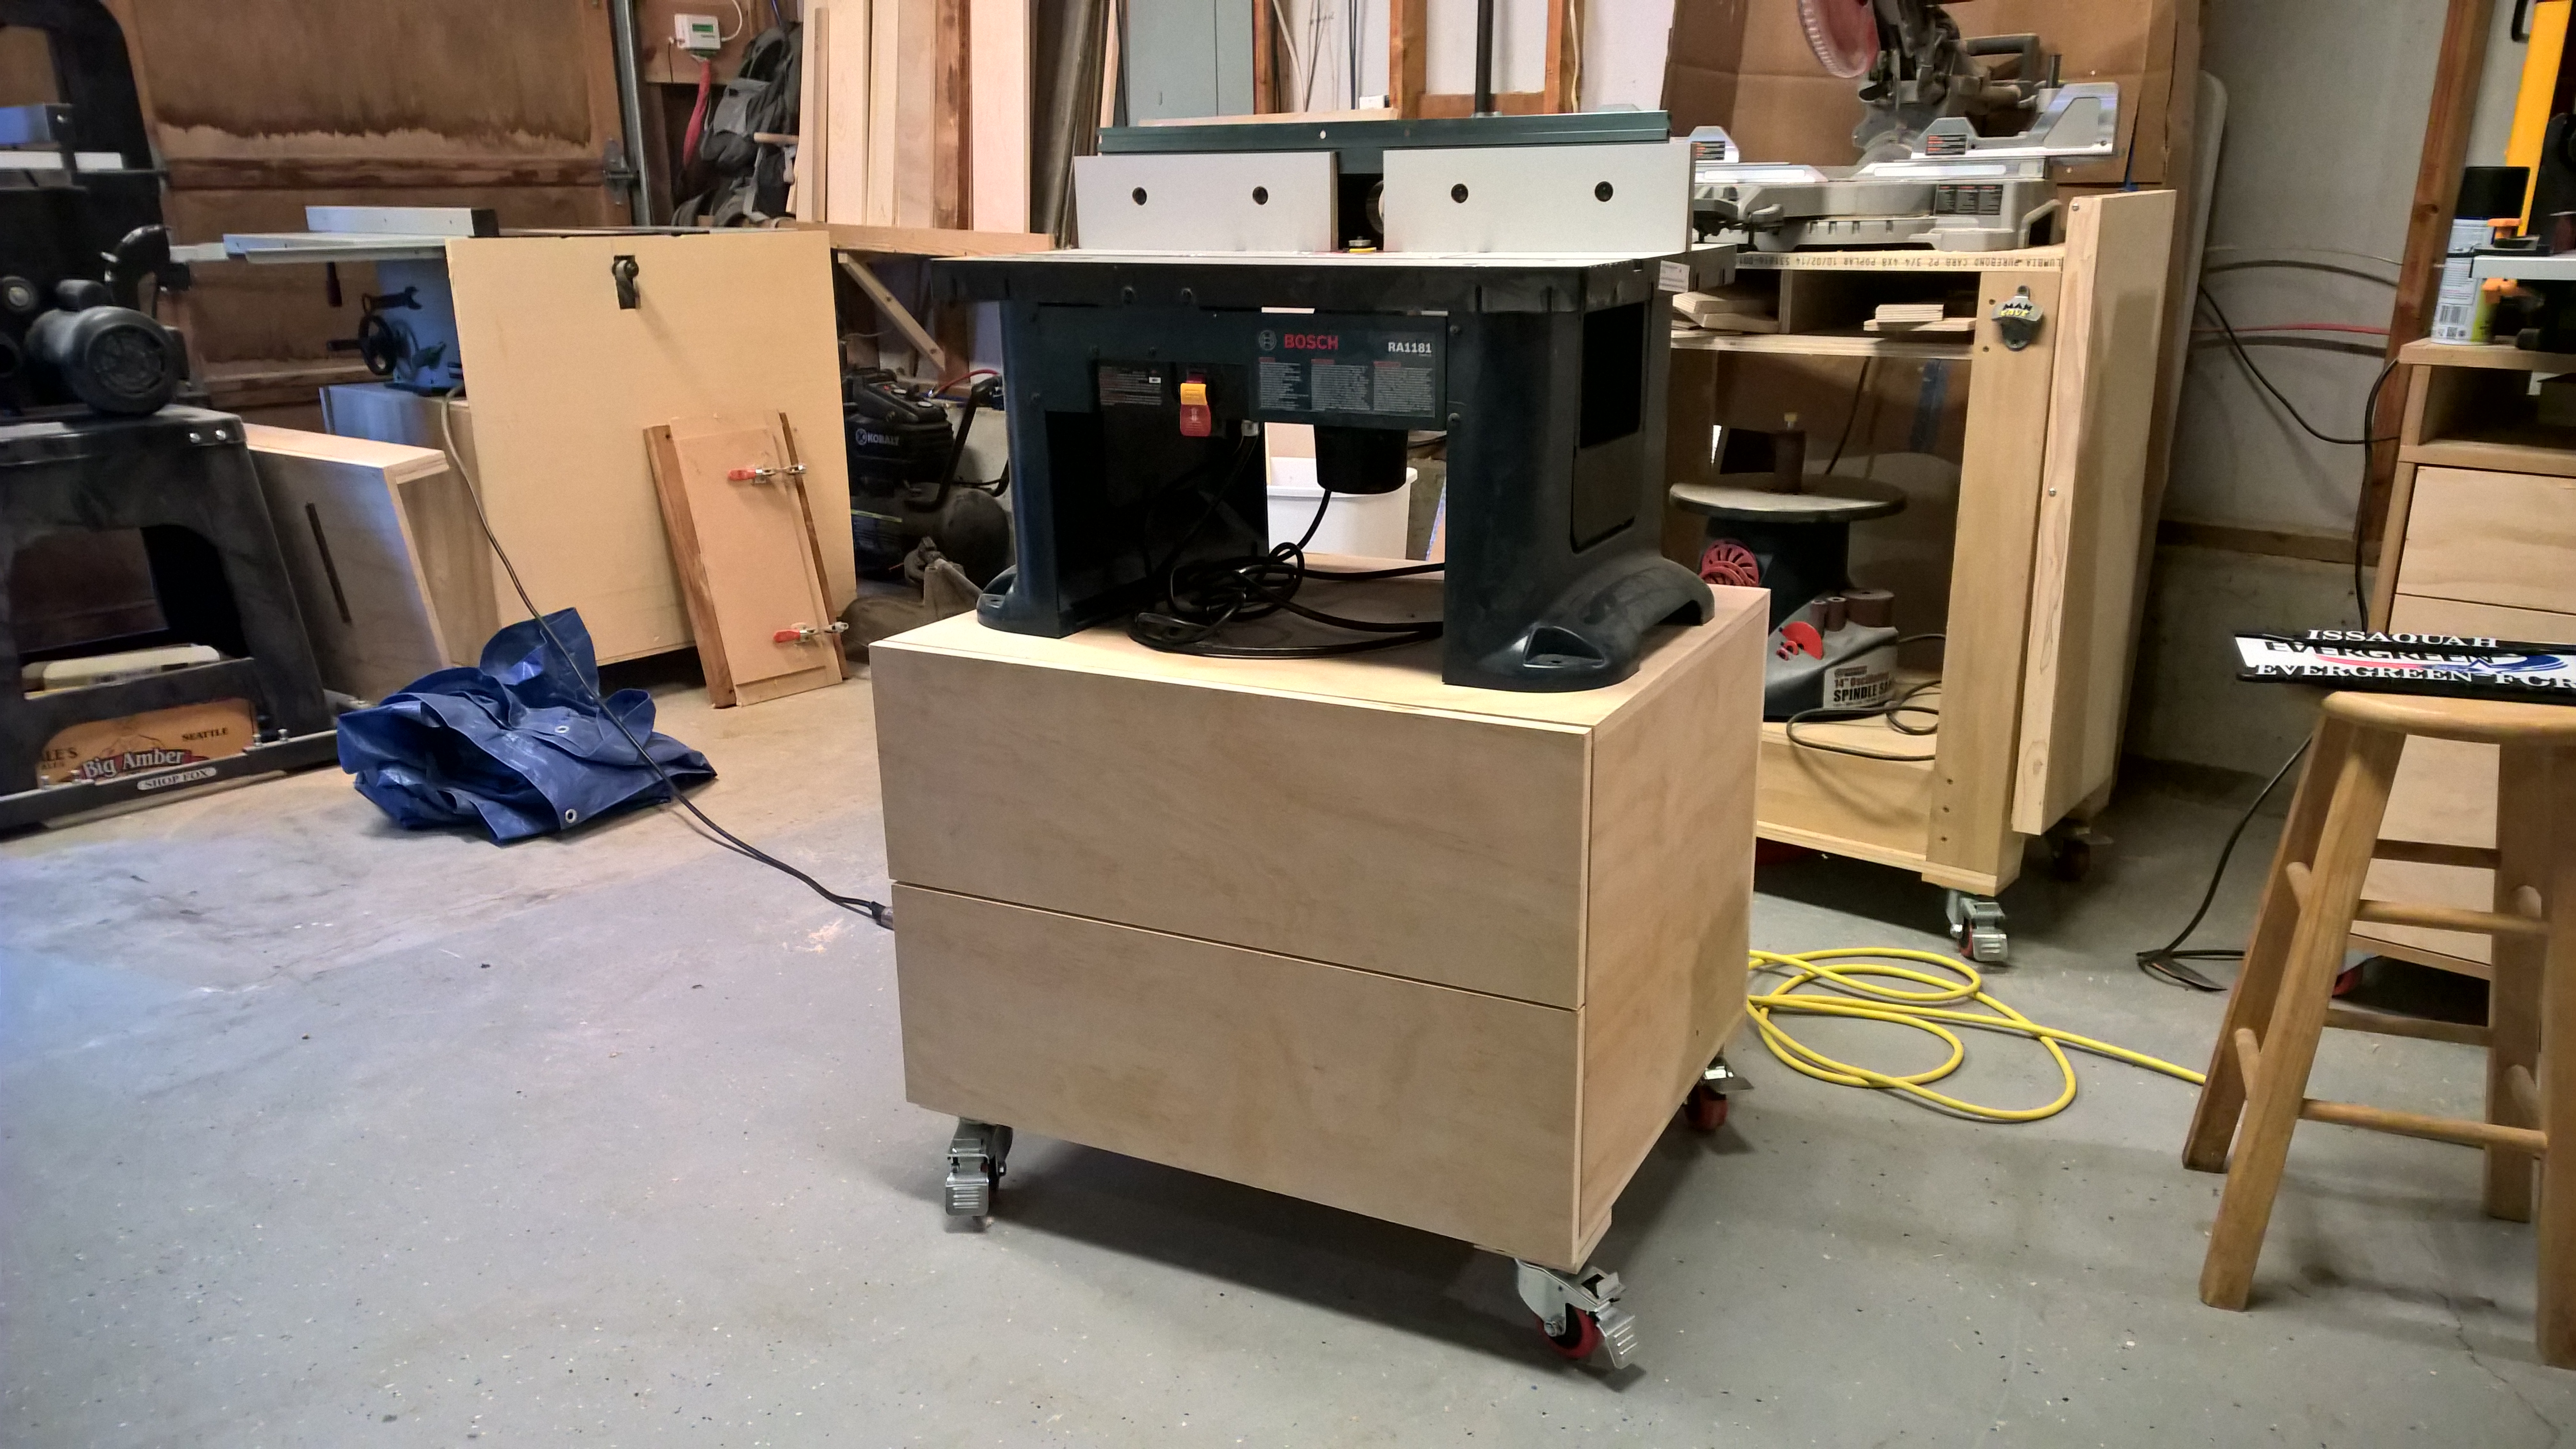
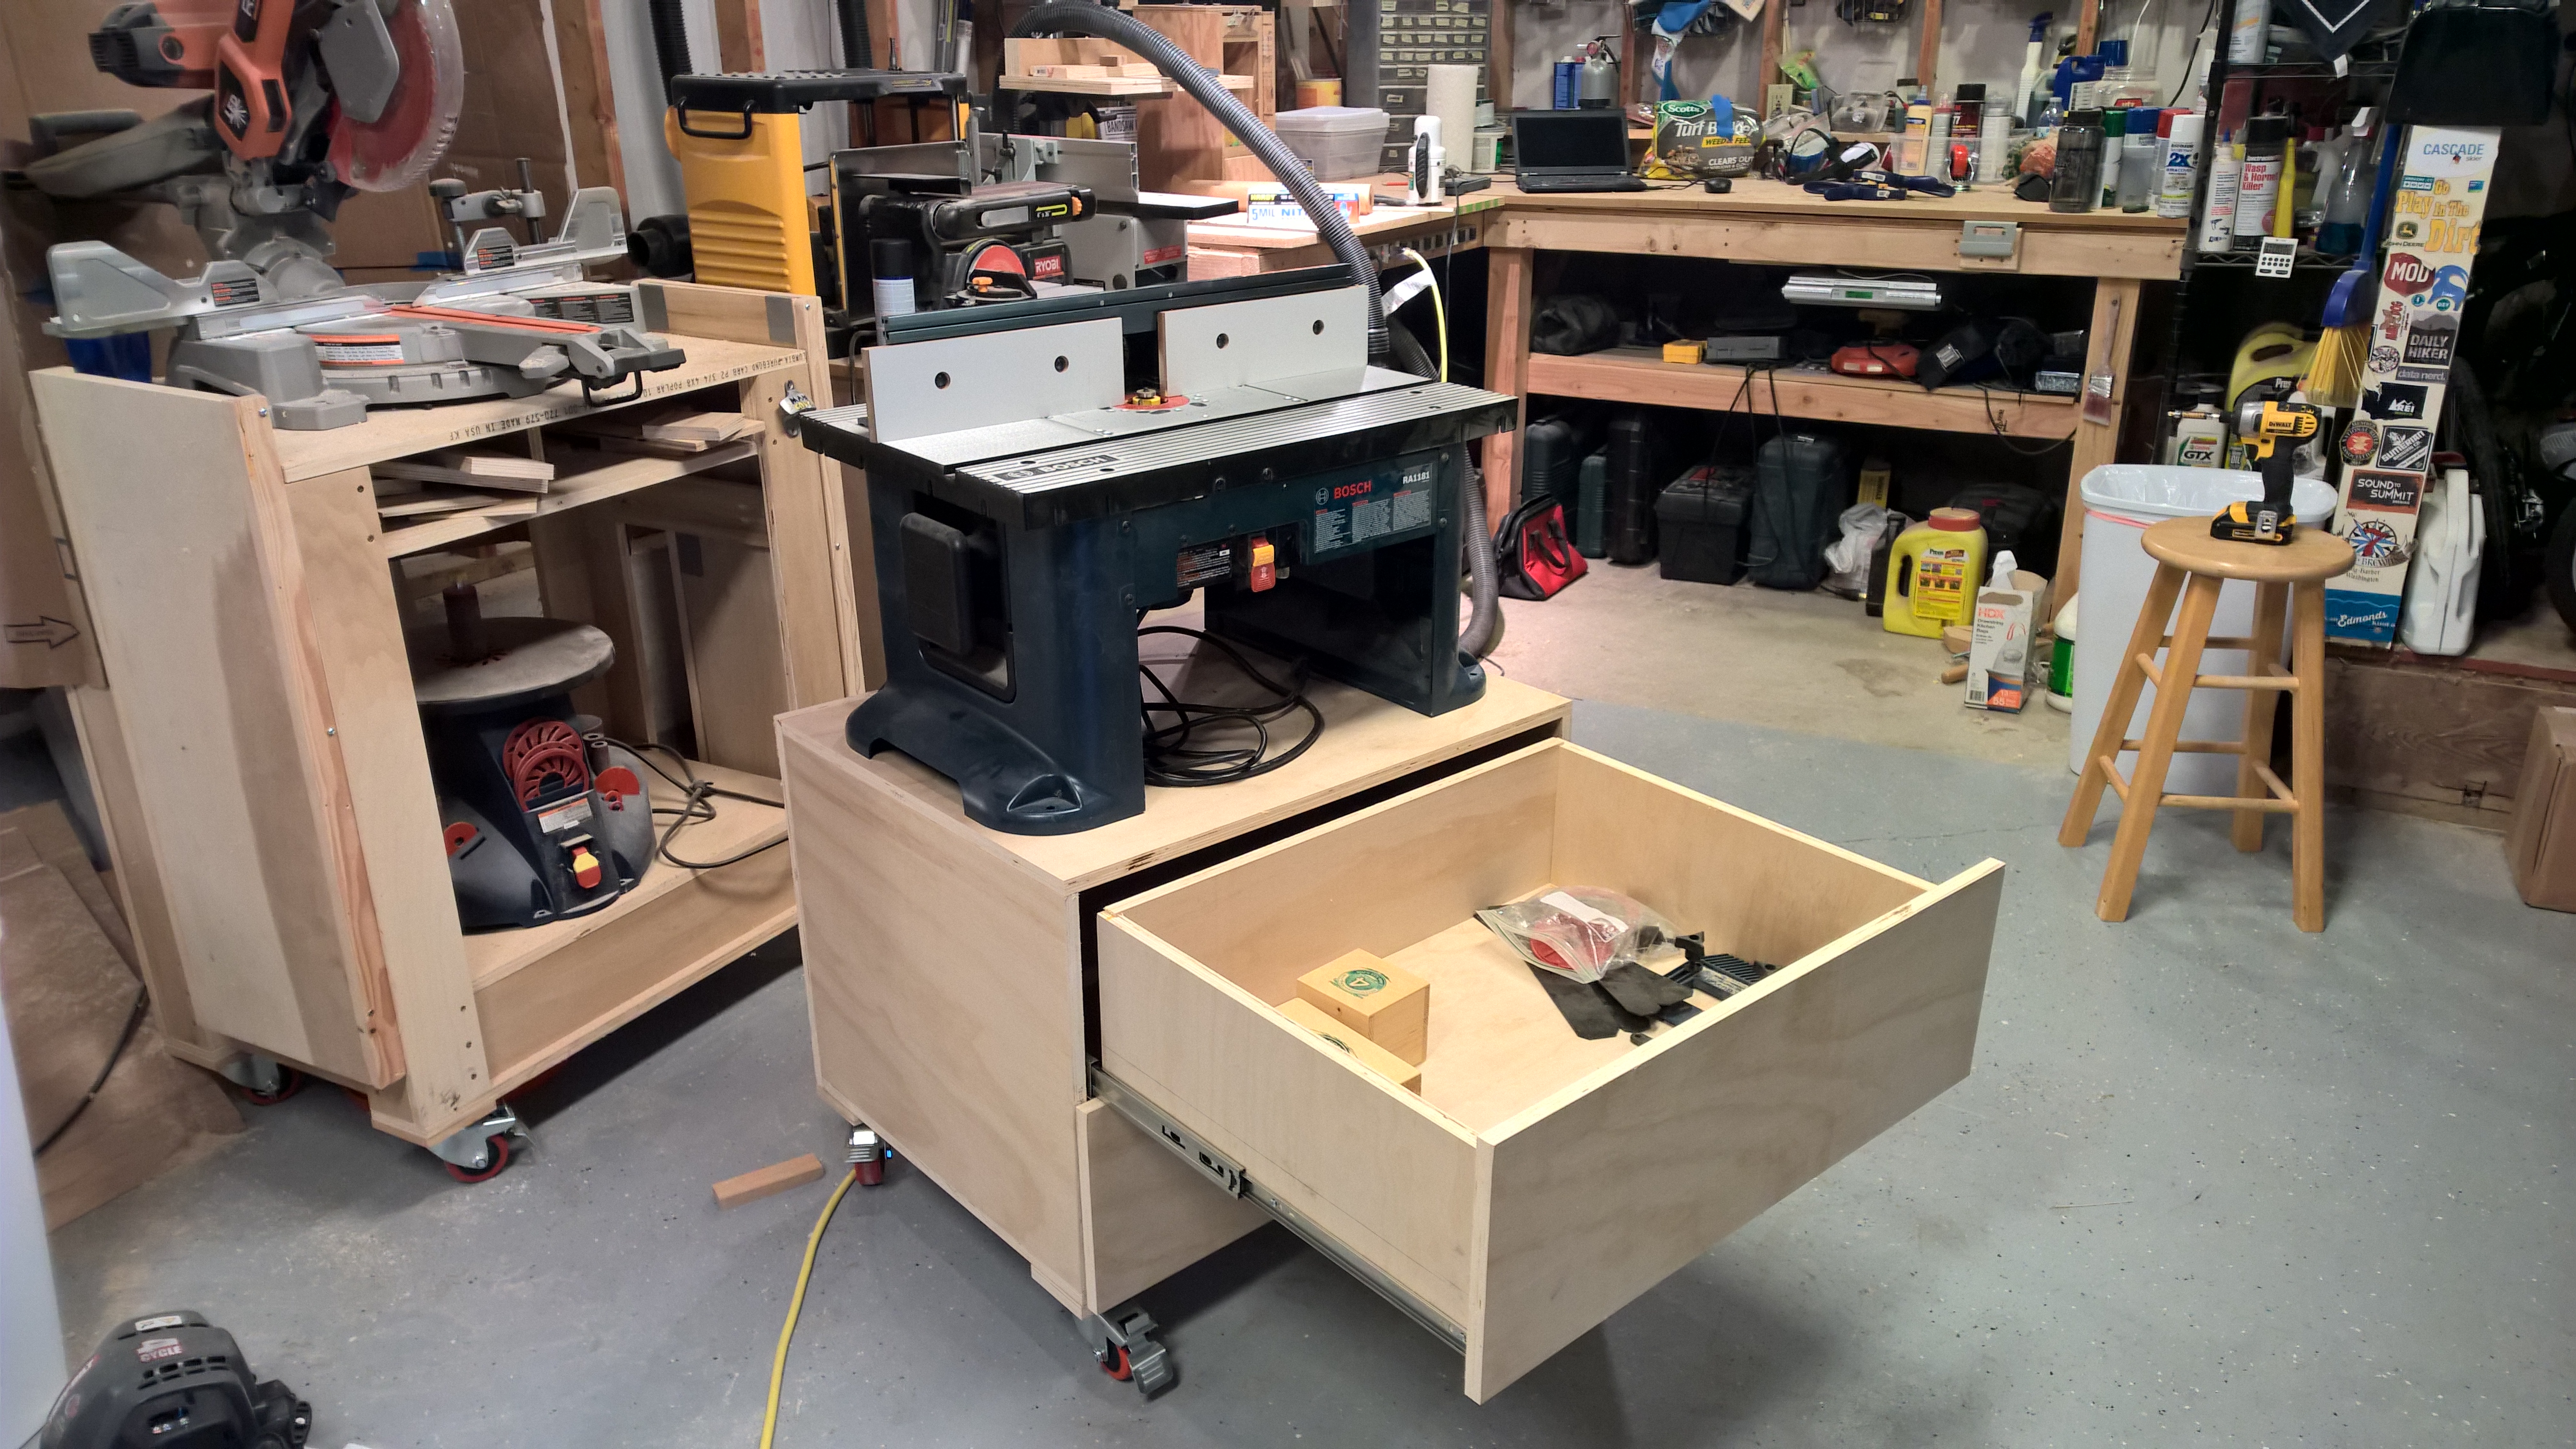
I bought a router table a while back but I’ve never had a good place to use it. I kept it along the wall in the garage and when I wanted to use it, I had to drag it out and either use it on the floor or put it on a folding table. It was worth it for big projects but for small things I often skipped it. Now that I have more space in the shop area, I decided to build a cart to give the router a more permanent home and give me some additional storage space. It’s just a simple cabinet on wheels with two drawers but I’m excited to have it completed, and it was wonderful to just drive to Home Depot and throw a couple sheets of plywood in the truck!
I finally got around to watching The LEGO Movie. It’s… awesome! Everything is awesome! The cast reads like a list of my favorite actors: Will Arnett, Alison Brie, Charlie Day, Will Ferrell, Will Forte, Morgan Freeman, and Nick Offerman and Chris Pratt. The kid in me loved the story and the geek in me loved the awesome computer graphics.
Long time followers of my nerd adventures may remember that I’ve made a few movies of my own. I finally uploaded them to YouTube for your amusement.
Up first is a stop motion video made with cousins Tim, Mark and Ryan. It was probably during Christmas and I’d guess it was around 1987 or 88. We did it in Tim’s basement with his VHS camcorder. There was a feature that would record a few frames with the press of a button. When we had the idea, I remember talking about who was going to build each piece. Before Mark went back to his house to build everything, we typed in a bunch of reminders on his awesome Casio calculator watch. The video took forever and we had a “script” change at the end. As a Lego man was moving across the crosswalk, he fell down perfectly in the middle of one of the recording clips. We went with it (what else can you do?) and turned it into a medical emergency. It’s a riveting story. I sped up the video below so that you can get your boredom in a shorter amount of time.
I thought this project was incredibly cool so a couple years later, I decided to try it again on my own. I borrowed our neighbor’s VHS-C camcorder (so “tiny”!) and set up a table in our basement. The city I built was much simpler than the first one and the story was non-existant.
And last, but certainly not least, I fell down a rabbit hole in college. My Junior and Senior year and then part of the year after graduation were spent doing a Lego movie on the computer. This was about 2000-2002 so there were none of the fancy Lego CAD programs available. Instead, I painstakingly built up a library of Lego pieces in a program called POVRay. It was a free tool that did raytracing but the modeling was all done in text. So to build a piece, I’d start with a rectangle, add some height and draw the nubs on top. I even had versions of the pieces with the word LEGO writen on top of each nub. Something like a Lego person is a huge amount of code. I had posted it to the web a while back and found it on archive.org. This link shows you what it takes to draw a single Lego character. Before I got too deep into the project, I built a short little sample video based on the old Budweiser Wazabi commercial.
The pieces were incredibly detailed and it literally took years to build it all. I also wrote a bunch of crazy math functions to animate the camera movement through the virtual world and also to animate things like walking characters. Rememember that since it is all text based input, “walking” means manually adjusting the rotation of various geometric shapes while translating the whole object forward. It was crazy complicated, but obviously I really enjoyed it for whatever reason. It was kind of relaxing to sit down for a while every night and “build” more pieces from scratch and at a time when I had very little money, it was fun to have limitless amounts of Legos to play with.
After spending eons on the graphics, I put about 30 seconds of thought into the story and here’s the result:
It’s not too far-fetched to say that this project got me my job at Microsoft. It took about 11 minutes to render a single frame of the movie (on my P2 350Mhz computer) and there were 2538 frames. That comes out to about 20 days of non-stop computing power. But oh yeah, don’t forget that I screw up a lot so I had to redo a bunch of it. To get it all done more quickly and to enter a programming contest at Purdue, I wrote a distributed rendering program. POVRay could be controlled via the command line so you would install POVRay and my client app on your computer. A central server would hand out individual frames for all the clients to render and then the client would send back the final image. (Archive.org has a copy of the design document for this project.) It actually worked and saved me a bunch of time. Not only that, I won the programming contest which netted me an original XBox and an HP Jornada PocketPC. But better yet, the guy who ran that comptetition went on to work at Microsoft. When I was looking for a job, JimM helped me reconnect with him and I ended up working in his team for the next six years!
So yes, this Lego project was ridiculously complex and within a few months of me releasing that video, there were bigger and better Lego rendering tools available. But I do think that finding fun projects like this area great way to stretch your abilities and feed your passion. This single project helped me in a lot of interviews when I was exiting college and it taught me a lot about programming.
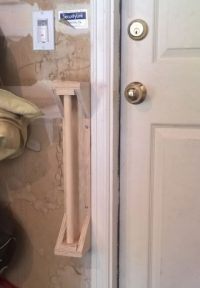
The door to our garage has a spring in the hinge so it closes automatically. That’s generally handy but I’m waiting for it to smash Elijah’s hand. He has to hold onto the door frame to step down. So to help keep all his fingers attached, I pulled out some scrap wood and built a little hand hold for him. It was a one night project using an old broom stick as the round piece to grip and so far it’s working out really well.
After a couple failed projects, I was looking for a quick win and decided to make some wooden mallets. They’re handy for assembly wood parts. The big wood face is gentler on your project than a standard hammer. There are a lot of different ways to approach the project, but I chose to use Jay Bates’s laminated method.
First I had to choose some wood. When we got married, Tyla already had an old, beat up oak dining table. She always dreamed of refinishing it, but last summer we agreed it was better to just get rid of it instead of continuing to store it. I salvaged quite a bit of wood from it. It has just been sitting in the side of the garage and I decided to make use of it. I grabbed one leaf and rain it through the planer to get all the old finish off of it. It cleaned up nicely.
After that the rest was pretty simple. The head is built from three layers of wood with the middle layer being chopped in half to make a hole for the handle. The handle is tapered so it slides into the hole and sticks there. When finished, the handle can be detached from the mallet by just pounding it through. There’s not much too it but I think it will come in handy.
I made two thinking that I’d probably screw one up, but both came out reasonably nice so I gave one to Tim since we were heading to his house for dinner that night.
I’ve had a lot of projects go really well lately, but there’s one that has continued to haunt me and I’m officially tossing the idea. I give up.
Tyla found some motorized Thomas the Tank Engine trains for Elijah. They aren’t the size of the standard wood tracks, but they do make plastic tracks. I thought it would be fun to make my own tracks because then we could have whatever pieces we wanted and it could exactly fit on his play table.
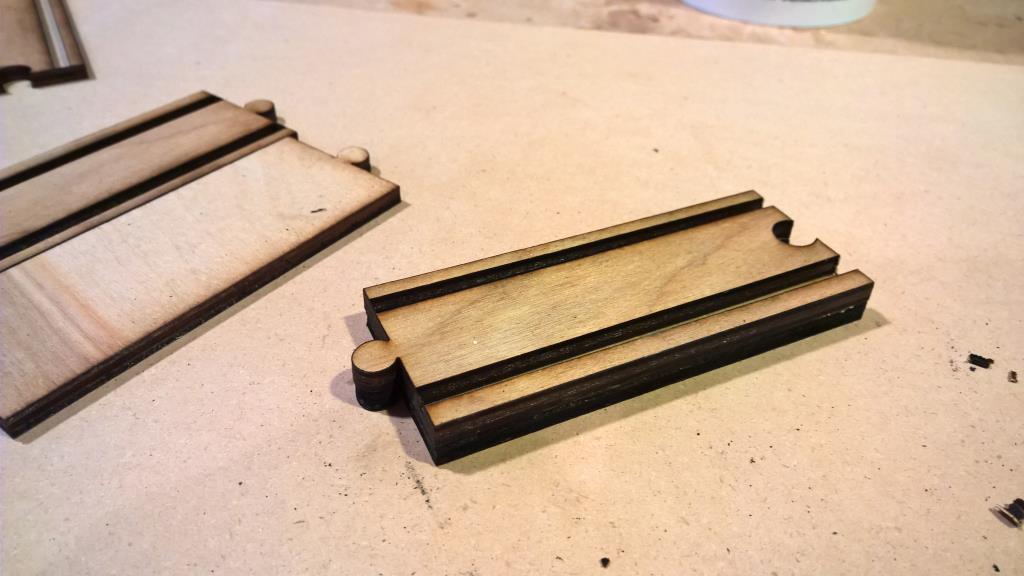
The first few attempts involved etching the wood repeatedly to burn in the tracks. I tried multiple times and finally got the interlocking knobs to fit properly, the curves to be big enough that the train could make the turn, and the rails to be the right width. The problem was that they were never deep enough to hold the train in place. When you’re etching wood, you can only take so much off at a time before it starts the wood on fire, so these attemps amounted to hours and hours in front of the laser cutter watching it slowly take away material. Here’s one of my best attempts with that method. It was rare for a train to make an entire circuit around the track without falling off and I eventually tossed these in the trash.
I gave up for a couple months and then had the idea that maybe I was approaching the problem backward. Instead of trying a reductive process of burning away material, why not do an additive process? I cut one piece that formed the bottom of the track segment and then the top segment was made of three pieces: the middle and then the two outer edges. The “rails” were left blank on that top piece. So the whole segment was two thicknesses high but the rails were only one thickness high. These were very quick to cut and it didn’t take too long to glue everything together. I thought for sure this would work but… the bottom of the train drags on the middle piece and the wheels can’t get to the bottom of the groove to push the train along. Fail. In the trash it goes.
If I spent enough time I could probably figure out the right way to do this, but this project has ceased to be fun and if I decide that I really want Elijah to have tracks, I’ll spend the $26 on Amazon so he can have tracks that actually work.
It wasn’t a complete bust because I learned a lot about the laser cutter and fine tuning designs, but it stinks that I don’t have anything physically complete to show for all that time.
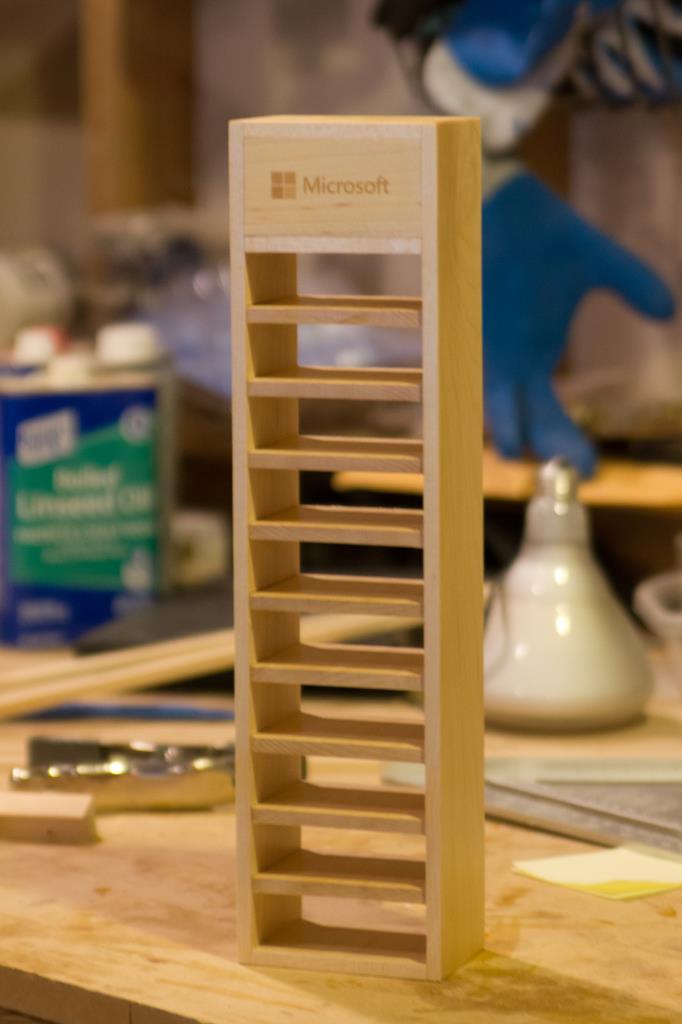
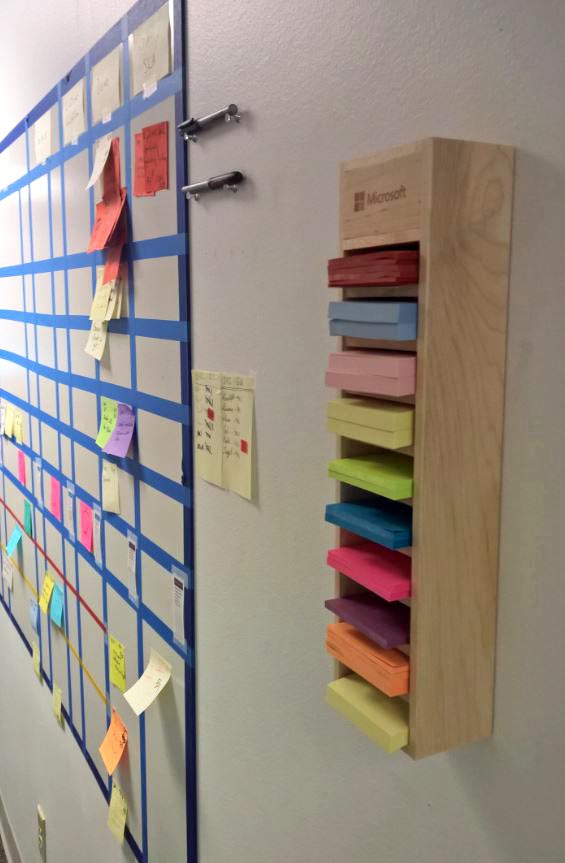
Our process for getting things done at work involves a lot of sticky notes. The person who has the office closest to the tracking board inevitably ends up with a huge pile of Post It Notes in their office. I decided it would be more handy to have them right on the wall next to the board so I grabbed a scrap piece of maple and set to work. I had a stack of post it notes on hand and kind of planned the design as I went. It’s held onto the wall with a French cleat and to hide that, I etched the Microsoft logo into some maple veneer.
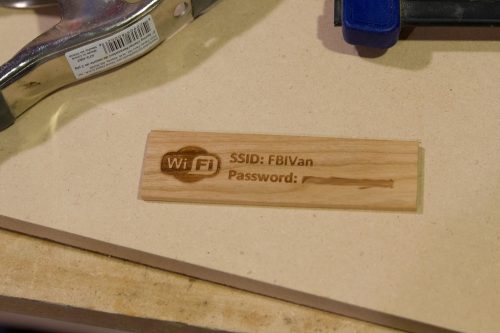
Now that we have a house with a dedicated guest room, I thought it would be nice to put a little sign in there that has the guest WiFi network and password. When I took my last trip to the laser cutter at work, I brought along a scrap piece of cherry and etched it right in. It’s a good reminder that projects don’t have to be complicated to be fun.


 The door to our garage has a spring in the hinge so it closes automatically. That’s generally handy but I’m waiting for it to smash Elijah’s hand. He has to hold onto the door frame to step down. So to help keep all his fingers attached, I pulled out some scrap wood and built a little hand hold for him. It was a one night project using an old broom stick as the round piece to grip and so far it’s working out really well.