Studio711.com – Ben Martens

Maker

Play Table

Over the past couple weeks, I’ve noticed Elijah playing on his own a lot more than he did before. The coffee table is one of his favorite play spots right now. I want to support these activities, but it’s hard to watch him smashing his cars around on the table. I’ve put plenty of my own scratches into the table, but if he keeps at this for a couple months, we’re going to have sawdust on top. I’ve been trying to figure out a good way to build him some sort of bigger play table anyway, and one day it dawned on me that I could solve both problems with one project.

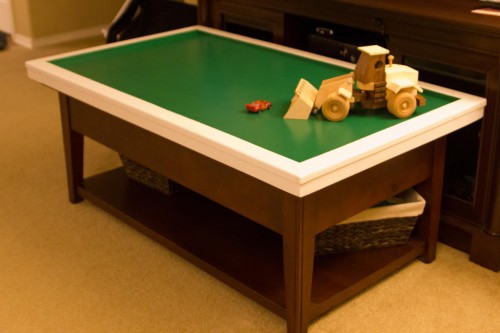
I had a scrap piece of plywood that was big enough to cover the coffee table so I cut it to about the same size and trimmed it with some simple 1×4 pine. Using pine takes a little extra time because it pays to fill all the knots with wood filler, but it’s so cheap that it’s worth it for a project like this.

It only took a night or two to complete the build and then the painting began. Thankfully we had a semi-sunny weekend so I set up the saw horses in the driveway and started painting. I covered everything with a coat of Kilz primer. The rim was painted white and then, after taping, the inside was painted with four or five coats of green. I did all of it with spray paint and kept it smooth with some fine sanding every once in a while. I finished it off with a few coats of spray lacquer.

I had thought about painting a road onto the board and even laser cut some paper to use as a stencil. I didn’t use them though because I wasn’t confident that I could get a clean enough line using the templates.

The end product works perfectly. We already had some soft foam around the edges of the table. This slides over the top of that foam so nothing is touching the actual wood of the table.

Elijah spent a lot of time playing at that table the first day. I spent less than $4 on the project (not including leftover spray paint and lacquer) and used up some scraps. He can beat this up all he wants, and it’s really nice to be able to spread out his Legos without watching them spill off the edge of the table.

IMG_4404

Silverware Drawer Organizer

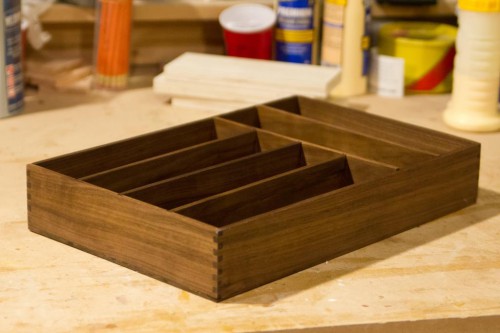
When we moved in, we bought some cheapo plastic silverware drawer organizers. They work ok, but they never really fit the drawers. I was looking for an excuse to use my new box joint jig and I decided the silverware drawer would be a good project.

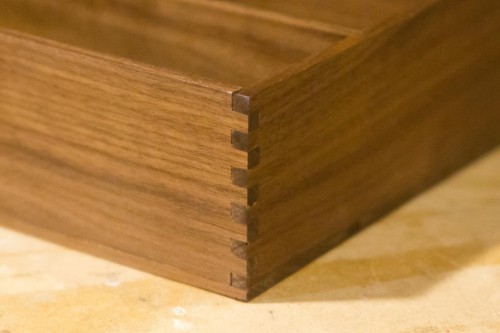
I had walnut laying around and I wanted to use a nice hardwood for the box joints so this whole project got made out of walnut. It’s kind of ridiculous but it’s so much fun to work with walnut. I resawed it on the bandsaw and planed everything down to thickness. The Wixley digital planer gauge that I got for Christmas really worked nicely for the planing. I glued two pieces together to make the bottom, cut the box joints and then cut the dados for all the inserts.

My original plan was to glue it up but everything fit so nicely that I’m not going to glue the pieces in. This way we can easily remove them to clean the drawer out if we need to. I put on a bunch of coats of lacquer and then let it cure for a few days before sticking it in the drawer.

Is it overklil to have a solid walnut silverware drawer? Yep. But I love that everything fits so much nicer now and it was a good learning experience.

silverwaredrawer1 silverwaredrawer2

2×4 Toy Trucks

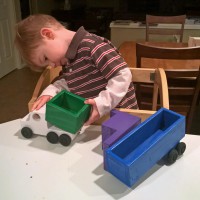
toytrucksSteve from Woodworking For Mere Mortals, recently posted a project showing how to make a simple toy truck out of a 2×4. The end result is a truck that can have a pickup bed, camper, or trailer attached to it. Elijah has been asking to play with the semi truck that Grandpa Martens made me. That is special to me and I’d rather leave it on the shelf so I thought this project might be a quick way to get him his own truck.

I had Elijah come out in the garage a couple times to “help” me with the project so he could feel like it was partly his work too. We also made two sets of trucks so that we could give one to his friend Ike as a belated birthday present.

My DIY spray booth came in very handy for putting all this spray paint on in cold, rainy weather. The trucks came out ok. I used scrap 2x4s which was fine but some of them were pretty beaten up. These will be great trucks for the kids to bang on and smash. And if they break and we have to toss them? Well hey, it was only about $2 worth of wood!


Family Sign

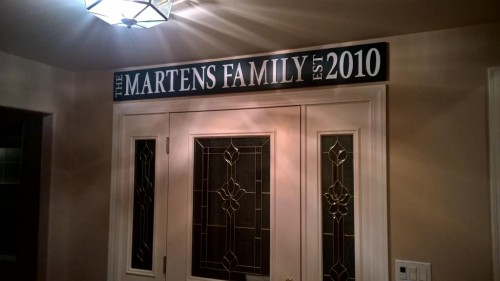
I’ve had a couple laser cutter project posts recently, but the real reason I learned how to use it is because Tyla wanted a family sign. She found some on Etsy that she liked but we didn’t like the prices. My first thought was to cut them out on the bandsaw but I quickly realized that would take forever and I wasn’t sure I could cut out the smaller letters.

The laser cutter made quick work of the letters and then it was just a matter of painting them and painting the backing board. It has been really cold and wet around here but I managed to get it all done and assembled.

The dimensions on the sign came out as planned, but it feels pretty big now that it’s in place. It’s growing on me though. The nice thing is that this was made out of scrap wood with only a few hours of work. Most of the time was just doing the painting and letting that dry.

You can’t see it in the photo below, but the letters are made out of 1/8″ wood so they are raised up from the backing board. It’s a nice 3D effect and gives really crisp lines.

familysignoverdoor

Seahawks Skyline Cutout

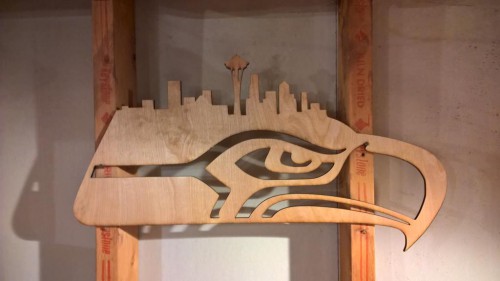
There are some pretty cool custom Seahawks signs floating around Etsy and local craft fairs. I decided to try making my own on the laser cutter. I spent a bunch of time in Inkscape modifying/drawing a logo. I don’t take much credit for the design. It’s largely a copy of other ones that I have seen, but I’m really happy with how this one turned out. It can be cut at any scale but this one is a little over 20″ wide.

seahawkswoodsign

Custom Mario Coins

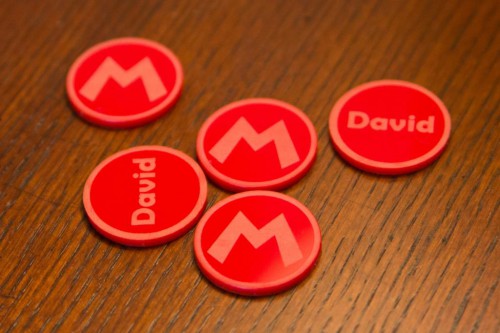
One of the first projects I attempted on the laser cutter was making some acryllic coins for my nephew. He loves Mario and I thought that it would be a good learning opportunity for me and something fun to maybe spark his interesting in making things.

The design is pretty simple. It’s just the Mario logo on one side and his name on the other side. I etched a circle around the outside of the coin on both sides. When I etched the first side, I also cut out the coin. Then I carefully flipped the coin over without moving the rest of the piece and cut the back. They weren’t perfect because there’s a little slop in that flip but they came out pretty well.

customcoins

Laser Cutter

Tyla has been looking at customized family signs on Etsy. She had a hard time finding one that was the right size and design and I had a hard time paying that much for a piece of painted plywood. We joined forces and designed our own custom sign. Instead of painting it, I wanted to cut each letter out so it would look a little more interesting.

I designed it on the computer, printed off the large tiled pages and then spray glued the first letter onto a thin piece of wood. I don’t have a scroll saw so I put the 1/4″ blade on my bandsaw and got to work. Between the sawing and sanding I realized it was going to take a LONG time to get through the entire sign. Time for plan B.

At work they have a “Maker Garage” for employees to use for free. It’s full of a bunch of tools that you need to get projects done like a drill press, soldering irons, etc. There’s a big community around it that shares ideas and teaches new skills. They also have an “advanced” part of the room that contains more expensive tools. You have to go through training to use them but there are some incredible machines in there including a milling machine, CNC, a couple different 3D printers, an computer controlled embroidery machine and two laser cutters. I’m excited by all of those things but the laser cutter had one of the easier onboarding processes and it was exactly what I needed for this project.

It took a few hours of online and in-person classes but I’m now certified to use their laser whenever I want! I just have to provide my own materials or scrounge through the scrap bin. It can either cut all the way through material or etch it. Obviously it will only etch some materials like stone, but you can either cut and/or etch lots of materials like acrylic, wood, leather or even food. Basically you can do anything you want as long as it’s not reflective to the laser, it’s not going to immediately catch fire, and it doesn’t release poisonous gas when it’s cut.

To pass the training class, we had to modify their sample and successfully make a safe cut with some simulated problems along the way. So what you see below isn’t anything fancy, but it’s my first output from the laser cutter! Thank you Tyla for spending extra time with Elijah alone at home while I finished this training.

firstlasercutter

Tool Cart

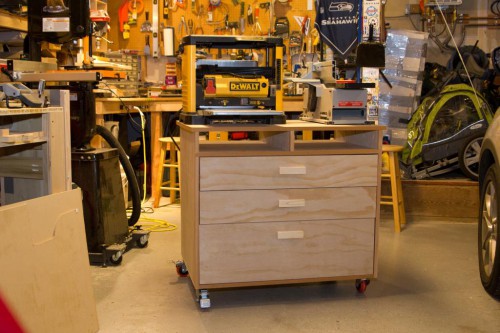
I’ve been dreaming about a workshop rebuild that will probably happen next summer. My original plan was to build a bench down the side of the garage to hold my tools. Then I realized that it could be more convenient if I had a few rolling carts to hold the tools. They can be rolled into place when needed and then pushed off to the side when they aren’t important.

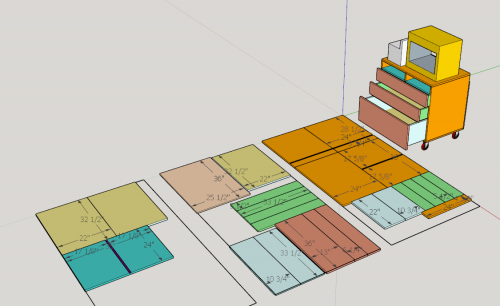
I designed this one out in Sketchup and that worked extremely well for me. After designing it out, I also laid out the cut list and cut ALL of the pieces before starting to build. It was a leap of faith but it worked out great! I didn’t have to recut anything. I was almost completely done before I realized that I had made a big mistake. When I put the tools on top of the cart, they didn’t fit!

In a bonehead maneuver, I had never actually put the tools in the position that I would have them on the top of the cart to measure the total space. I just measured the individual tools and when I did that, I forgot to include the part that sticks out of the back of the jointer. ARG!

Thankfully, the jointer and the planer only overhung the edge by about an inch. I resolved this by running a 3/4″x3/4″ piece of leftover cedar all around the top edge. I also trimmed out the rest of the cart so it looked more intentional. It looks fine and everything fits without hanging over the edge.

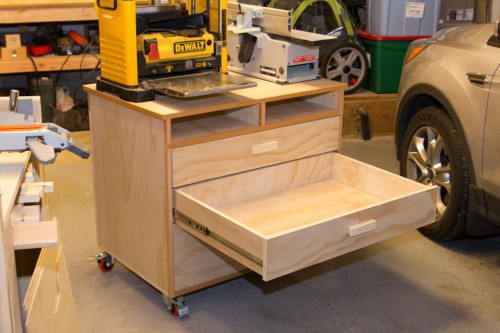
The drawers came out pretty nice. This was my first time using drawer slides and they work wonderfully! They were really easy to install and I got the full-extension drawer slides so I don’t have to fuss with stuff hiding in the back of the drawer.

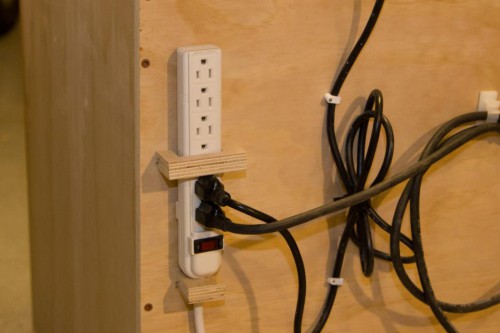
The final touch was to build a simple attachment to hold a power strip on the back of the cart. This means I only have one plug to power the cart and I also have some extra power ports if I need them.

I want to build one more of these to hold the drill press, spindle sander and belt sander. I’ll probably use a very similar design but this time I’ll make sure that I lay the tools out and measure the total space!

sketchuplanerjointer

planercart1

planercart2

planercart3

Wooden Snowflakes

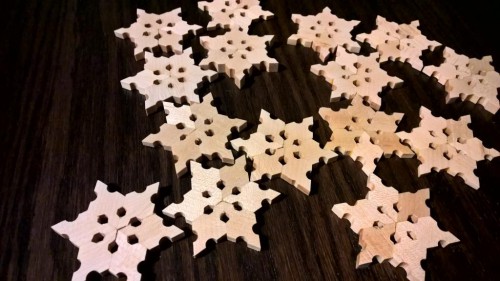
A few years ago, Steve Ramsey posted a fun video about how to make wooden snowflakes. I decided to give it a shot and it was harder than it looked! I had a strong suspicion that my first attempt would fail so I did it out of cheap pine. I made a bunch of mistakes and thought I had it figured out so I moved on to maple for my second attempt. Nope. He clearly says in the video to glue the face grains together. I don’t know if he misspoke or if I just understand what he means but when I do that, I don’t get six evenly distributed points. I won’t explain the whole thing here, but if you build this, make sure you hold it all together with rubber bands and make sure it looks right before you apply glue.

The third time was the charm and they came out pretty nice. My only failure was that even after the third attempt, the pieces still didn’t form a perfect 360 degrees so there are gaps between some of the pieces. Oh well, I was tired of the project by the time I got to this point so I called it good enough!

We only put a few on our tree. Some of these will go out as gifts to Elijah’s teachers, but if you want one too, let me know and I’ll see what I can do.

woodensnowflakes

End Loader

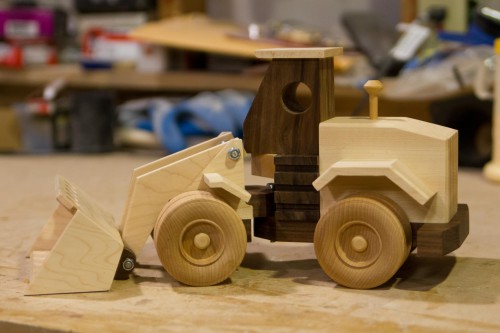
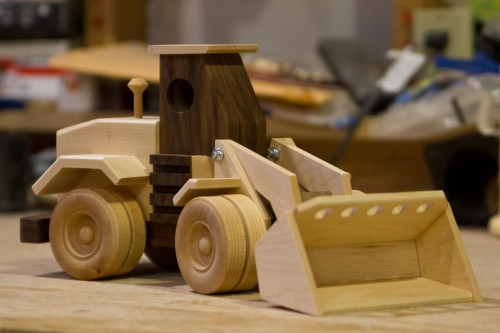
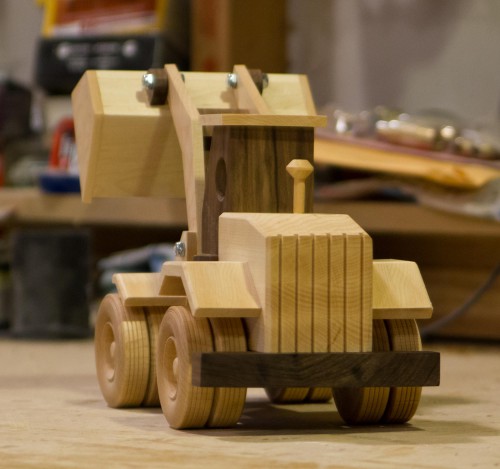
For the past years, every few issues of Wood Magazine have had plans for a construction toy. I recently purchased the plans for the End Loader and completed it. It was another big learning experience for me. Aside from the quick planes I did recently, this is the first toy that I’ve built. The biggest thing I learned is that precision matters. You can’t be too precise. I made a large number of these pieces twice just to get them perfect. I also spent a lot of time sanding to try and get it as clean and smooth as possible. Because it’s so small, people look at it very closely and even small flaws will stand out.

Along with the plans, I also purchased the kit that contains wheels, smokestack and the hardware needed to complete the project. I don’t have great equipment for making those circular pieces so buying the kit let me focus on the rest of the loader.

It took me about two weeks to complete and I’m thrilled with how it came out! One of the hardest parts was getting it all sprayed with lacquer. Lacquer is supposed to be sprayed above 65 degrees or in low humidity. I couldn’t spray it in my garage since the fumes are so intense and they can actually ignite from the pilot light in the furnace. I set up a pop up tent on the back patio, hung tarps from three sides and hung a space heater from the top, pointed down at the table. I also brought all the pieces and spray inside to let it warm up to room temperature. That setup might have been overkill, but I didn’t want to screw this up after all the time I put into it.

I’m very happy with how this turned out. It will end up being Elijah’s Christmas gift. Last year I built him the table and this year he gets a toy. I think it would be fun to build something for him each year but we’ll see how that holds up.

The next project or two will be quicker and easier but I think I might do one or two more of these toys. I have plenty of walnut and maple leftover from this project.

endloader1 endloader2 endloader3