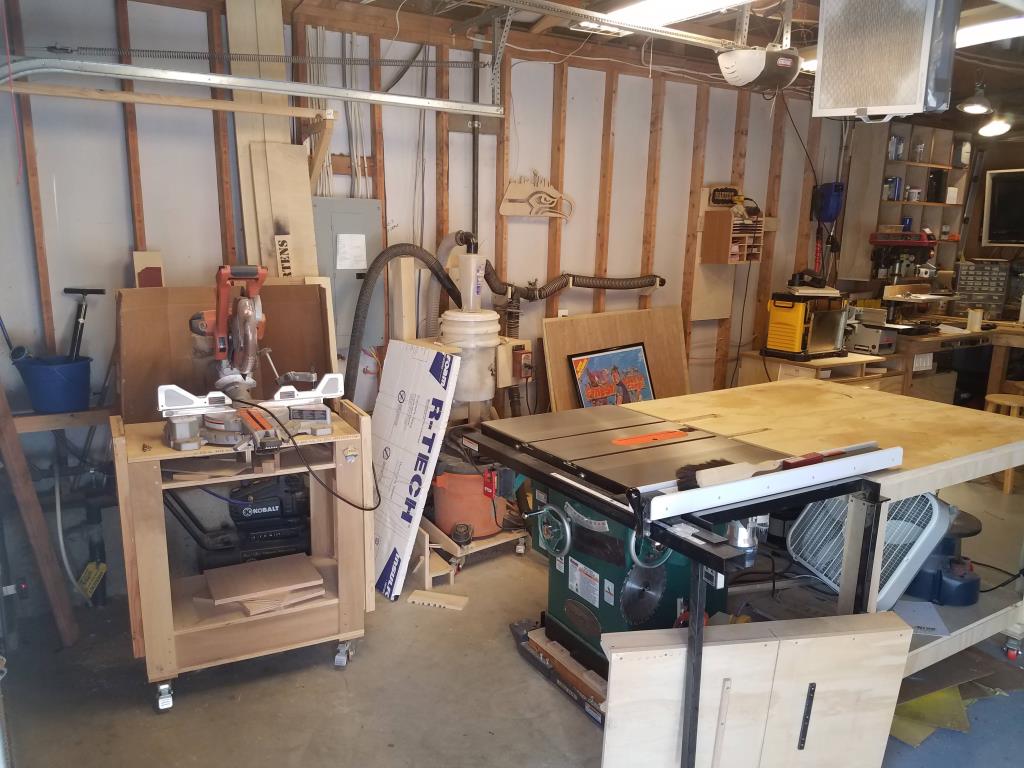
My woodshop is the third bay of our garage so I basically have one long wall to work with. It has always been a catch-all spot where I storage random sheets of plywood and generally dream of what might go there some day. It was time to stop dreaming and make use of it. I find that in my workshop I repeatedly get stuck in indecision. It’s silly because I will be making it all myself and I can just change it later if I decide I want to. Pick a path and go for it!
I saved some money by not building actual individual cabinets but rather each cabinet shares a wall with the one next to it. It was going to be a LOT of plywood, so I started by drawing the whole thing out in Sketchup, figuring out what pieces I’d need to cut and then I used a free cut list generator to help me optimize my plywood usage.
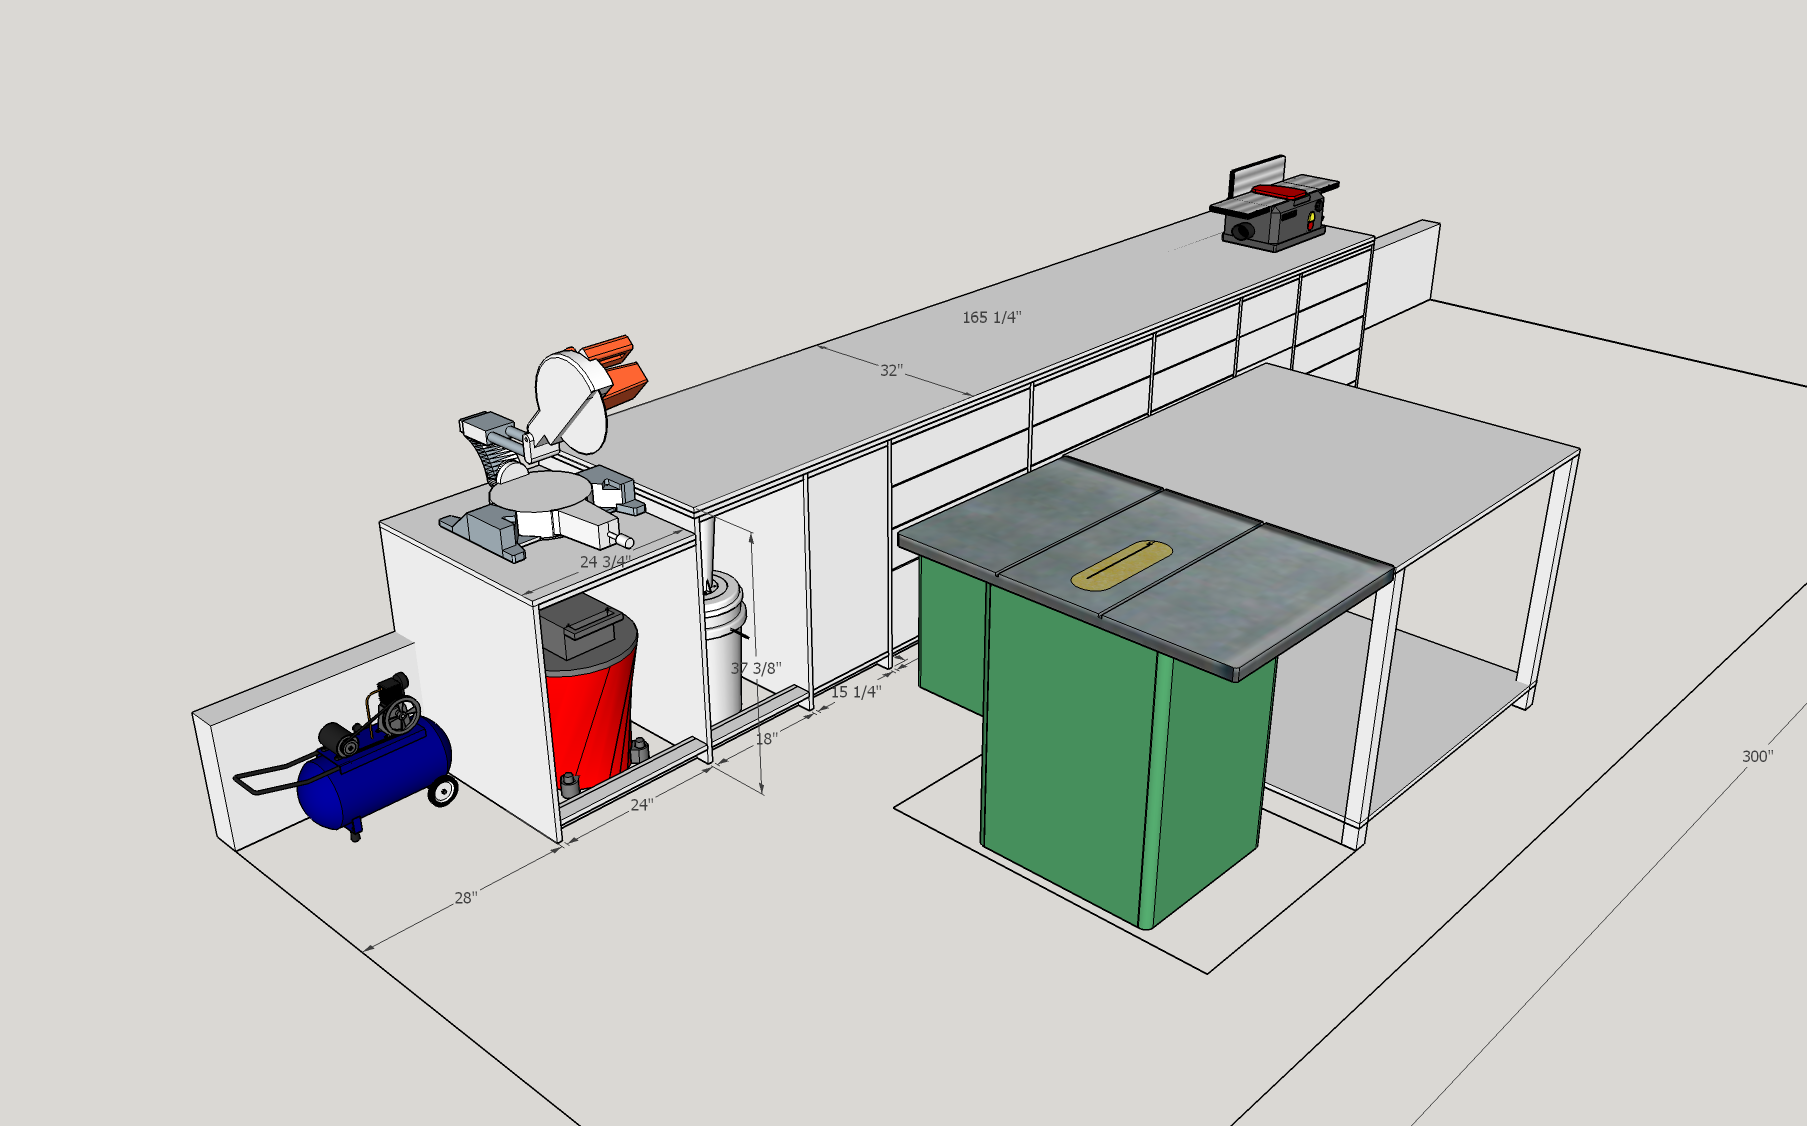 Part of the plan was to make a more permanent place for my miter saw to sit. The cart that I built in 2015 has been working great, but I’m tired of having it be in the way. With this new plan, the miter saw sits lower than the other cabinets so that wood rests flat across the saw onto the top of the cabinets. At some point I’ll put some T-track into the top of the cabinets to add a stop block with a tape measure for quick, accurate cuts on the miter saw. Normally you see these built with outfeed support on both sides, but I don’t have enough room for that. And while I’d prefer to have the outfeed support on the left side, this made more sense. The garage door is on the left so if I have to cut a really long piece, I can open up the door and get some extra room.
I used 3/4″ pine plywood (~$35/sheet at Home Depot). I’ve used that for most of my shop projects and I’m always impressed at how nice it is for the price. The tops of the cabinets got two sheets of the plywood. It adds a bit of cost but it really strengthens the top and makes the cabinets feel more solid.
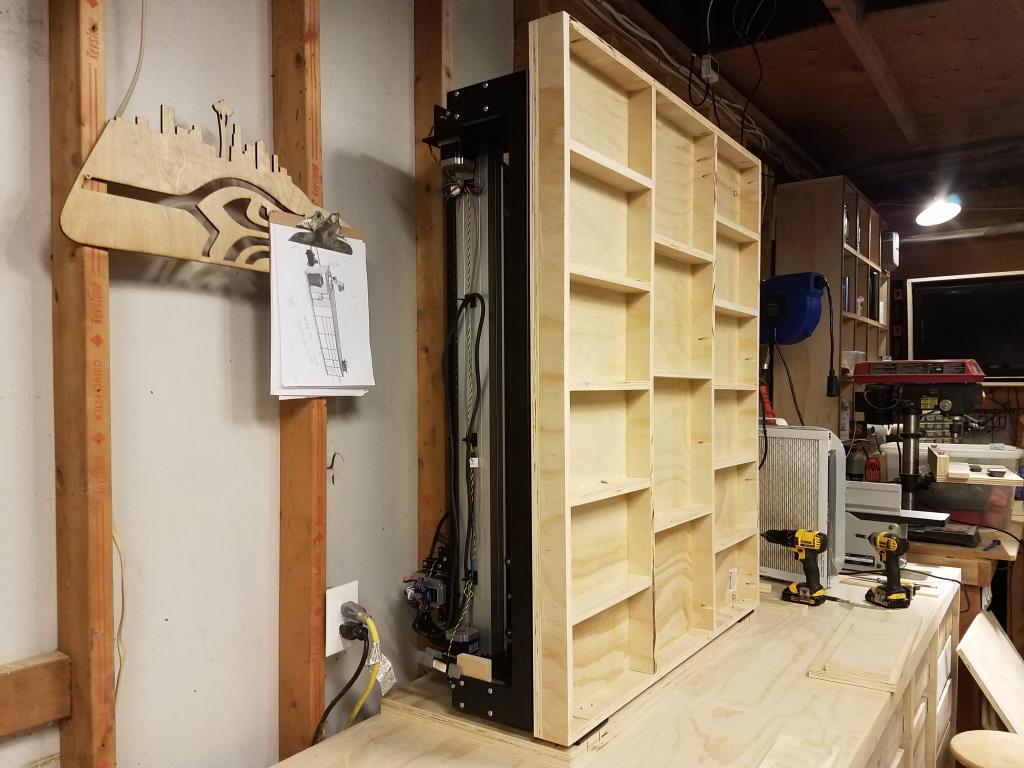
The first step was cutting each of the vertical pieces. These were basically just rectangles with a notch cut out for a toe kick, but there were two complications. First of all, I had to cut out a notch for the foundation wall. Secondly, the garage floor isn’t level. I wanted to spend a little extra time to make the top work surface be level to avoid hassle with the drawers later. So each of the vertical pieces was going to be a slightly different height. Instead of trying to get that perfect, I left each one about an inch short. Then when it came time to mount them in place, I would hold them at the right height, slide a piece of scrap plywood up next to the bottom and screw the scrap into the vertical divider. So the cabinets are screwed into the studs and then rest on the floor.
I don’t know if I’d do it this way again or not, but to space out the vertical dividers, I cut a bunch of pieces the with of the cabinet and pocket holed them into the dividers. On the plus side, it made it easy to assemble each section one by one and keep them all evenly spaced, but on the down side, it was a lot of screwing and cutting.
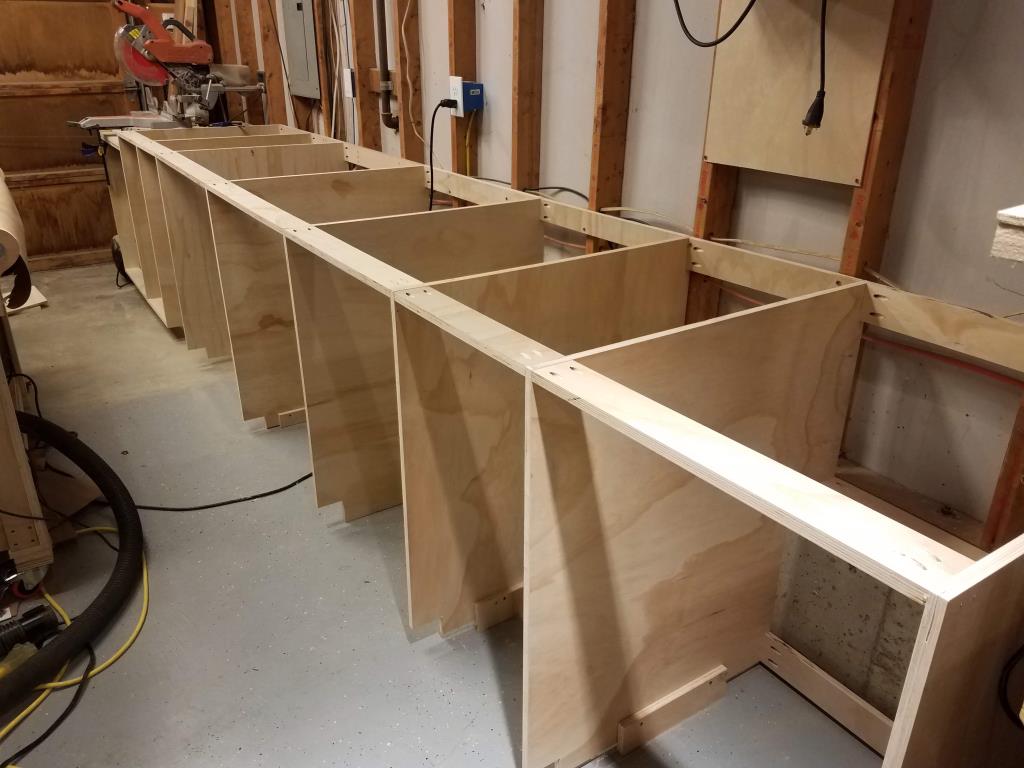
You’ll see that not every opening is the same width. I went with 3″ multiples since that’s what normal cabinets use, but I tried to add in some variety for storing different things.
After adding the top (YAY! Finally a place to put some tools!), I ripped down some 2x4s to make a face frame. Hiding the plywood edges looks nice but it also helped me make perfectly rectangular openings which pays dividends down the road when it’s time for drawers. The laser level was instrumental in getting the top of the cabinets level and also at this point in the process when I was making the dividers perfectly vertical and the horizontal face frames perfectly flat.

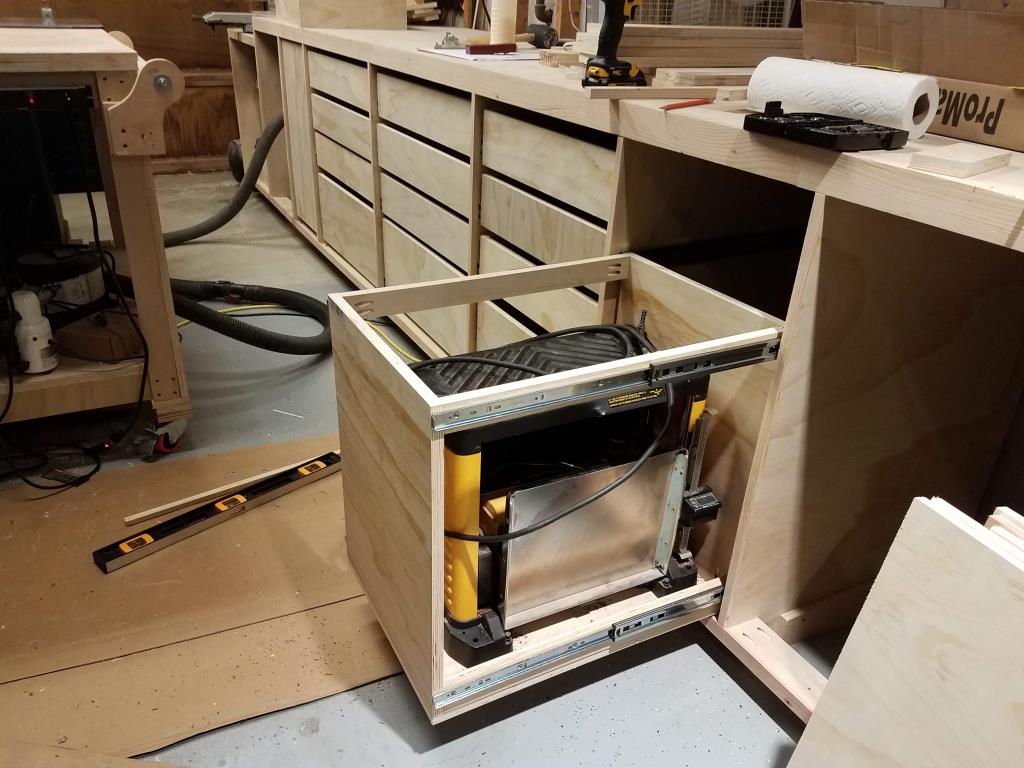
Now it was time to make the drawers. A LOT of drawers. 20 to be exact. Again, I probably could have gone an easier route, but I chose to assemble the drawers by using dadoes. This gives a bit of additional glue surface and helps to keep things square during assembly. Unfortunately my little shop vac can’t handle the dust collection duties for dadoes so it repeatedly slogged up the hose inside my table saw. I finally just gave up on dust collection with the dadoes, disconnected everything, and cleaned up afterwards.
Most of the drawer sizes were pretty standard, but there were two special ones. One of them is full height and my plan is to use that for scrap hardwood storage. I have a bunch of smallish pieces and I had previously been standing them up in a trash can. The other one holds my planer. That planer is pretty heavy so I ended up using a double set of drawer slides which seems to be working well so far. If it starts to sag I can always kick a block under the end of the extended drawer when I’m using the planer. I don’t know how well both of these special drawers will work in the long run, but it’s easy enough to take them out and add standard drawers later.
Speaking of drawer slides, that part of the project can really break the bank. I have bought some very cheap slides from Amazon in the past and had good success so I went that route again. This time I got Promark full extension slides along with some mounting screws.
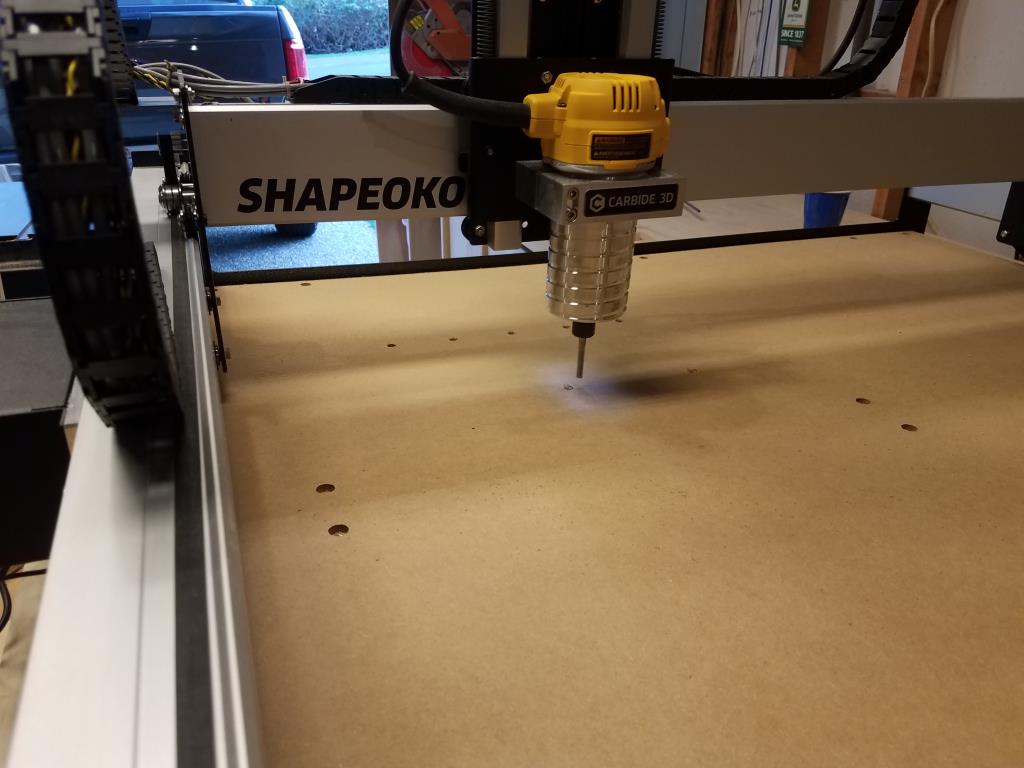
After the above photo, I finished off the last six drawers and now it’s fully functional. I moved on to some other projects, but soon I will add drawer fronts. Those will help to hide the uneven spacing of the actual drawers and bring them up flush with the face frames. I’m planning to design and cut some drawer pulls on my new CNC machine as well.
This was a huge project and it was a pain breaking down 13 sheets of plywood, but man I’m loving it! I have a huge new work surface and so much storage. Building drawers takes a lot of extra time and money, but I find that they are a lot better than deep shelves because you can actually use the whole depth instead of forgetting what’s behind the first row of stuff.
Elijah came in at the end of this post and wanted to help so I’ll close out with his thoughts. “I just really like those cabinets. I love them. I just really love those cabinets. They’re so great. They’re just so great. That’s all.”