Studio711.com – Ben Martens

Woodworking

Mother’s Day Gifts

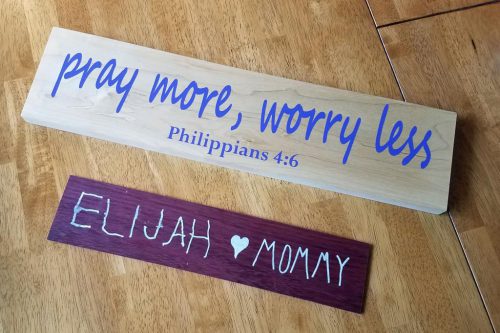
Tyla and I don’t usually exchange gifts for Mother’s Day and Father’s Day, but I’ve been wanting to try out the vinyl cutter in the maker space at work and this seemed like a good excuse. You can easily buy a very similar sign on Etsy, but I wanted to see how hard it was to make one myself.

I had quite a bit of extra 8/4 maple laying around so I cut it in half and got it down to the approximate size of the finished sign. Then I spent some time on the vinyl cutter and cut out a couple versions of the sign, figuring that I’d screw one up and need to try again.

I stuck the vinyl down on the wood and the peeled up the letters, being careful to leave the interior of letters like A and O. Then I applied two coats of purple spray paint and peeled up the vinyl. That part took quite a while because the paint had made the vinyl brittle, but eventually I was done and it came out pretty well.

The final step was using a keyhole router bit to cut a notch in the back for easy hanging.

Will I do this again? Ehh… maybe if it’s something really custom, but it did take quite a while. If the sign you want is on Etsy for $20, it’s probably worth just paying for it.

Elijah also made a sign for Tyla. Ever since he saw this piece of purpleheart, he has talked about making it into a sign for Tyla. I bought a white pen and he wrote his name on the board. I finished it up with “loves mommy” and added a couple coats of spray lacquer.

Happy Mother’s Day!

Grizzly Bandsaw Riser Block Kit

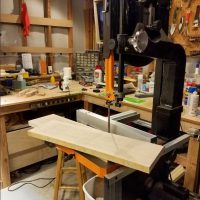
Keeping up with the theme from yesterday, I realized that I haven’t written about the riser block kit for my bandsaw. I got the Grizzly bandsaw 1.5 years ago and have really enjoyed it. It gets used most often for curvy cuts and resawing thick stock.

I never really felt like I had the hang of resawing thick boards. I always got a lot of blade drift and I’d just try to free hand it to compensate for the drift. It sort of work, but I wasted a lot of material with wavy cuts.

For Christmas, Dad and Mom got me a riser block kit for the saw. The stock configuration gives you about a 5 3/4″ capacity but the riser block kit doubles that. I don’t usually work with 11″ boards, but I do regularly have 6 and 7″ boards so this is very handy. Getting the kit also meant that I had to get rid of my old blades and buy longer ones. I had learned a little more about blades by this point so I bought some nicer Timber Wolf blades. I have one for resawing and one for cutting smaller curves. I don’t know whether I have it all tweaked better this time or if the blade made all the difference, but wow, resawing with this thing is incredible! I can just set the fence to the thickness I want and watch the saw plow through. It has no problems going through 8″ of hard maple and when I’m done, I have a pretty smooth and straight cut. It means I no longer fret too much if I have to resaw a 1″ board into two 3/8″ boards. I know I can nail the cut right on the money.

P.S. If you follow my woodworking account on Instagram, you’d have already seen this picture.  @martenswoodworks

Grizzly Table Saw Three Month Update

As you already surmised from the title of this post, I’ve had my new table saw (a Grizzly G1023RLW) for three months. It was a huge splurge and way more than I needed, so I was curious how I’d feel after a few months. Would I regret going big?

No way. I LOVE this saw! It’s dead accurate, or at least better than I can measure and it has gobs of power. I’ve plowed lots of different pieces of wood through it and I’ve never heard the motor change pitch. It just laughs and says, “Is that all you’ve got?” I thought I finally got it to bog down with a 2.25″ piece of walnut, but it turned out that my fence was a little bit out of alignment so I was getting a small pinch (yikes!) That was easily adjusted and the saw resumed it’s monotonous sawdust making.

I’d buy this saw again in a heartbeat. That’s a relief because I have a nasty habit of getting bored with a hobby about the time that I finally spend money on a really nice piece of equipment for it. With RC planes, I fizzled out around the time I bought a Spektrum Dx6 transmitter. With skiing, I slowed way down right after I bought brand new, high end skis. Was the same thing going to happen with the table saw? So far, the answer is no. I’ve been amazed at just how many nights I’ve used the saw and there’s no end in site for all the projects I want to build.

Maybe this is the hobby that sticks with me?

Picture Frame Jig

Picture frames are four pieces of wood stuck together. How hard can that be?

Very.

Getting those corners to match up perfectly, have all four corners be exactly 90 degrees and have those joints be strong is not easy to achieve without some help. My next project involves making a picture frame so I decided to take some time and make a couple jigs.

The first step is to make the main picture frame jig. Thankfully the interwebz are full of ideas, and I chose David Picciuto’s jig. He has a nice video describing how to make it, but my quick summary is: “It works!” I did a quick test with some scrap wood and the glue up went perfectly.

Next I’ll work on making his spline jig to reinforce the corners.

Piano Book Shelves

We’ve lived in this house for 6.5 years. For that entire time, our piano books have sat on the floor in the box that they were packed in (or scattered messily around the box.)

I decided this would be a good wood working project to tackle so I flipped through a bunch of plans and settled on the tower bookshelves from Wood Magazine, partially because I previously purchased the digital back catalog of the magazine so the plans were “free.” The plans recommend oak or maple but I thought I’d go for cherry.

The project began with a trip to Crosscut Hardwoods to buy the most expensive piece of plywood that I’ve ever purchased (though it can get much more expensive than this!) I got a 3/4″ piece of cherry plywood that was nice on both sides, a 1/4″ piece that was nice on only one side, and a 1″ thick board.

I was pretty nervous about cutting into the plywood, but I was also excited to use my new table saw with a big sheet of plywood. My old saw was too wimpy and too unsafe to do big pieces. I cut about 25″ off one end and then ran the rest through the saw. The saw ran like a champ, and combined with the assembly/outfeed table, it never felt unsafe.

After cutting some strips of hardwood and using it as edge banding on the plywood, the main joinery is done using biscuits. I’ve done a little bit of work with the biscuit joiner before but never this much. It really is simple and makes quick work of some of these bigger glue ups.

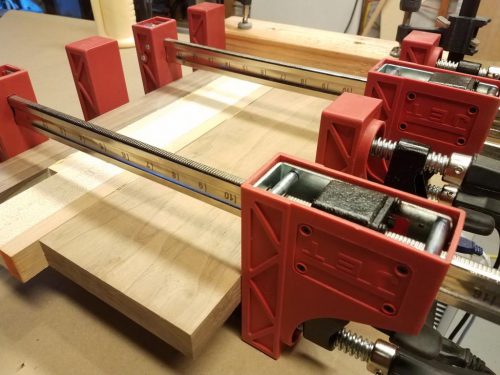
Next up was the base and the top trim pieces. Those were a little tricky as the plans recommended biscuit joints on the mitered angles to hold the joints together. That worked but I think I’d probably choose a different method next time because it took forever to get my cheapo biscuit joiner dialed in for that fancy cut. In the photo below you see a scrap piece filling in the empty back so that the band clamp can squeeze evenly all the way around.

The final construction step was to build the drawer, install the drawer slides, and then cut/attach the drawer front.

For a finish, I chose to keep it simple and went with a wipe on polyurethane. It does give a bit of a plasticy finish but that build-up is also extra protection for the books that will be sliding in and out fairly regularly. After the coats of finish were done, I put on the 1/4″ back and reinstalled the drawer.

Once we figured out where to place it in the room, I took the time to attach the top to a stud with a strap. It’s very easy to tip over and with a three year old running around, it wouldn’t take long for it to topple over.

This project was a nice way to dabble in some nicer furniture. This was about the biggest thing I can comfortably handle in my shop so I won’t be tackling a dining table anytime soon, but I’m happy I did this one.

It’s pretty easy to see the different colors of cherry woods, but I’m hopeful that as time goes on, the cherry will all darken up to the same color. But even as it is now, I’m very happy with it and admit to walking into that room just to check out the bookshelves. It’s a nice step up from the cardboard box mess on the floor.


Martens Woodworks On Instagram

I’ve been using Instagram a lot more than Facebook. I get more interaction with random people who are interested in the same things as me, and it generally feels like a happier place.

I want to use Instagram even more to connect with the woodworking community, but I also don’t want to bombard friends and family who don’t care about that stuff. So I’m segmenting my posts under two accounts. The @benwmartens account will still be normal day-to-day, family-life pictures. The new @martenswoodworks account will have lots of pictures all related to woodworking and will show day to day progress along with the finished project.

If you like it all, it’s easy enough to just follow both, but I won’t be offended if you don’t like seeing lots of progress pictures for my projects.

Some day I dream of supplementing my income with woodworking and maybe this is the first step down that path. For now, it’s still totally a hobby but maybe I can start building a brand.

Shop Vac Cart

I’ve really enjoyed having dust collection in my workshop, even if it’s just a simple shop vac with a cyclone. I kept it under my workbench, but the mess of wires and hoses basically meant that it stayed there. It was a pain to dig it out to vacuum out the car or anything like that.

I finally made a version of Jay Bates’s shop vac cart. The cyclone hangs above the shop vac so it uses less floor space and gives me a space to collect all the various attachments. It’s also very easy to move around.

The project was pretty simple but I’m always amazed at my ability to mess up the easiest things. The end result is good enough though and I think it will be helpful. One negative that I didn’t forsee is that the hose connection is now ~5 feet off the ground and most of my dust collection parts are near the ground. That just means I need a little bit longer hose but maybe that will be offset by being able to move the cart closer to the machine I’m using.

New Crosscut Sled

I’ve written before about making a crosscut sled for the table saw. I used the first one so much that it kind of wore out and I had ideas for improvements so I made another. They’re incredibly convenient especially for the smaller toy projects that I was doing. It’s a very safe and precise way to cut small pieces (among other things.)

My new table saw had miter slots that were a different width so I needed to build another sled. This time I incorporated some t-track and a flip stop that slides in that track. This allows me to get repeatable cuts with the stop but I can also flip it up after I set the position of the piece to avoid any binding between the blade and the stop.

The process was pretty much the same as previous builds, but because I had a much more precise saw, I decided to spend extra time squaring up the fence to get perfect 90 degree cuts.

I used my big square to get it initially set close to 90 and then did the 5 cut test to see how far off I was. Watch that link to see it in action, but basically you make a cut, rotate the piece, make a cut, rotate, etc. You do that 5 times and then you measure the width of the last slice at the top and the bottom. That helps you calculate how much out of square your sled is because it really magnifies the error. I was so far off that it was plainly visible to the naked eye. How could that be when my square said I was spot on? I futzed with it for quite a while and then got frustrated and walked away. During my break, I realized that the only explanation was that my square wasn’t square. Indeed it wasn’t! So I changed up my method of dialing it in and got it to a point where over a 40″ cut, I only deviate by 0.001″ from being perfectly square. That’s insanely perfect. In fact, it’s so good that I suspect I’m within the margin of error for my setup and my measuring tools. Plenty good enough for me.

40 Years

Yesterday was Dad and Mom’s 40th anniversary! Congratulations! They’ve been supportive as parents and been a great example of a loving marriage for us to follow.

It feels a little silly to give someone a hunk of wood as a gift after forty years of effort, but that’s what I did. I took one of the pictures from their honeymoon in Jamaica and transferred it onto a piece of pine. To do the transfer, I took a sheet of blank address labels that you run through your printer and I peeled off all the labels so I was left with the waxy surface. I printed with my inkjet printer right onto that waxy surface and then carefully pressed it onto the wood. Through trial and error I learned that you really need to give it a good rub to transfer the ink. Steve Ramsey has a good video about this process. If you’re smarter than me, you’ll remember to flip the image in your photo editing software before doing this.

I finished it off with a couple coats of spray lacquer to protect it a little and then made a support so it would stand up kind of like a photo frame.

Table Saw Assembly

My new Grizzly 1023RLW table saw is assembled and ready to use. It took significantly longer than expected largely because I’ve never done anything like that before and I had to do many of the steps three or four times to get them right. Luckily, I wasn’t in much of a hurry so I was able to take my time and get it right.

I took some extra time to raise the saw up 4 1/4″ to a more comfortable height for me. That’s 3/4″ higher than I had my old table saw set at. I’m a big guy and it’s nice to have things at a level that doesn’t hurt my back when I’m out there for a couple hours.

This thing cuts like a dream. It’s silky smooth on start up and powers through boards like they aren’t even there. I’m looking for excuses just to cut boards!