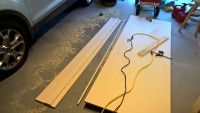
 I usually work alone in the garage so cutting big sheets of plywood or MDF can be a hassle. Running it across the table saw just isn’t an option until I’m dealing with smaller pieces. In the past, I’ve picked out a straight 2×4, clamped it to the plywood, and then used that as a guide for the circular saw. That works pretty well but it can take a long time to get the guide set up in just the right spot.
I finally got around to making a jig to help with this. It’s not complicated and I definitely didn’t invent the idea, but here’s how you make it:
1) Cut off a 3″ by 8 foot slice of your sheet of plywood. Make sure that you’re keeping a factory edge and you mark it. That’s your straight edge.
2) Measure the distance between your circular saw edge and the blade. Add 3″ for your cutoff and then another ~3″ for clamp room. Cut off another slice that wide. That will be the base of your jig.
3) Glue the 3″ strip on top of your base strip. Make sure the factory edge is pointing at the wider side of the base strip. It should be about 2″ from one edge. Add nails to hold it in place while the glue dries.
4) Now make a cut with your circular saw to trim off the extra wood.
You now have a zero-clearance jig to help you rip plywood. If you’re making a cut on the plywood, add a pencial mark on each end of the sheet where you want to cut. Then clamp your jig down so that it is right up against your pencil marks. Run your circular saw, holding it tightly up against the top fence and you’ll get nice straight cut in the right spot.
My typed-out description isn’t great, but there are lots of videos showing how it all works. I recommend Jay Bates’s blog post and video. He gets to it about halfway through the post/video.
The 8 foot length is a bit long when you’re doing 4′ cuts but we’ll see how it goes. Maybe I’ll end up making a second shorter one.
