The next phase of the garage shelf project was building a workbench. Here’s a shot of the old bench.

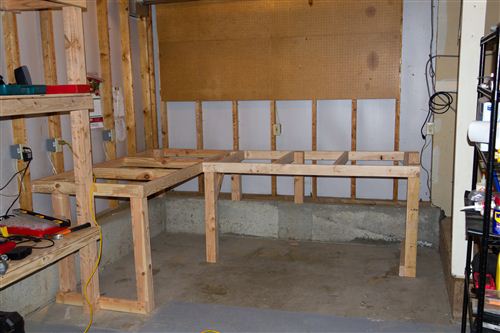
It’s not quite the dream work area that I had in mind. The day after I built the storage shelves, I set to work building a new workbench. The shelves had been thoroughly planned out, but the workbench was designed as it was built. I decided to have the bench be roughly 38” tall. As with the shelves, I had to factor in the slope of the floor out to the driveway. Here is a shot of the frame. Some of the posts rest on the foundation. It bolts to the wall for rigidity, but I don’t rely on any of the wall joists for actual support.
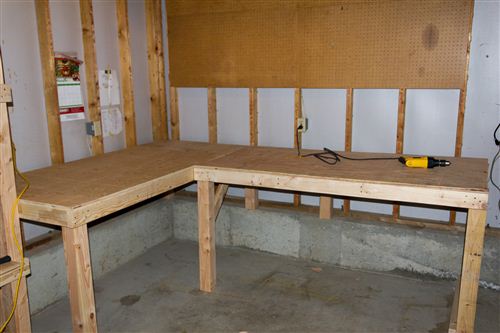
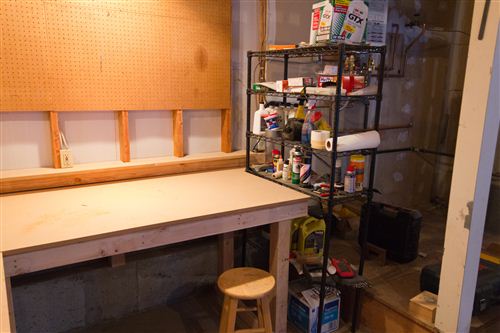
Next it was time to apply the work surface. I went with one layer of 3/4” plywood and a top layer of 3/4” MDF drilled in from the bottom. Some day I’ll probably replace the MDF with a more durable surface, but for now it makes a very smooth work area.
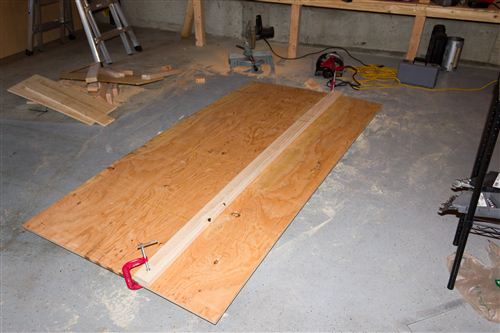
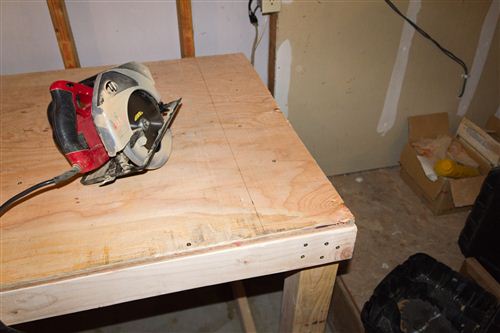
I don’t have a table saw, but the method pictured below worked very well for making large cuts.
Once I got the plywood on, I realized that I didn’t have a good place for some black metal shelves that I had in the garage. I bit the bullet and cut a few inches off the end of my brand new workbench and remounted the legs. I wish I had thought of it originally but it turned out ok.
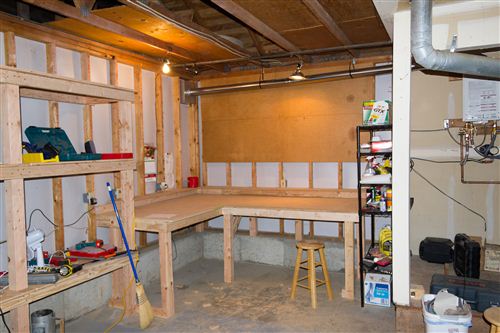
That’s as far as I got on that day. The next day, I spent a few hours adding a rail and shelf along the edge of the bench. The base of the shelf is a 2×4 and then the shelf is 3/4” MDF with cutouts for each wall joist.
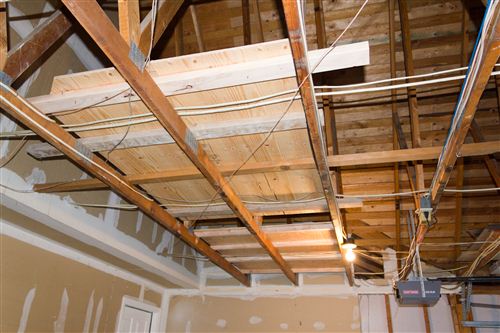
On the second day of the workbench project, Logan also came over to help me put some plywood up in the rafters. It was pretty tricky and a bit time-consuming because all of the wires are run on top of the rafters. Not only was it hard to get the boards up through gaps in the wires and rafters, but I also had to lay down 2x4s on the rafters to give the wires room to go underneath the plywood. We added about 80 square feet of storage space up there.