
 We’re a couple weeks away from having our master bathroom remodel finished. I’ll do a full write up on that with lots of pictures when it’s finished, but I wanted to share one small slice of the project with you now.
Going into this project, one of the biggest question marks in my head was how in the world we were going to decide on what tile to used. We needed to pick out a new counter top, tile for the floor, and tile for our soaker tub and the shower stall. I looked around at the websites of a few tile places and was scared away by what I thought would be extremely high prices. Looking to save a buck, I headed to a discount tile store in Bellevue. They’re small but they have a nice showroom and the employees were fantastic in helping me design our bathroom. I took in a door from the cabinet and walked out with samples to show Tyla. The floor was white with some gray and brown in it and the shower/tub tile was 8×20” sage. The counter was a gray color. She loved the look so as soon as we signed the contract with our general contractor, we placed the order for the tile. Everything was scheduled to arrive two weeks before the contractor started any work on the bathroom. Perfect!
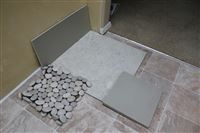
The tile arrived so I picked it up and set it in the garage. We had the 8×20 wall tile, 20×20 floor tile, and rocks for the bottom of the shower. The next day I realized that the wall tile and the rocks were wrong.
No problem. I called, they ordered the new stuff and said it would arrive in a couple days. A couple days turned into a couple weeks but they were sure that it would show up on the exact day that the tile install was scheduled to begin. The correct rocks did show up pretty quickly but I had to wait for the tile.
While I waited, I got more and more nervous about what would happen if the tile didn’t show up. Additionally, I wasn’t sure I even wanted it to show up. Was that sage green going to look ok? Would it still look good in 10-15 years?
The magic day came with silence so I gave them a call. They had to check on it and get back to me. “Your tile isn’t here. It’s not coming. It’s never coming. It’s discontinued.” Apparently the warehouse they work with had been sending mixed messages and here I am at the end of the chain with a contractor waiting to install tile that I don’t have. Yikes.
Thankfully my contractor was super helpful. He suggested a couple places in this huge complex of tile warehouses in south Seattle that kept a lot of tile in stock. They looked pretty fancy but what could I do? We were in a hurry. Tyla and I headed down there with our contractor and asked to only see tile that was in stock. We pretty quickly settled on a 12×12 tile that was gray with some brown in it. And the price? The price about 40% of what the original tile cost! We picked up the tile that same day and we were back in action. On top of that, I felt a LOT more comfortable with our less ambitious design. I figure that gray, brown and white are going to be at least sort of in style for a long time.
I eventually got my money back from the original tile store, the new tile got installed, and it all has a happy ending (minus a few weeks of little sleep, but that’s just prep for a baby, right?) If we ever need tile again, I’ve learned my lesson and will head back to one of the big tile warehouses like Daltile where we ended up getting our tile. The prices were excellent and a lot of it was in stock. What does the new tile look like? You’ll have to wait a couple more weeks until the bathroom is finished!
 Logan and I took the “Break More Birds” class at the Kenmore range last weekend. It’s a two hour class that includes two rounds of trap and only costs $35. it’s an incredible deal and I want to take it again in a couple months. Unfortunately it was raining pretty hard for the whole class, but that didn’t stop us from learning a lot.
 While Tyla has been studiously reading through her baby name book over and over again taking notes, I’ve kept a simple text file on my computer and added names to it whenever I heard something I liked. Agreeing on something like this seemed like it would be pretty difficult so I refused to talk about it with her until we knew the sex and could cut the discussion in half.
  Humans are terrible at evaluating risk. Did you know that you’re seven times more likely to date a super model than to die in a plane crash? Or did you know that 115 people die every day in car accidents which means you have a 0.015% chance of dying each year in a car accident? The odds of simply being in a car accident in a year are 2.2%! Or did you know that on average, you have a 0.84% chance of dying each year? Yet how many people are afraid of their cars or heart disease and how many people are afraid of planes or some random health story they read on the internet? We get distracted by the grandiose stories of dramatic events and focus on those relatively minor possibilities.
 The Hobbit is out and is one of the first movies to offer a higher framerate than standard movies. There was a bunch of other relatively new tech in the theater. Here’s my review of each piece:
 If you use a Surface RT, you may have noticed that Flash only works on some sites. There is a whitelist built in and Flash will only work if the website is on that list. But what about sites like studio711.com? If you want to watch the Flash that is used here, you’ll need to do a little extra work. Of course you’ll be doing something that isn’t recommended by Microsoft so proceed at your own risk. Still willing to try it? Follow the steps at
  I’ve made beer twice in my life so I’m an expert and would like to share my learnings with you. It turns out there is a lot more to beer bottle preparation than I knew. When the guys told me to start saving beer bottles, I did what I think most people would do. I kept the old box, rinsed out the bottles when I was done with them and dropped the bottles in right side up. Well what do you think happens when you put a slightly wet bottle in a dark place and leave it for a while? MOLD. It was pretty gross, but luckily they were salvagable. Here’s the process for reusing a beer bottle.
Your Credit Card Was Stolen
The flip side of this is since it’s becoming more common, it’s a good place for scammers to hop in and confuse us. I just received a call saying my card had been compromised so it was now locked and I needed to input some information into the phone system. My suspicions were already high because the call was from 000-000-0000 and it referenced a card from a company that I didn’t think I did business with.
The bottom line is that you should assume ALL calls pertaining to anything like your credit card, bank information, retirement accounts, etc are fake. When I get a call like this that I think might be legit, I ask for the caller’s name and extension and tell them I’ll call them back. I then go look up a number that I trust from their main website or from the back of the card and try to get back to that extension. I did that last time my card was stolen and the guy said, “Wow, that was smart. I’ve never had anybody do that before.” It should be very common!
You’re not required to give out your information to anyone. Think about how you can verify the person you’re talking to. Social engineering scams like this are increasingly popular and you need to always have your guard up. If you’re interested in the topic and/or want to learn more ways to protect yourself, check out Kevin Mitnick’s book called The Art of Deception.