 At the beginning of this month, I mentioned that Zane Lamprey is trying to fund his new TV show through Kickstarter. He did get an impressive amount of money, but with only a few days left, he only had about $350K of his $500K target. The way Kickstarter works is that if you don’t hit your goal, nobody pays a penny. Amazingly enough, he blew through his target with about a day to spare! He’s said that for $500K he can do five shows and for every $100K over his goal, he’ll add another show. He posted a pretty thorough breakdown of where the money goes. Here’s part of his post from http://chug.tv
Someone posted on my Facebook yesterday questioning how it could possibly costs $100,000 per episode to “follow you around with a camera”. I explained to him that $500,000 six ways is actually $83,000. But, there is also a 5% cut that Kickstarter takes and another 5% that Amazon takes to handle the thousands of transactions. And, we have to fulfill all of our obligations to you, the Kickstarter backers. We’ll still have to buy, print, and ship thousands of t-shirts, hoodies, medallions, posters, DVDs, Blu Rays, as well as the travel, food, and venue rentals for the dinners and parties that we’ll be doing in LA, NYC, and Chicago.
And while that may still be a lot of money to have a camera follow a guy around to bars, it’s a very small budget to make an actual network quality TV show. With Chug, as we did with Three Sheets, we’ll have over a month of planning and pre-production where the producers will need to lock down locations, hire fixers (international translators and location scouts), get shooting permits, carnets (certificates that allow us to ship our gear in and out of the country), coordinate travel, and get insurance (which alone is about $25,000). Then, while shooting, there are: two camera guys, (with expensively rented cameras, gear, and lights), a sound guy, (with expensive rented gear), two producers, and the executive producer. This is aside from hidden daily costs like the flights, rental cars, train tickets, hotels, per diem, and food. Then, as we’ll end up with dozen of hours of raw footage, we’ll need to hire editors, assistant editors, a post production supervisor, motion graphics animator, writer, and producers to put the show together. And, during the several months that the production will be on-going, all of those people will obviously need to be paid… except me.
The money raised by Kickstarter, in fact, won’t be enough to fund Chug. No money that comes in from the Kickstarter campaign will go into my pocket. I’ll actually be putting in my own money to get the show made to the quality that you should expect from a TV show. The fact is that I am gambling on the idea that I can sell Chug to a network after the show is made and after the Kickstarter backers have all been given their rewards. Even though they’ve all said “no” already, I have faith that some network will see what an amazing show we’ve made, be surprised by the dedicated fan base, and hire us to make more episodes. That’s my contribution and dedication to the show.
It’s interesting to note that he’s not making a penny off this and is using it as a way to produce some episodes and attempt to sell them to a network. It’s a lot less risky for a network to buy episodes that are already done than to fund production and hope to make their money back. Then if the episodes do well on TV, they might buy more!
Congrats to Zane and his team for surpassing their goal and thanks to them for making more episodes! I’m excited to see them!

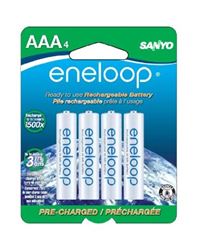 With our son coming any day now, I feel like we’re about to really ramp up our battery usage. For the past couple years, I’ve been investing in Eneloop rechargeable batteries. They hold a charge very well in storage and can be found at a decent price. I charge them with a La Crosse BC-700. It’s a wonderful little device that gives you detailed readouts about the state of your battery and provides a variety of charging speeds and options to get the most life out of your batteries.
 “You’re still here?” That’s the question I get from people at work who know that Tyla is about ready to pop. There’s no baby yet, but we’re really getting close. The due date is June 6 but we’re about smack dab in the middle of the “normal” window for birth. The national average for first time moms is that they go five days past their due date which would put us at about a week from now. They won’t let her go more than two weeks past the due date so one way or another he should be coming out before the 20th!
 When you hang out in the same groups and same areas for a long time, it’s easy to think that you’re getting to be a pretty good skier, hiker, etc. Skiing at Crystal always reminds me of this. You can ride up the Forest Queen list and hear people talking about how incredible they are (on blue and green beginner runs), but if you head out to the Northway lift, you’ll see people throwing backflips off cliffs and not bragging at all. Living in the Pacific Northwest, there’s always someone nearby who is infinitely better than you. We have some incredible outdoor athletes around here!
 As I’ve started to get more involved in shooting sports over the last couple years, I’ve been thinking about why people view it any differently than golf. Whether you go to a gun range or a country club, you’ll be surrounded by retirees joking around and having fun. It’s a very similar environment. Somebody could use either a golf club or a gun to kill you, but most people don’t have an irrational fear of golf clubs. Why?
 While I’ve sent quite a few rounds through both a rifle and a shotgun, I haven’t spent much time with handguns. I decided to add one to my collection but which one to buy? I ended up with a
  In one of our recent classes, the teacher talked for a while about Sudden Infant Death Syndrome (SIDS.) I had heard it in passing before, but I didn’t know much about it. The
 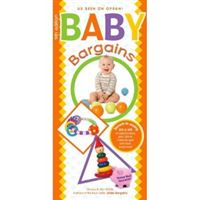 There is a deluge of product information available for a pregnant couple, and as a first time pregnant couple, we didn’t even know what types of things we should be buying, much less which specific brands and models we should look at. Rather than researching everything individually, we decided to pick one overall book and stick with it, for better or worse.
Arrested Development On Netflix
Netflix was really slow that day. A quick check of Twitter indicated that lots of other people were having similar difficulties and I wonder if it was because Arrested Development came out? It’s still pretty big news to have an internet streaming company fund a “real” TV show so it doesn’t seem unlikely that the hype was more than they could handle.
As for the show itself, it’s fun to see all the characters again, but I’d probably rank the fourth season somewhere around the quality of the first season. It’s good, but not as good as seasons two and three. It is really nice to have all the episodes available at once instead of having them doled out one by one each week. I’ll be very surprised if this isn’t very close to the future model for shows. Getting one episode a week with a bunch of commercials in the middle really seems ancient and backward.
Thank you Netflix for funding this project and thanks to Ron Howard and crew for cranking out more episodes.