Studio711.com – Ben Martens

Gadgets

Laser Cutter

Tyla has been looking at customized family signs on Etsy. She had a hard time finding one that was the right size and design and I had a hard time paying that much for a piece of painted plywood. We joined forces and designed our own custom sign. Instead of painting it, I wanted to cut each letter out so it would look a little more interesting.

I designed it on the computer, printed off the large tiled pages and then spray glued the first letter onto a thin piece of wood. I don’t have a scroll saw so I put the 1/4″ blade on my bandsaw and got to work. Between the sawing and sanding I realized it was going to take a LONG time to get through the entire sign. Time for plan B.

At work they have a “Maker Garage” for employees to use for free. It’s full of a bunch of tools that you need to get projects done like a drill press, soldering irons, etc. There’s a big community around it that shares ideas and teaches new skills. They also have an “advanced” part of the room that contains more expensive tools. You have to go through training to use them but there are some incredible machines in there including a milling machine, CNC, a couple different 3D printers, an computer controlled embroidery machine and two laser cutters. I’m excited by all of those things but the laser cutter had one of the easier onboarding processes and it was exactly what I needed for this project.

It took a few hours of online and in-person classes but I’m now certified to use their laser whenever I want! I just have to provide my own materials or scrounge through the scrap bin. It can either cut all the way through material or etch it. Obviously it will only etch some materials like stone, but you can either cut and/or etch lots of materials like acrylic, wood, leather or even food. Basically you can do anything you want as long as it’s not reflective to the laser, it’s not going to immediately catch fire, and it doesn’t release poisonous gas when it’s cut.

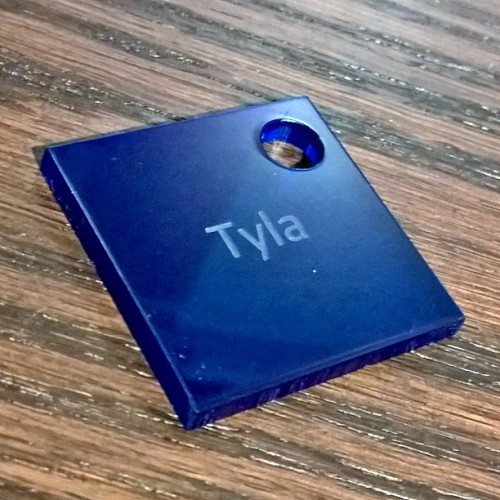
To pass the training class, we had to modify their sample and successfully make a safe cut with some simulated problems along the way. So what you see below isn’t anything fancy, but it’s my first output from the laser cutter! Thank you Tyla for spending extra time with Elijah alone at home while I finished this training.

firstlasercutter

Automated Light Switches

IFTTTwemoThere are a LOT of ways to automate your home. In addition to all the products that have hit the market recently, there are some well-established systems that have been around for a decade or more. If you’re an expert, this post will make you cringe, but with all those caveats, here is one way to automate lights in your house.

I’ve installed some Wemo switches around the house. The next thing I wanted was to have the lights turn on and off on a schedule but be sufficiently randomized that you couldn’t sit outside with a watch and predict when the lights were going to turn on. Since we all watched Home Alone, we all know that’s how burglars operate.

WeMo publishes and SDK for Android and iPhone but none for just a standard Windows application. I really wanted to be able to control this with code that runs on my server. So instead of hacking the network traffic and trying to send the signals that the switches expected, I did it simpler (and probably uglier.)

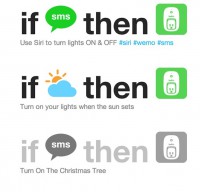
WeMo switches can interact with IFTTT. The “If This Then That” site does just what it says: if something happens then do something else. They call each one of those pairs a “recipe.” I connected my light switches to my IFTTT account and then set up some recipes so that if I send an email to IFTTT with specific hashtags I can turn the various light switches on and off. Then I wrote an app that sends those emails at random times within a fixed schedule. It has been running for a while and it works great!

It’s nice to walk into the house when it’s dark and already have lights on at the appropriate times, and since we have LED bulbs all over the place, it costs almost nothing to have these extra lights on.

DIY Home Security

homesecuritySome of you know that I installed a security system at our house instead of contracting it out to ADT or one of the other popular companies. I never blogged about the project, but it was a major project for me. The physical installation wasn’t very hard, but it took a ton of time to research what I needed to buy. I’m not going to go into specifics on this public site, but here is some of the basic info in case you’re interested in this for your own home.

The main reason you would probably want to consider this is that you can save a lot of money on your monthly bill. I think ADT is currently charging $37/month for their basic package. By doing it yourself, you can get the same monitoring coverage for $10/month. You don’t have to be a math whiz to know that saving $27/month adds up quickly.

Our house was previously serviced by ADT but there was no active service when we moved in. The panels that ADT uses are locked down. While they are standard models, they are tweaked so that you can only use them with ADT. The sensors that are already on your doors and windows are probably reusable. In our case, all of the sensors were hardwired and those are extremely simple to reuse. The “only” thing I had to do was replace the main control panel and the keypad.

In retrospect, I could have saved myself some time if I had just bought the exact same panel that was there before. It would have been obvious how to wire it up! But I went with a new panel mostly because I didn’t think of that option, and also because I wanted to be able to support wireless sensors. I’m glad the wired sensors were there, but I wanted to quickly and easily expand the coverage of the system.

Once I had the panel in hand, I carefully labelled all the wires on the old panel, disconnected the wires, and then reconnected everything. Programming is all done via the keypad and you’re interacting with 90s technology. Everything is done via long strings of numbers and you better have a firm grasp on the manual so you don’t get loss. It’s ridiculous, but it works.

I was able to confirm that the alarm worked locally so then it was just a matter of hooking it up to the phone line. You cannot use a VOIP telephone line (like the one you get from Comcast.) It must be an actual old-fashioned telephone line (POTS) or you can use a cellular monitoring system for a little extra money per month.

So is this a good DIY project? Ehhh… if you’re a geek and you’re willing to spend a lot of time reading manuals, you can figure it out. You’d also have the advantage of being able to call me up and learn from my mistakes. I’m thankful we have it but I spent a TON of time getting it going. I think a lot of that delay was because I was so nervous about dropping a few hundred bucks and then screwing it all up.

Our system has been rock solid and we use it regularly. We’ve only had one false alarm and that was attributed to a helium balloon slowly floating in front of a sensor. I love our custom solution because when I decide to add some more sensors, I can do it for $20-40/sensor. There’s no service call from a tech, crazy prices for installation, or additional monthly fees. And if I want to control it from my phone or hook it into a home automation system, it’s just some more research and purchases on my end. We’ve already added fire and carbon monoxide monitoring for a grand total of $0/month.

Is the system safe? Sure. I’m already using the layout that the “professionals” recommended for the house and then I’ve added more sensors on top of that. I can tell you that the fire sensors we got are exactly the same as the system that we put in at church for tens of thousands of dollars. A smart burgler could get through our system, but they could get through your ADT system at least as easily. I could spend more money to tighten up some of those holes, but at some point you just have to let it go. Having the sign out front is probably more important than the layout of our system.

I enjoy this kind of thing so it’s worth my time to save the money. Obviously the math is different for most people because companies like ADT are very successful!

Church Surveillance System

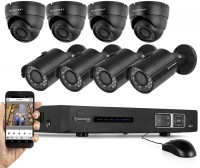
amcrest1080p8chI’m the volunteer IT guy at church so they came to me when they wanted to install a camera surveillance system. I have a DIY system at home that works pretty well, but for church, I wanted something that “just works” and doesn’t require a geek to operate it.

I ordered the following:

A couple Saturdays ago, I met DaveK and LoganB at church to do the install. It’s not very complex. You just decide where you want the cameras, where you want the DVR, and then you run wires to connect them. I’d say about 90% of the project was just running cables around. Yes, there are wireless systems but wired is a lot more reliable at this point. Plus you don’t have to worry about powering a wireless cameras. The cables carry both video and power.

I was really impressed by the quality of the cameras. Those eight cameras give us good overage over most of the church and the entrances. Even with it cranked up to record all 8 cameras 24/7, we still get over two weeks of storage on the DVR.

We were done in about four hours, and by the end I was itching to upgrade to some better cameras at home because these cameras at church look so nice!

WeMo Light Switch Review

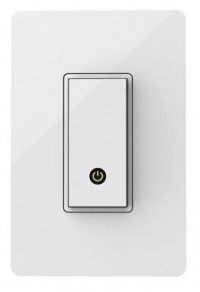
wemolightswitchI have a pretty long checklist of things I do when we leave our house and one of them is setting up a few light timers. But if you watched Home Alone, you know that simple light timers are pretty obvious to burglars.

I have tried a couple more complex options, and the latest one is the WeMo light switch from Belkin. They have a variety of products like this but they all have WiFi built in which means you can control them from a variety of devices.

I installed one in our house and everything was really simple to get going. The hardest part was that they only support Android and iPhone. Ken had loaned me an older Android device but it wasn’t able to run the software so he came through again and loaned me Galaxy S3. That worked fine and setup was a breeze. You basically put the phone on the same temporary WiFi network as the light switch and then the phone passes along the regular house WiFi credentials so the light switch can get on the network with all your other devices.

From there you can schedule the light switch from your phone or from the IFTTT website. Side note, if you haven’t played with IFTTT, it’s fun to check out. IFTTT stands for “If This Then That” and they are positioning themselves as a way to get more value out of your Internet of Things devices. For example, I set up a “recipe” that says “If I hold down my WeMo light switch for 5 seconds, call my phone.” (It’s a convenient way to find a lost phone.) Or maybe you want it to turn on the house lights when you get close to home, turn down the heat when you leave, or flash the lights when you get to your Fitbit step goal.

WeMo is a nice way to get into home automation without making a big mess of your house or having to explain it to your house guests. This light switch is still a regular light switch. You don’t have to know anything about it to work it, but it has a bunch of extra capabilities that I can use if I want to geek out a bit.

The one complaint is that this only works with lights that have a single switch attached to them. They don’t (yet) have a solution for 3-way circuits. Hopefully that comes because it would be really nice this on some of our 3-way circuits.

You can pick this up from Amazon for $37.

OpenSprinkler With Power BI

I’ve been happily using OpenSprinkler to control my irrigation system this year. One of its many features is logging how long each zone is on, but I haven’t done much with those logs yet. Last weekend, I decided to dig in to the data.

The first thing I did was write a little app that runs every morning, checks the latest logs, and uploads the new data to a SQL database in Azure.

Then I stood out by the water meter and figured out how much water each zone used. That included the startup usage (since water drains out of some heads when the zone is off) and the usage per minute. That let me calculate how much water I’ve been using over the past few months.

I fired up Power Query for Excel and brought in all the data so I could get some nice Power View charts and graphs going. (Note that I could also have used the new Power BI Designer instead of Excel, Power Query and Power View.) I saved that workbook to OneDrive and imported it into PowerBI.com. I set up PowerBI.com to automatically refresh the workbook every morning and show me the charts on a dashboard.

It might sound complicated but it only took me about an hour of work and that included standing out by my water meter for 15 minutes. Now I can fire up the PowerBI.com website every day and analyze my water usage. Since this isn’t based on an actual water flow meter, it won’t help me find leaks, but it does help me get an idea of how much money I’m spending to keep my yard green. I’m also working on some new features that will keep track of the high and low temperatures each day along with the precipitation.

You can get a long way in Power BI before you need to pay for anything so go give it a shot if this sparks some ideas in your head.

pbiopensprinkler

Wireless Charging

DT-903_orange-white-greenFor the past 2.5 years, Tyla and I have had cell phones that support wireless charging. Last summer, I bought some cheapo wireless chargers and they just didn’t work reliably. I kind of gave up on the idea until they scattered some official Nokia charging pads around my building at work. I used them for a while and it worked every time. So I tossed the old ones that we didn’t use anymore and bought the nicer ones from Nokia (DT-903) which happened to be in our company store.

They work perfectly! Drop the phone on and boom, you’re charging. Plus, the charger connects to your phone with Bluetooth LE and will flash the light if you have a low battery, text message, email, etc. The flashing is configurable and you can set nighttime hours when the light is off completely. That’s a must-have feature since we have these in the bedroom.

Nokia also makes the DT-900 which is less expensive and I don’t think it has as many features, but we might pick one of those up for down in the main living area.

It’s definitely a luxury purchase, but Qi charging is a standard across lots of Windows Phone and Android devices. (Sorry, no iOS unless you put a special case on your phone.)

Boat Auto Pilot

Trying to launch a boat by yourself is a tricky project. I don’t own a boat, but this product almost makes me want to buy one. Drop your boat in the water and the computer gizmo box drops the trolling motor to keep your boat in a holding pattern until you’re ready to have it come over to the dock. Brilliant!

Instagram Photo Booth

When we visited Project Pie in San Diego and they had an iPad stuck to their wall. You can see it on the left side of the picture below. The iPad was running Instagram and they encouraged people to take their own picture and post it. This would be an awesome idea for a wedding or any other big gathering. If you’re doing it somewhere without Internet connectivity, you could just run a camera app that saves to the local storage. I wish we had thought of this for our wedding!

projectpieinstagram

Car Bluetooth

soundbotNow that I’ve caught up with the times and realized that Bluetooth actually works, I decided to finally add Bluetooth to my car. It’s easy to get jealous riding in our new Escape that Tyla drives most of the time. While I did add a nav system to my Subaru, it was a unit from 2006 so there wasn’t much to it.

For $18, the SoundBot seemed like an easy device to test out, and so far, I’ve been very impressed with it. It gets power from the cigarette jack and then connects to the auxiliary input on my head unit. Now I just get in my car, it pairs automatically. The SoundBot is sticky mounted to my dash and I can use the play/pause, forward, and backward buttons to control basic playback. I’ve spent so many years taking my phone out of my pocket and plugging in an audio cable. This feels luxurious!

If you have an older car, I think you’ll be happy with this device, and hey, if not, you’re only out $20. It’s not a major life commitment.