Studio711.com – Ben Martens

Home Improvement

Dimmer Switch

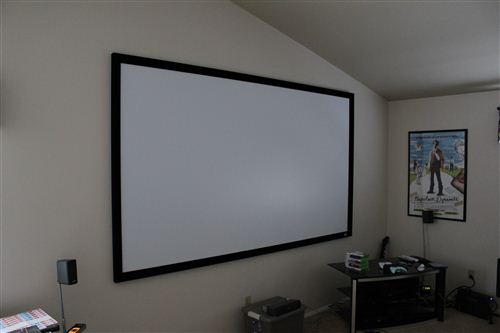
We like to eat dinner while we watch movies in the theater room. For some movies the light bouncing off the screen is enough to illuminate our food, but for darker movies, it can be a challenge to scoop up those tricky peas.

Since it’s pretty difficult to do anything with the vaulted ceiling, I added 12 feet of rope lighting behind the couch. It’s mounted to the wall but in such a way that you just see a glow emanating instead of direct light.

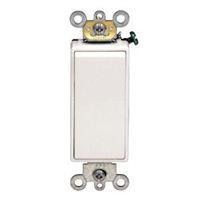
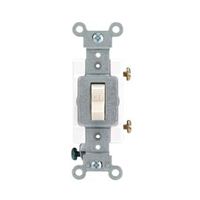
To top it off, I added a dimmer switch. We started with a Leviton dimmer switch extension cord. That worked ok but I thought I could do better so I picked up a Lutron MIR-600THW dimmer switch. It took a little more work because the outlet I wanted to use wasn’t on an outlet yet.

I cut into the wall yet again (this was the 9th time I’ve used the drywall saw in this room) and made a hole for the switch in the same stud bay as the outlet at the standard switch height. After flipping the circuit breaker off, I removed the outlet, removed the connection between the top and bottom outlet so only half would be switched, fed some Romex up to the new hole and then wired in the switch. Perfecto!

Now we have a dimmer switch that we can use to give us just the right amount of ambient lighting. But it doesn’t end there. This switch has an infrared remote control! It was a piece of cake to set up our fancy Harmony One to control the light switch.

The dimmer switch worked out so well that I’m thinking about adding one in the bedroom too. No more getting out of bed when we finish reading and have to decide who gets out of bed to turn off the lights.

Projector Screen

The next step in the home theater project was getting some sort of projector screen in place. I’ve been using a blank wall since we moved in, but this really isn’t a wonderful solution. There are a couple nail holes that screw up the picture, there is texture on the walls, and the paint isn’t pure white.

There are a number of articles online that describe various ways to create you own screen. After doing a lot of research, I decided to opt for a cheap pre-made screen instead. I purchased a 120” Elite Screens Sable Fixed Frame screen. One of the reasons this screen is less than one third of the cost of most screens is that it packs down into a reasonable size box for shipping. That translates to “some assembly required.”

It took me about 1.5 hours to get the screen put together, but I could probably cut that in half now that I know what I’m doing. You basically assemble the frame with a few screws and then methodically stretch the material with clips to provide a smooth flat surface. Tim and Chelsea came over to help mount it on to the wall and it took all four of us to get it on there.

I’m fairly pleased with the end result The black velvet border really sucks up any light from the projector that flows over the edge of the screen. That is important because it allows you to easily fill the whole screen with the picture. The screen does have some imperfections and a noticeable hot spot when the picture is a solid color. I’m playing around with a few ideas to minimize the appearance of the flaws, but for the price, this is still good deal.

Next up: mounting speakers on the wall and running speaker wire inside the walls.

Tying Trees

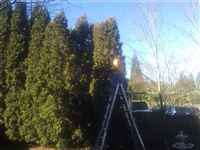
We have a row of arbor vitae trees in the backyard. They provide a nice visual block between us and the neighbors, but during the recent snow storm, they took quite a beating. The tops of the trees were bent down so far that I could hit them with a broom!

Thankfully they rebounded, but I thought I’d take a little action to hopefully help the situation next time. I purchased 100ft of 1 inch tree chainlock. That is now wrapped around all the trunks so that instead of individual trees, I now have one mass of trees that support each other.

While I was up there, I noticed that the previous owner had used some small rope to attempt the same thing on a couple of the trees. While those trees didn’t have quite as much trouble with the snow, the rope was really destroying the bark. In some places the tree had tried to grow around the rope and in others, the rope was rubbing the bark off. This plastic chain should do a better job and keep the trees healthy.

We’ll have to wait until the next snowstorm to see how well it works!

Projector Cables

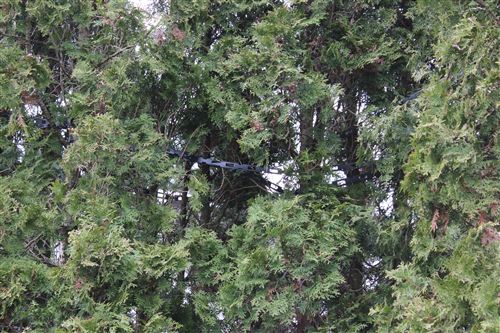
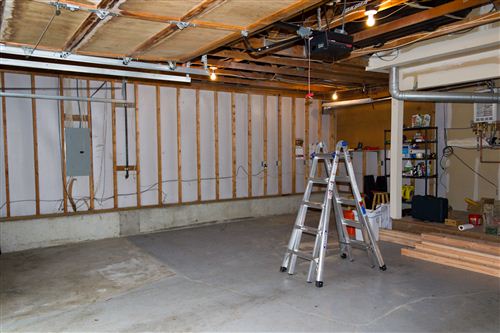
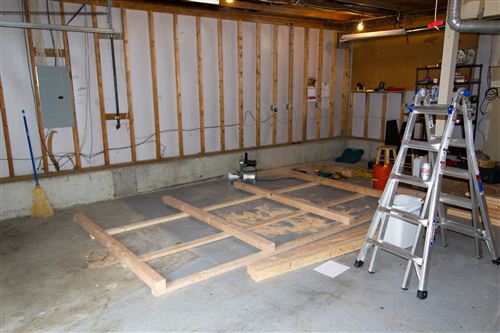
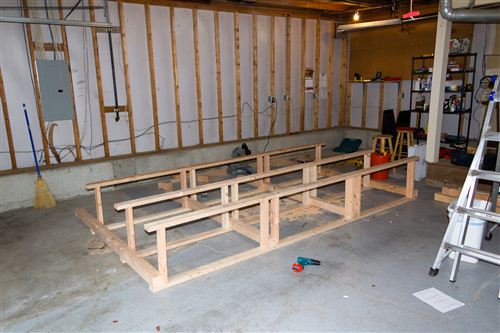
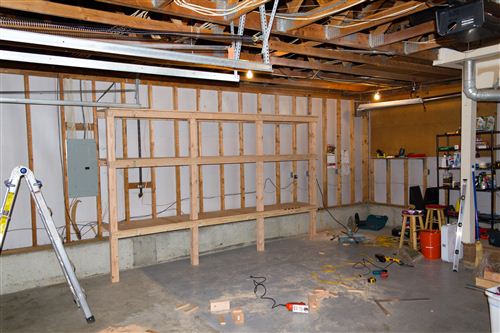
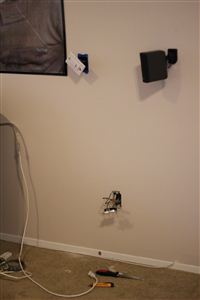
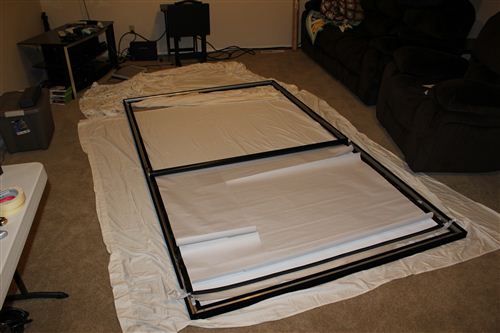
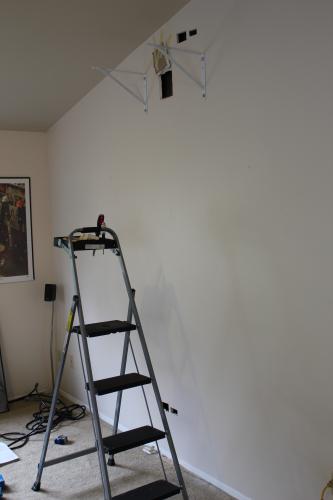
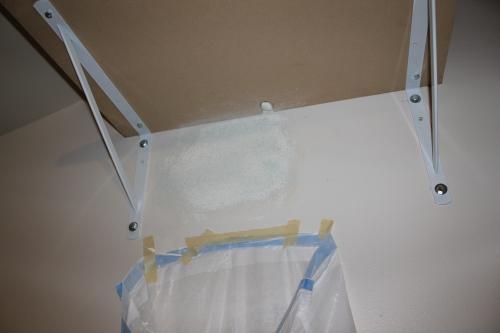
Very shortly after buying the projector, I built a simple shelf mount for it. It was easier and cheaper than hanging it from the ceiling and the Epson 8350 has awesome lens shift so I was still able to get the picture in the right spot. However, the cables were left dangling down the wall. I finally got around to fixing that this past weekend.

The key to the project was finding a good way to get power up to the projector. I didn’t just want to add an outlet up there, because I want the projector to run off the battery backup system in the AV rack. Enter the PowerBridge. It’s effectively two outlets connected by a piece of Romex. The special thing is that one outlet is male and the other is female. That means you can connect your extension cord to the outlet at the bottom and run it to whatever power source you want. There is also an opening for HDMI cables to come out. This is a great way to wall mount your TV without paying for an electrician! The kit had everything I needed except that I needed to buy more Romex because the included 6’ length wouldn’t reach up to the projector.

The other trick to this projector is mounted near the ceiling and this room has vaulted ceilings. That means that there is a ceiling joist between the projector and the floor. I had to cut an extra hole in the drywall just above the hole and drill through to feed the cables down to the floor.

The extra cut is the part that took the longest. I did a pumpkin cut on three sides, folded it back and then made my holes. After running the wires, I folded the drywall back in place and applied spackle and sanded until it matched nicely again. I sprayed on some orange peel wall texture and it’s almost as good as new. Obviously it needs a coat of paint to completely match, but I’ll do that later once the rest of the project is done.

Next up: mounting a projector screen.

In picture #3, the drywall wouldn’t quite stay flush so I applied a little glue and taped it in place until the glue dried. And in picture #4, yes, that’s a trash bag taped to the wall. I had it there to catch most of my sanding dust and any of the spackle that I might drop.

Cistern at Gates Foundation

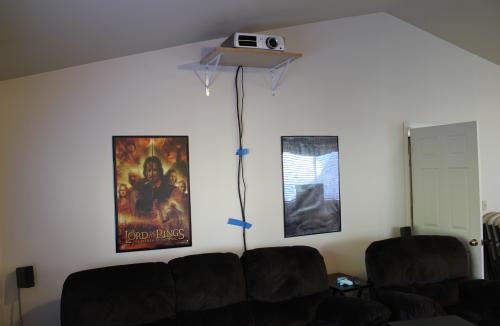
I’ve been pestering TimS with a lot of questions now that I actually have a yard. His landscaping expertise has already come in very handy. We were discussing various ways to improve water runoff from my roof. It tends to drain back down into the crawlspace making extra work for the sump pump and the previous owners already had a little bit of an issue down there. I think I’ll probably end up installing one of these dry wells, but we started talking about cisterns. He mentioned that The Bill and Melinda Gates Foundation headquarters here in Seattle has a 1 million gallon cistern that is used for flushing toilets and irrigation! The runoff from the paved areas and the roof of the building is collected there and reused.

I know it’s completely impractical for a lot as small as mine, but I can’t stop thinking about it. Sure I’d have to dig up most of my yard to fit a decent sized cistern in it. Sure I’d have to do a lot of work to get all of my downspouts to funnel into it. Sure it would cost orders of magnitude more money than I would save. But none of that means I don’t dream about it!

Toilet Repair

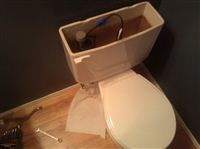
When the inspector went through this house, he noted that all of the toilets had very old gaskets that should be replaced. It wasn’t something we asked the homeowners to fix so I’ve been going through and getting them changed out. I’m far from an expert, but since I had a few issues that were solved by the Internet, I thought I’d give back some of the things I learned.

  • Home Depot sells a bunch of products by Fluidmaster. They have mixed reviews about their longevity, but it’s what I’ve been going with. I recommend the model that has two chains. In addition to the normal one, another runs to the float. When you flush, it unlocks the float and lets it drop. This way if you somehow do have a leak, your toilet won’t run until you flush it the next time.
  • Some of the Fluidmaster kits also include a nifty pinch valve that fits on to the bowl refill line. You can adjust how much water goes back into the bowl after a flush. I have one toilet that doesn’t need any extra water after a flush so all of that water was being wasted.
  • If you’re going to take the tank off as part of your repair, just replace everything including the main gasket between the tank and the bowl. It hardly costs any extra money and then you’ll be good to go for many more years.
  • Can’t get those rusty tank bolts off? Take the blade off your hack saw, slip it between the tank and the bowl and saw that bolt off. It’s way easier than trying to use WD40 or something to loosen it up.
  • Don’t put your tools away when you’re done. Leave them there for a couple hours and then check for leaks. If you’re like me, you’ll need to give the tank bolts a little more of a turn. I’m always afraid of tightening them too much and cracking the porcelain.
  • If it ain’t broke, don’t fix it. The first toilet went smoothly, but the second one was a pain. In retrospect, replacing the filler valve to be the kind that doesn’t run until you flush again was fine, but I should have left the tank bolts and main flush valve alone. It took me days to get past all the leaks and I’m still not convinced that I’m done.
  • Don’t invite your wife in to see what the guts of a toilet looks like. She won’t be amused. Ha!

Wall Switches

We have various colors of outlets and switches in our house. I’m planning to do a full sweep through the house replacing them all with white. The big question I’m dealing with right now is should I go for the flat switches or the older style that everyone is familiar with?


Which do you prefer? Leave a comment or shoot me an email.

Garage Shelves: Part 3

After the success of the shelves and the workbench, I decided to build some shelves and a coat rack by the door. For those of you keeping track at home, this is day four of the garage project.

Instead of designing them myself, I used some plans that I found online. I’ll spare you the details since you can read the plans, but here are before and after shots.

While the plans look nice, I can’t recommend that you build these shelves. They took FOREVER and it was very difficult to mount them to a finished wall. I had to be super careful to make sure the lag bolts went into the studs behind the wall. If I missed, the shelves would end up on top of Tyla’s car.

The horizontal 2x4s look goofy. I added them because the center vertical 2×4 doesn’t tie into any wall studs. It’s there for vertical support only. The horizontal 2x4s are screwed into it and then screwed into the wall studs. Also, that was about the only way I could hold the shelves up and screw them in myself. If I had it to do over, I think I would place 2x4s horizontally across the wall and then build shelves onto those. But I guess once I have some boxes on the shelves, I won’t see that anyway.

The coat rack is made from a bathroom shower rod and some eye hooks. We have coat closets inside, but this will be a good spot to hang motorcycle gear and wet clothes.

I think this will be the end of the garage updates for a while.

[UPDATE] Since I wrote this and took the photo, I have removed the bottom shelf. Our garage door openers don’t have working lights (they’re OLD!) so a motion detector by the door is our only hope of getting some light when we drive in and step out of the car. The bottom shelf blocked the motion detector’s sensing range. I’m not very proud of these shelves. They’re functional but I know I can do better. You might hear more about this some day.

Garage Shelves: Part 2

The next phase of the garage shelf project was building a workbench. Here’s a shot of the old bench.

It’s not quite the dream work area that I had in mind. The day after I built the storage shelves, I set to work building a new workbench. The shelves had been thoroughly planned out, but the workbench was designed as it was built. I decided to have the bench be roughly 38” tall. As with the shelves, I had to factor in the slope of the floor out to the driveway. Here is a shot of the frame. Some of the posts rest on the foundation. It bolts to the wall for rigidity, but I don’t rely on any of the wall joists for actual support.

Next it was time to apply the work surface. I went with one layer of 3/4” plywood and a top layer of 3/4” MDF drilled in from the bottom. Some day I’ll probably replace the MDF with a more durable surface, but for now it makes a very smooth work area.

I don’t have a table saw, but the method pictured below worked very well for making large cuts.

Once I got the plywood on, I realized that I didn’t have a good place for some black metal shelves that I had in the garage. I bit the bullet and cut a few inches off the end of my brand new workbench and remounted the legs. I wish I had thought of it originally but it turned out ok.

That’s as far as I got on that day. The next day, I spent a few hours adding a rail and shelf along the edge of the bench. The base of the shelf is a 2×4 and then the shelf is 3/4” MDF with cutouts for each wall joist.

On the second day of the workbench project, Logan also came over to help me put some plywood up in the rafters. It was pretty tricky and a bit time-consuming because all of the wires are run on top of the rafters. Not only was it hard to get the boards up through gaps in the wires and rafters, but I also had to lay down 2x4s on the rafters to give the wires room to go underneath the plywood. We added about 80 square feet of storage space up there.

Garage Shelves: Part 1

The shelves that Tim and I built in the condo were one of the best changes I made to that place. The garage in the new house is awesome, but I wasn’t real happy with the aesthetics or functionality of the old shelves and the workbench area. I’ll break this into a series of posts because it was a pretty big project.

Here’s what it looked like before I started. (That’s Logan’s truck in the photo.)

Functional? Probably, but I knew I could do better. Logan and I started by tearing out all the old shelves. The metal went to recycling where we made about $35. That covered the dump run for the rest of the stuff that couldn’t go to recycling.

Getting all the wood and cleaning out the old mess took a day. The next day I tackled the main shelves. Because of the electrical box and the plumbing (just to the left of this photo), I decided not to run them along the whole wall. I started by building the shelves on the floor. I used the existing wall studs as the support for the back side of the shelves and that saved a lot of time. I had to make each post a different length because the garage floor slopes slightly out to the driveway.

I was able to lift the shelves up into place and secure them to the wall.

Then I added some plywood for the shelves. Each piece was 2’x4’ so when I was at Home Depot, I had them cut the plywood for me. That saved a lot of time and made it easier to handle. All I had to do at home was notch out holes for the 4×4 supports.

By the end of the day I had a good looking set of shelves in place!