I’m very thankful that we added air conditioning to this house. This last Sunday it was in the mid-90s and we burned that sucker all day long. But I’m also a cheapskate at heart. I haven’t yet figured out exactly how much energy it consumes, but it’s far from free to run so I try to use it as little as possible. Here’s our basic strategy if it’s going to be warm:
- Leave windows open the night before to cool the house down as much as possible.
- In the morning, leave the windows open until it’s the same temperature inside as it is outside. Then close every window and close all of the blinds on the south side of the house. Turn on the AC.
- In the evening, once the outside temp is the same as the inside temp, turn off the AC and open everything up to get free cooling from outside.
- Run the house fan to keep the air circulating. Our vents pump more air downstairs than upstairs (they were designed for heating) so even just running the fan can cool it off upstairs.
We are PacNW wimps so we run the AC if it’s 80 or higher and we have it set to keep upstairs at 76 degrees. Our EcoBee thermostat supports multiple thermostats which is really handy in situations like this. It also has an API so I can connect to it and pull data off. I have logs of the indoor temp from each sensor along with the outdoor temp so I wrote a quick program that helps us remember when we should close the windows or open them back up. Now we get a text reminder when we need to make changes to the windows/blinds.
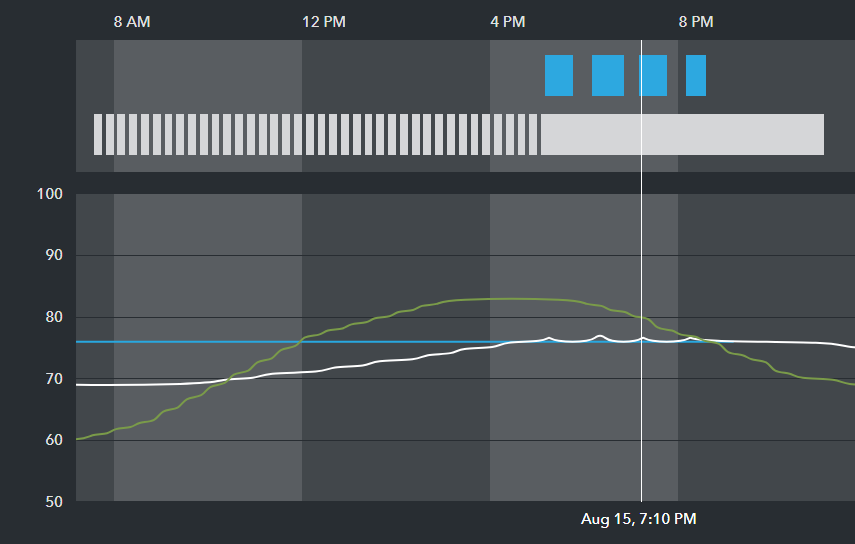
Here’s an example of what it looks like on a day that got up to 84 degrees. The night before, it got down to 59 degrees outside and inside it got down to 69. Around 10:30, the outside temperature got up to the same as the inside temp so we shut the windows, closed the blinds and turned on the AC. The house coasted until 5pm before the AC finally kicked on a few times until 8:30 when we shut it off and opened the windows.
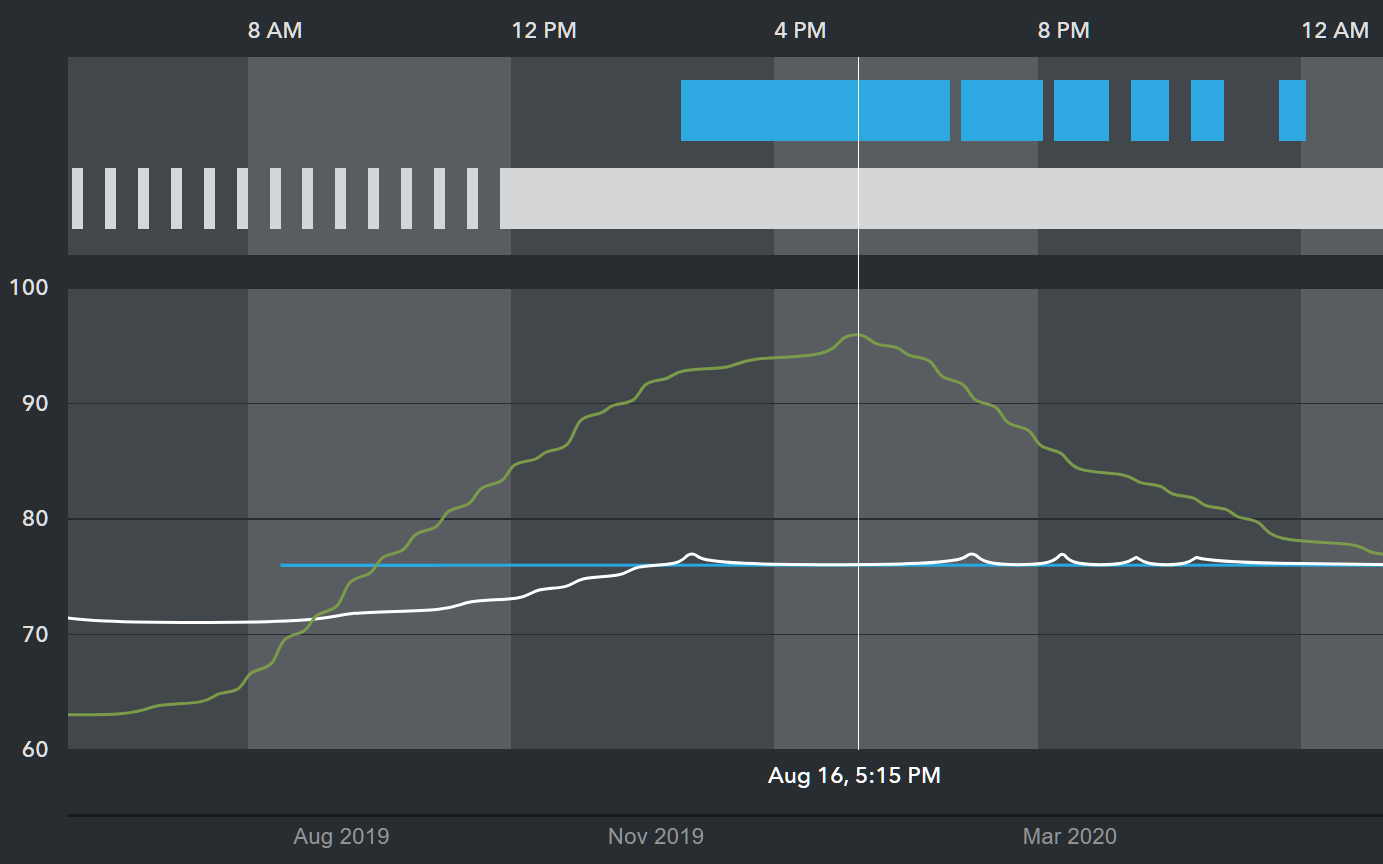
Here’s a comparison to show how much of a difference this strategy can make: On Sunday, it got up to 96. By cooling the house down a lot the night before, the AC didn’t kick on until 2:35.
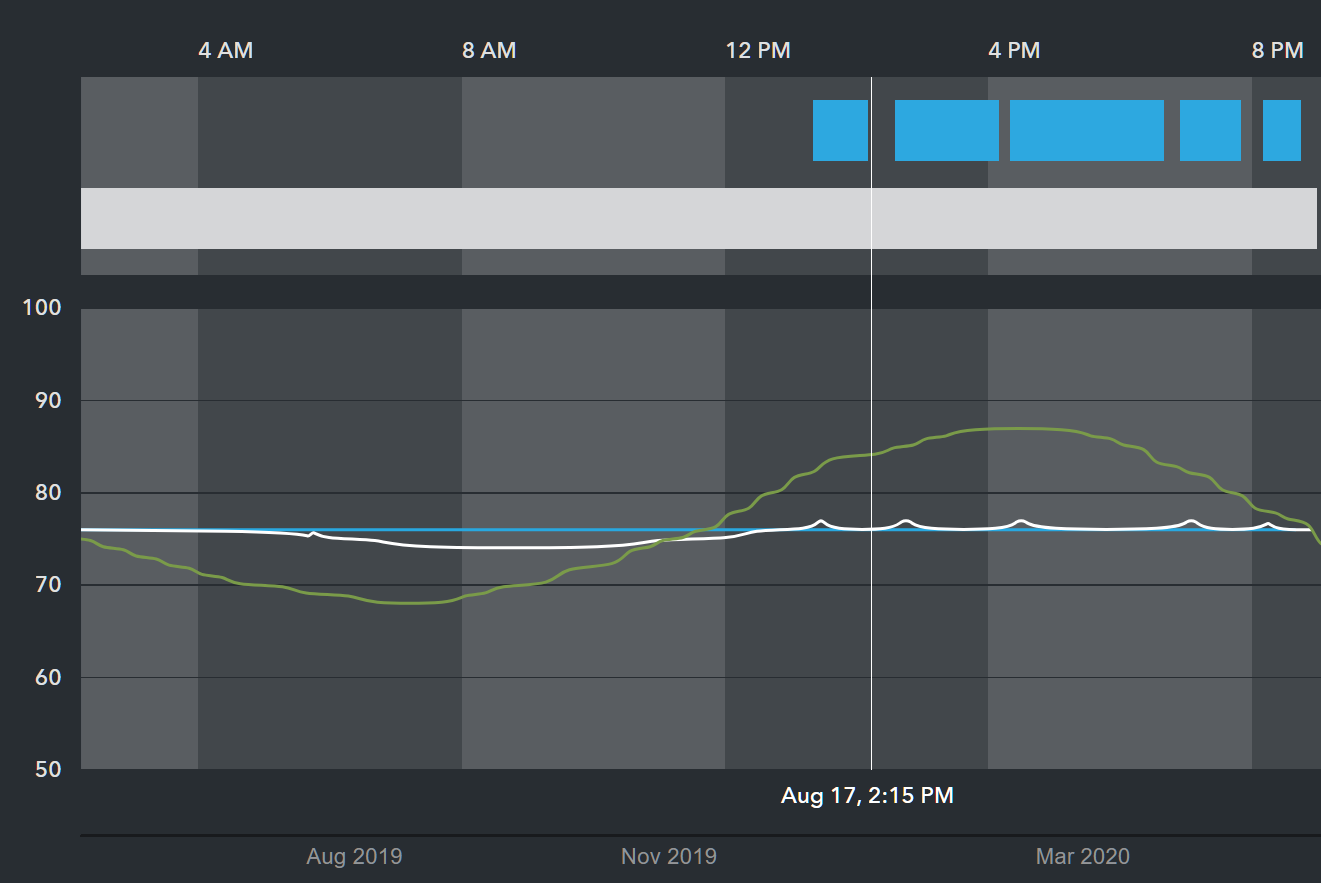
That night it stayed very warm so I never opened the windows until 6:30am when I got up. The house barely cooled off at all before I had to shut things up again. Monday only got up to 87 but the AC ran almost exactly the same* amount of time as the day before!
This works really well around here because even on hot days, we get a “marine push” that brings cool winds in the evenings. Another key is that we have low humidity so I only remember one or two days where we ran the AC more than normal because of high humidity.
* On Monday, I shut the AC off at 8:40pm. So to compare the two days, I took all of the AC usage up until 8:40pm on both days. Sunday’s usage was only 20 minutes less than Monday’s usage even though it was 10 degrees warmer.