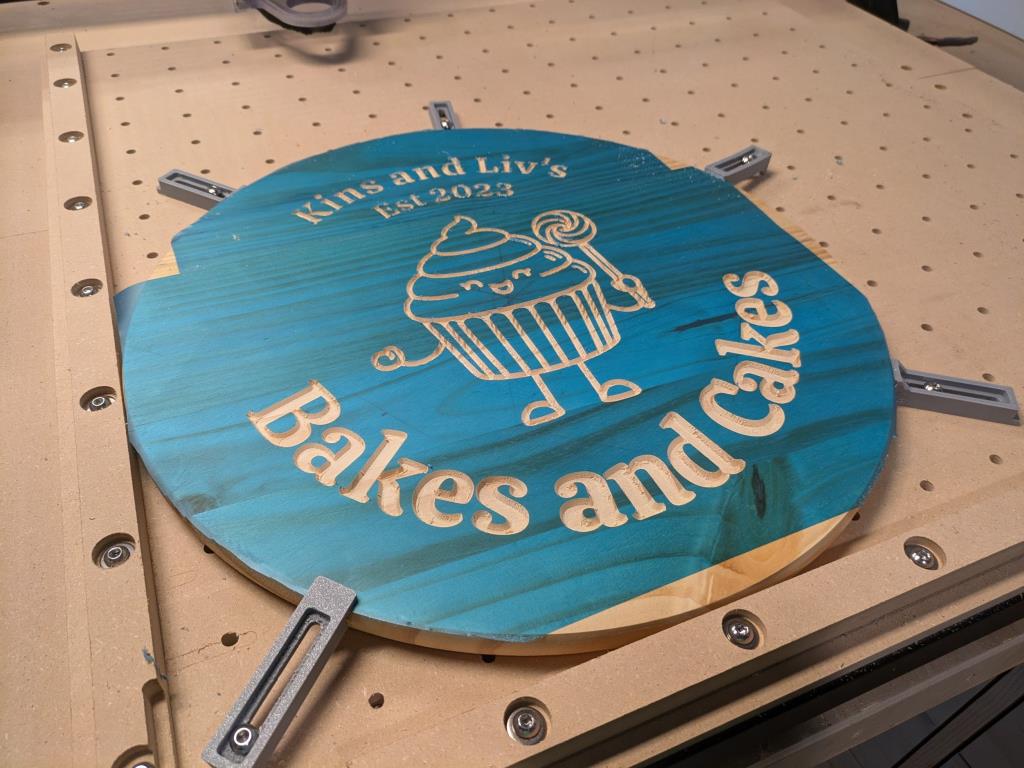
I was approached a few weeks back by a girl at church asking if I could make a sign for a kids craft fair/bake sale that she was entering. She quickly drew a picture of the logo she and her friend had designed. I’m frustrated that I can’t find the original drawing, but I took what she had and made a vector version of it on the computer. I actually started with Copilot to generate some similar ideas and then I combined all the ideas in Inkscape.
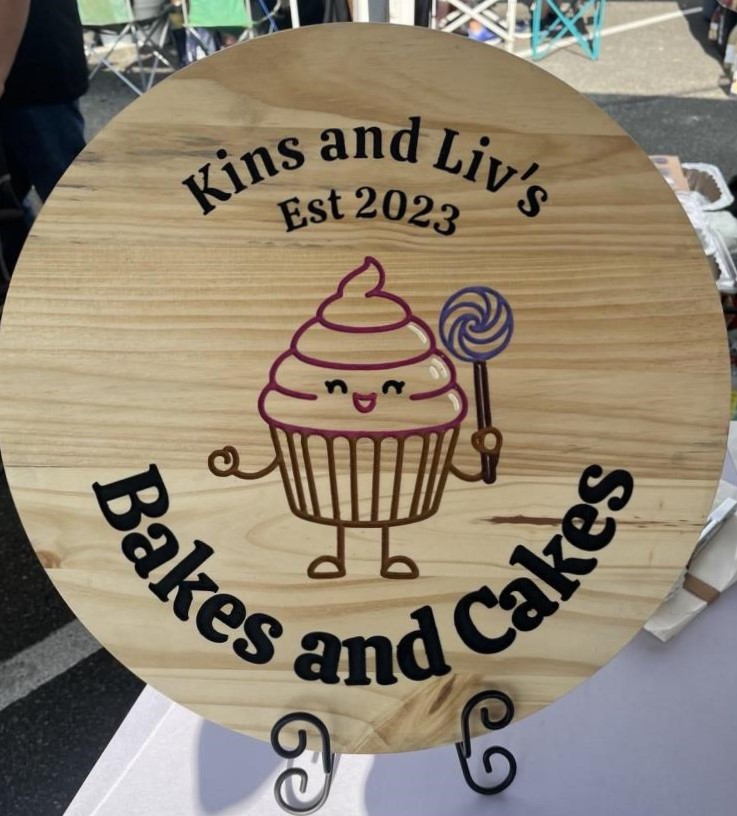
I ended up making two identical signs using round, pine blanks from Home Depot. I sprayed them with shellac and then covered them with Oramask the girls wanted to paint them after I was done.
The girls did a nice job painting the signs and it sounds like their bake sale was a hit! After learning a bit more, it sounds like lots of market setups have one day a year where the booths are run by kids. If you have a crafty kid, check for options in your area!
This is the third sign I’ve done on these round Home Depot blanks. They are a great size and relatively inexpensive so they’re a good option, but if you have a good source for other 3/4-1″ thick blanks in different shapes, please let me know. It would be fun to give people options of other shapes too.
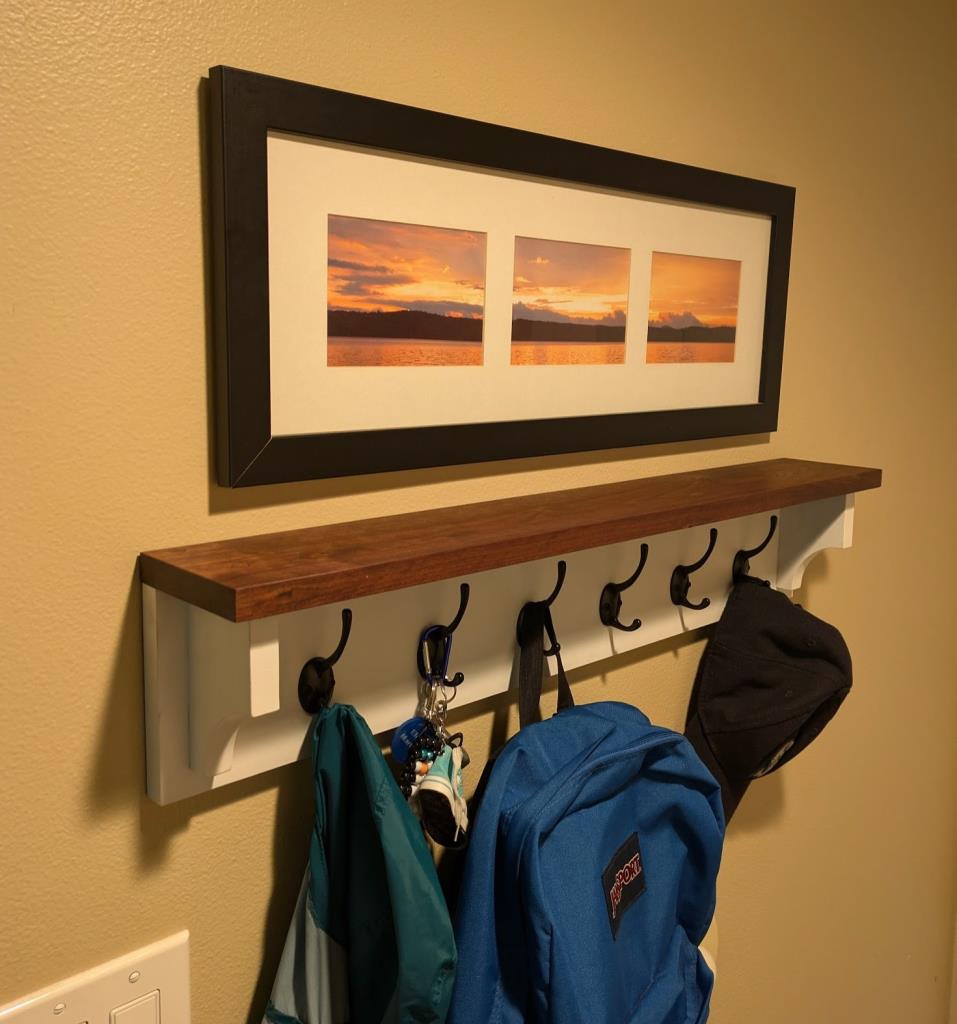
We generally use the entry door from the garage but there’s no easy place to hang up coats near that door. After more than 10 years of living in the house, I finally bought a cheap coat rack and screwed it to the wall. It worked but I wanted something a bit nicer.
While the design is almost exactly what you’ll see from many internet shops, the advantage of building it myself is that I can make it fit our space perfectly. For example, when the door opens, it hits the door stop just before it hits the wood. I was also able to put the mounts on the back directly in line with the studs but still have the shelf be centered in the wall.
The project went together very quickly. The white part is poplar with some rattle can white paint and then the top is walnut with David Picciuto’s experimental finish. On the back, I routed an insert for some metal keyhole hangers. The project was quick but it made use of a bunch of previous Christmas and birthday gifts such as dividers, self-centering drill bits, and plug cutters.
We’ve always had a photo hanging on that wall (a sunset from Camp Ticawa) and I can’t decide if it fits with the new coat rack. Perhaps a different frame would look better or maybe I need to move it completely.
I was happy that the rack installed level without any drama. I used a laser to make sure everything was aligned. Now we’ll see how it holds up to a school year full of heavy book bags!
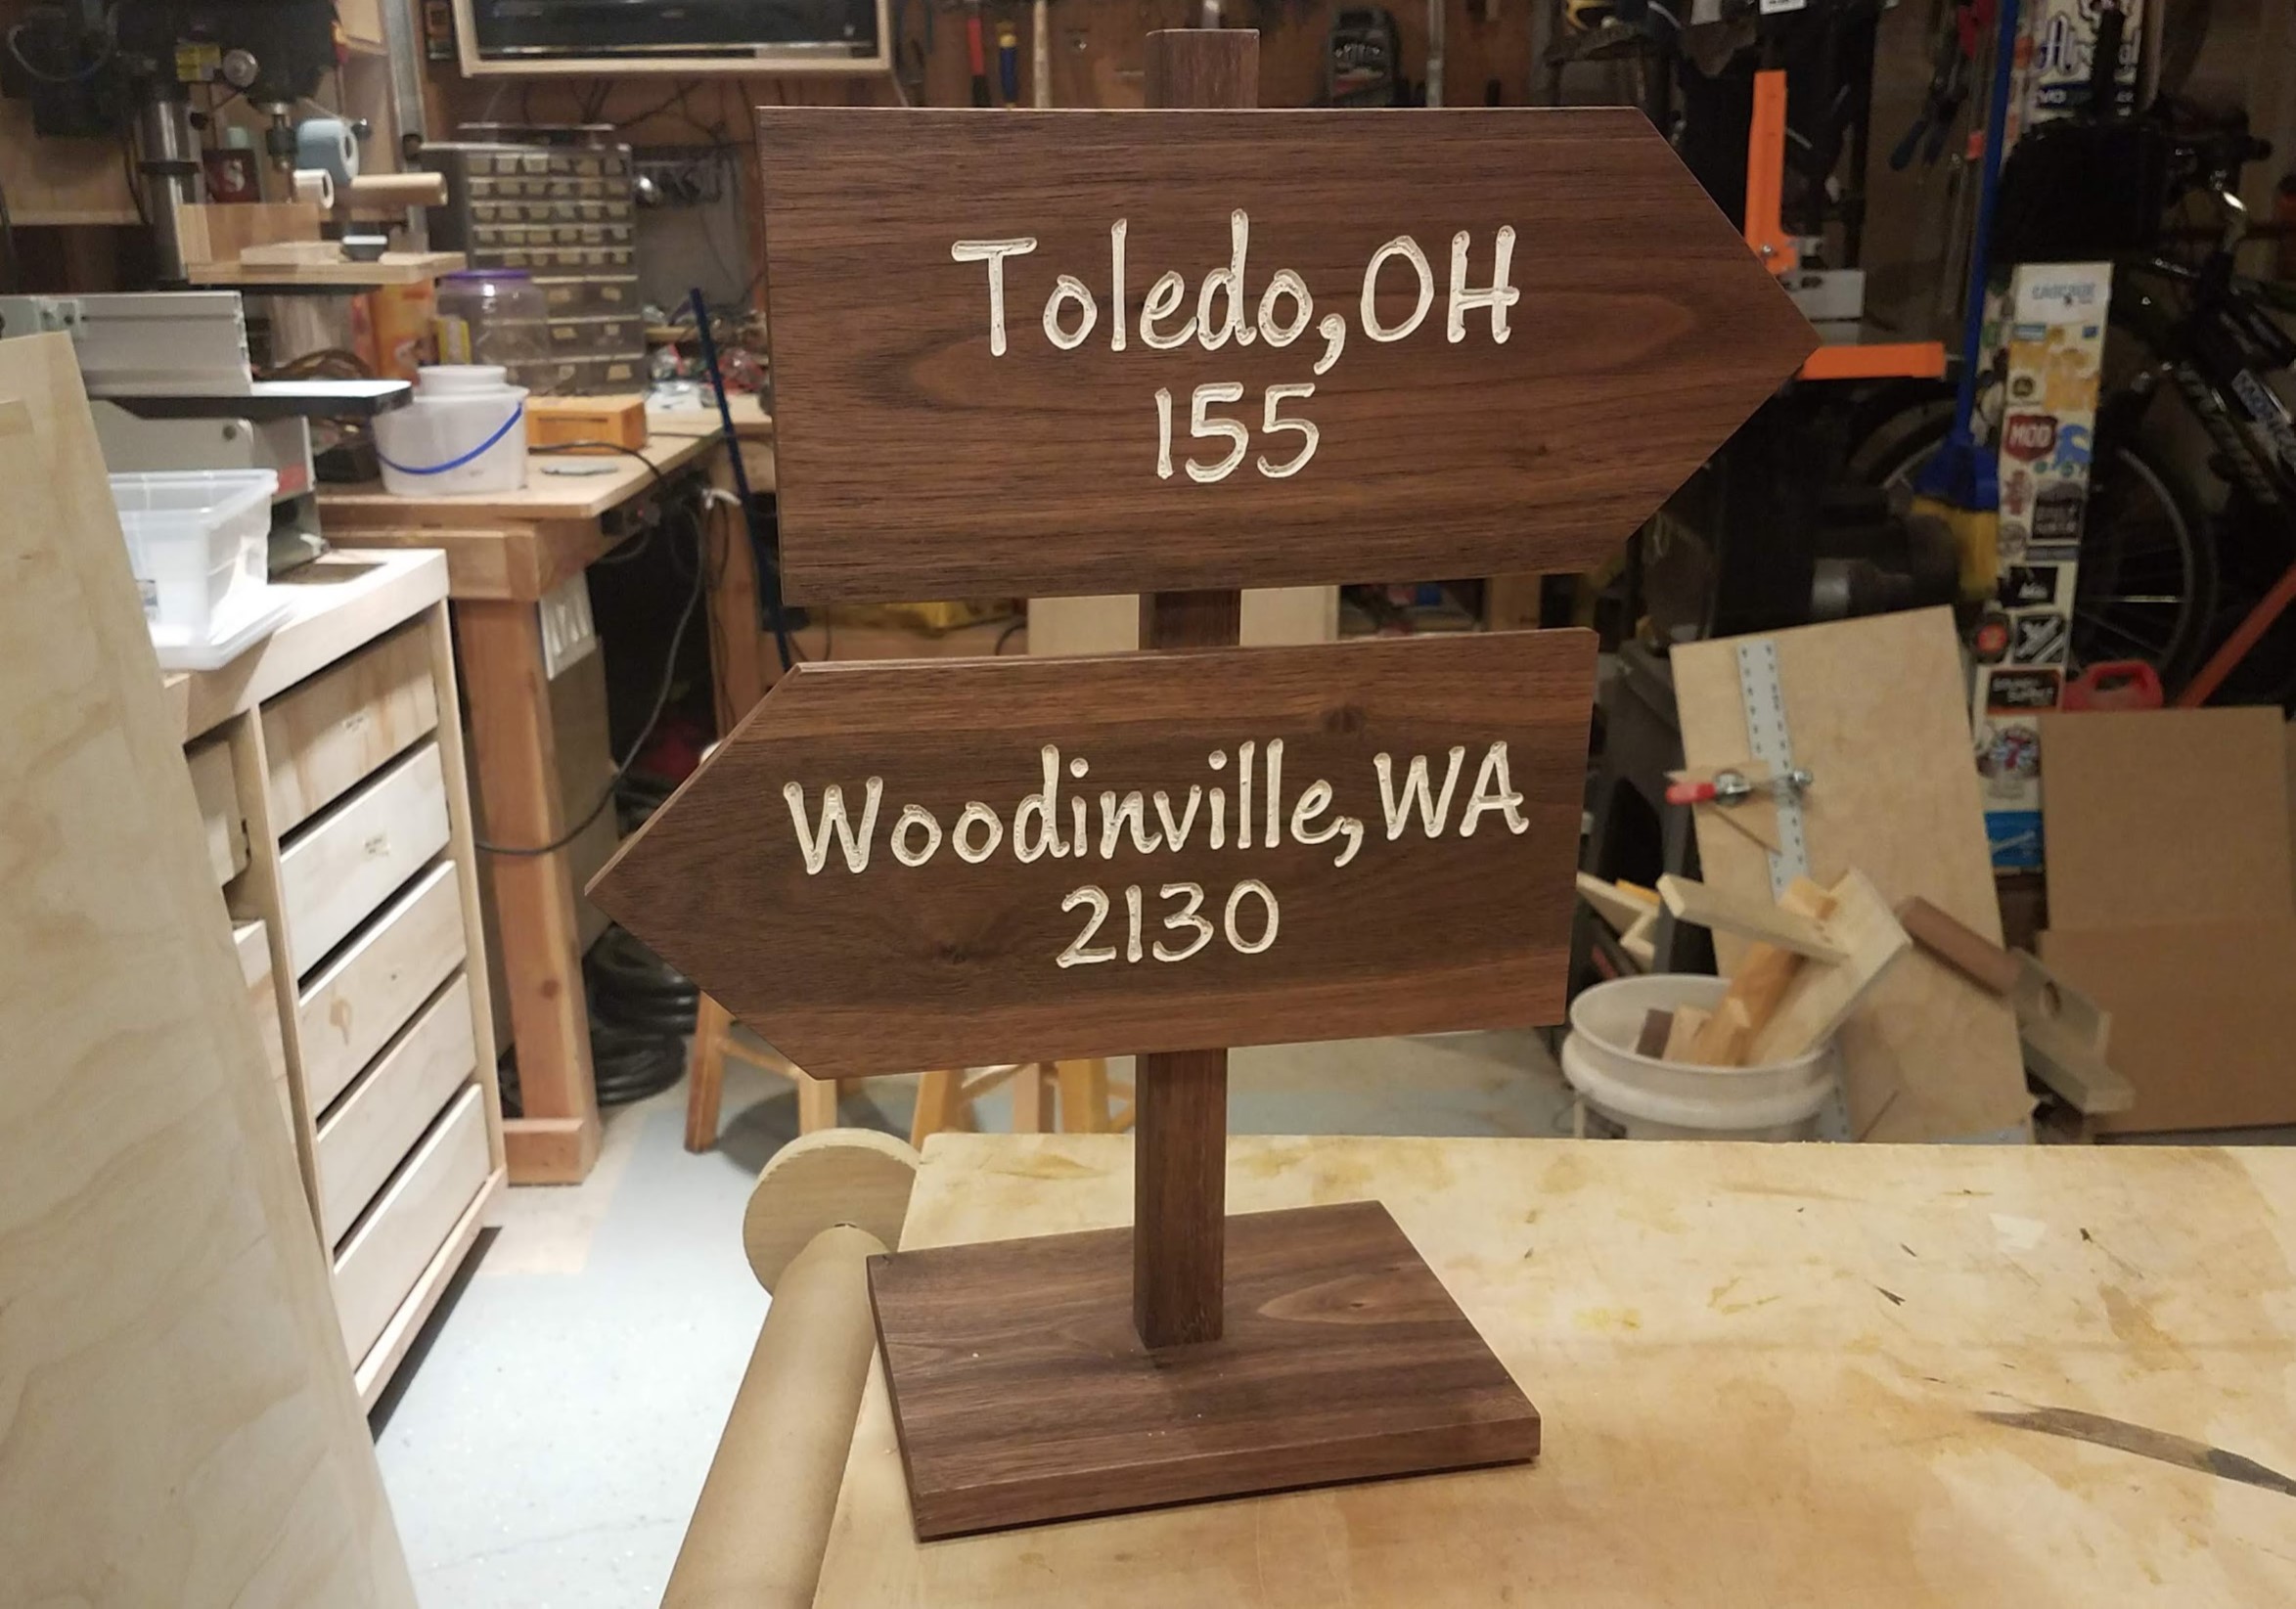
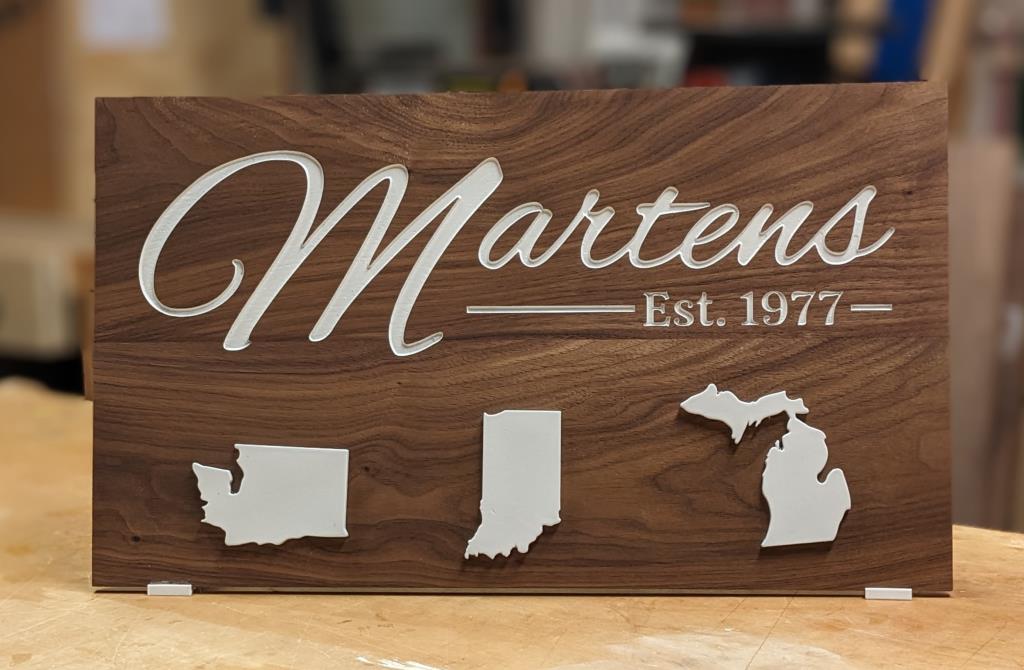
In 2019, I made a sign for my mom that showed how her family was spread across the country. It was kind of a quick project without a lot of foresight, so as soon as someone moved, it was obsolete and there was no way to update it.
I liked the idea but needed something that I could keep up with logistical family changes. I decided to attempt a sign that would use magnetic states that could be attached/detached as needed. Here’s how it turned out:
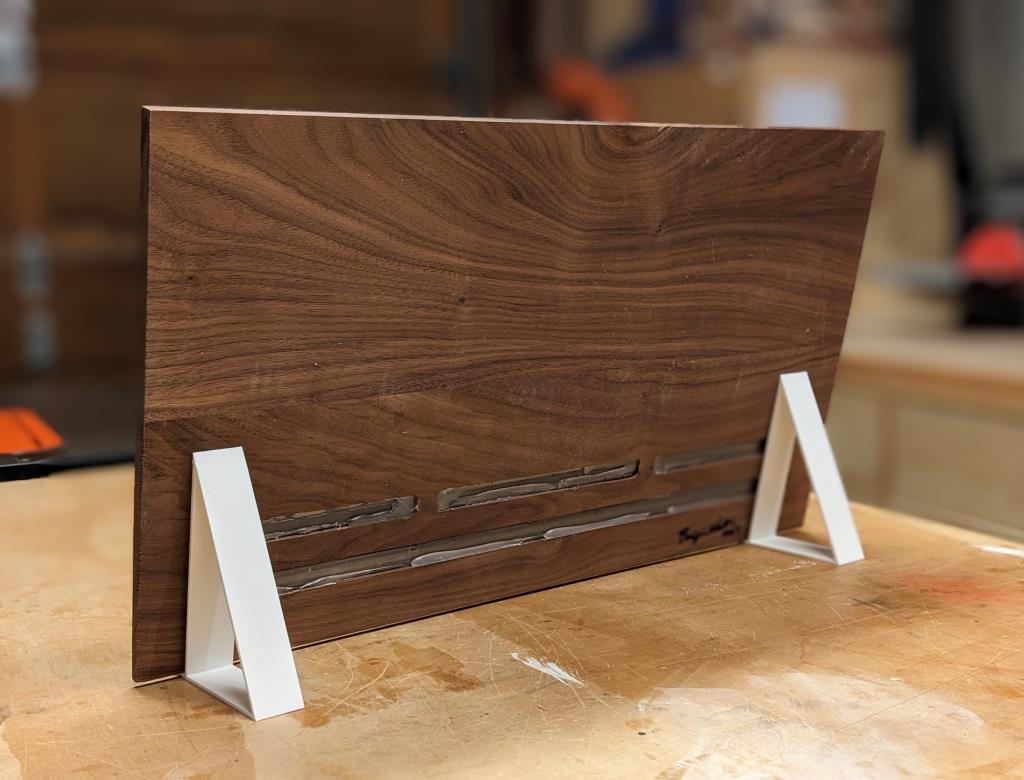
The states are 3d printed and have magnets in the back. I sprayed them with multiple coats of filler primer to get rid of the printing marks, and then sprayed them with white paint. The stands were also 3d printed. You can see the metal bars in the back and they’re just held in with hot glue. I made the wood there as thin as I was comfortable with so that the magnets would hold. It’s kind of an odd layout as I was experimenting with how many magnets I would need to hold the states on. I’d have a much easier time if I did this again, but it all looks good from the front so I didn’t think it was worth scrapping to start over. (Plus I didn’t have any walnut left!)
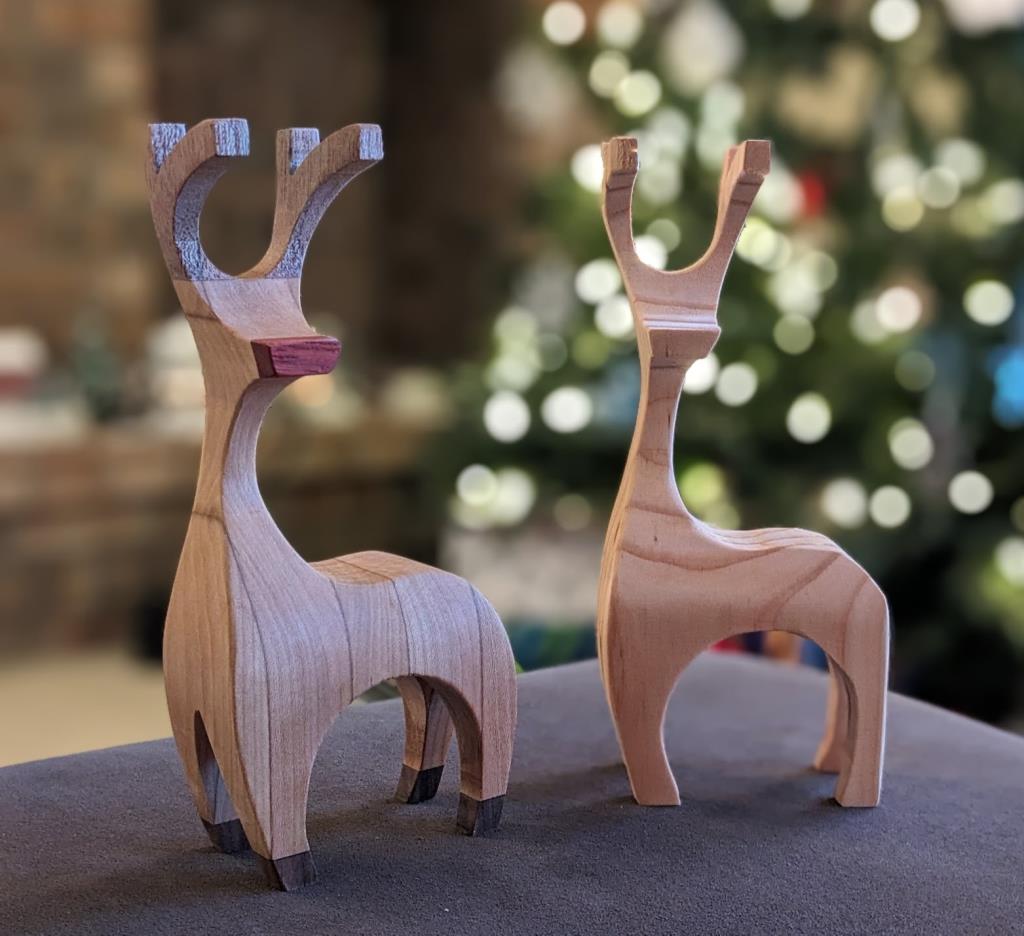
Years ago, I added “scrap wood bandsaw reindeer” to my project idea list, and this year I finally got around to making it. One of the big reasons I hadn’t made it before is that the plans call for a big Forstner bit and my old drill press really didn’t like those. This project felt like a fun way to see how well my new drill press would do with it. (Spoiler: it was awesome!)
I bought the plans from that linked video, mostly to support the creator, but as I dug in more, I realized this could have also been done without the big Forstner bit. Using the bit does result in less sanding so that’s a win. The process is a little hard to explain in text, but maybe you have heard the old saying: “How do you carve an elephant? Start with a block of stone and chip away everything that’s not an elephant.” This project is a lot like that. Imagine starting with a 2×4 about 7.5″ long. After drilling two holes in the face at specific points, you glue a template onto the narrow side of the 2×4 and cut it out on the bandsaw. The cutout pieces get taped back into place, the blank is laid flat, and a template is applied to the face. That gets cut out on the bandsaw again and then all the pieces fall out and you’re left with a reindeer.
I first made one out of a scrap 2×4 and then I made a fancier one with different species of wood glued together at specific points. The antlers are mahogany, the body is cherry, the hooves are walnut, and the nose is padauk. I didn’t have a big enough block of cherry so I had to glue one up. The lines are pretty visible but it was still a fun project. I’ll have to do it again when I have some thicker scraps. They require a lot of sanding, but I could see batching out some of these for gifts.
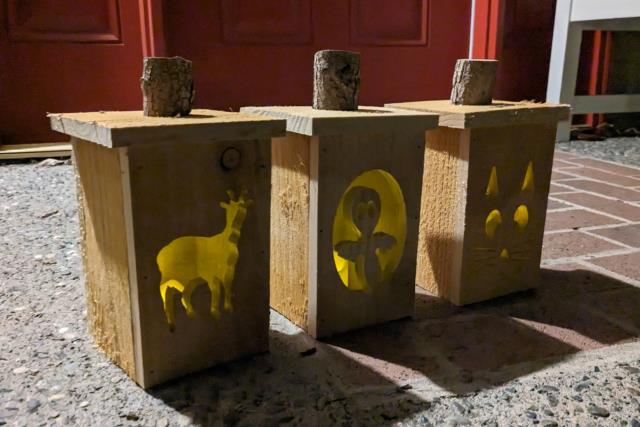
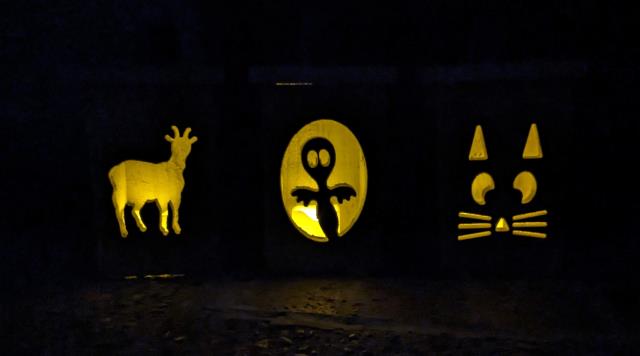
We usually carve pumpkins for Halloween but it’s a messy affair and then the pumpkins end up rotting on the front step. This year, we decided to try making “pumpkin boxes.” You may have seen these on Etsy or other craft sites.
I bought a couple fence planks and quickly had them cut into the pieces for a box. I used the CNC to carve the images. Tyla picked a goat, I picked a ghost, and Elijah drew a cat face. A quick glue up later, and I was done. I left the bottom open so we could set them on top of an electric candle light and I used pieces of a branch on top of the lids to look like a stem.
If we do this again next year I think I’ll get the family more involved in the design of their pumpkins and the assembly of them. We might also consider making some variable sizes.
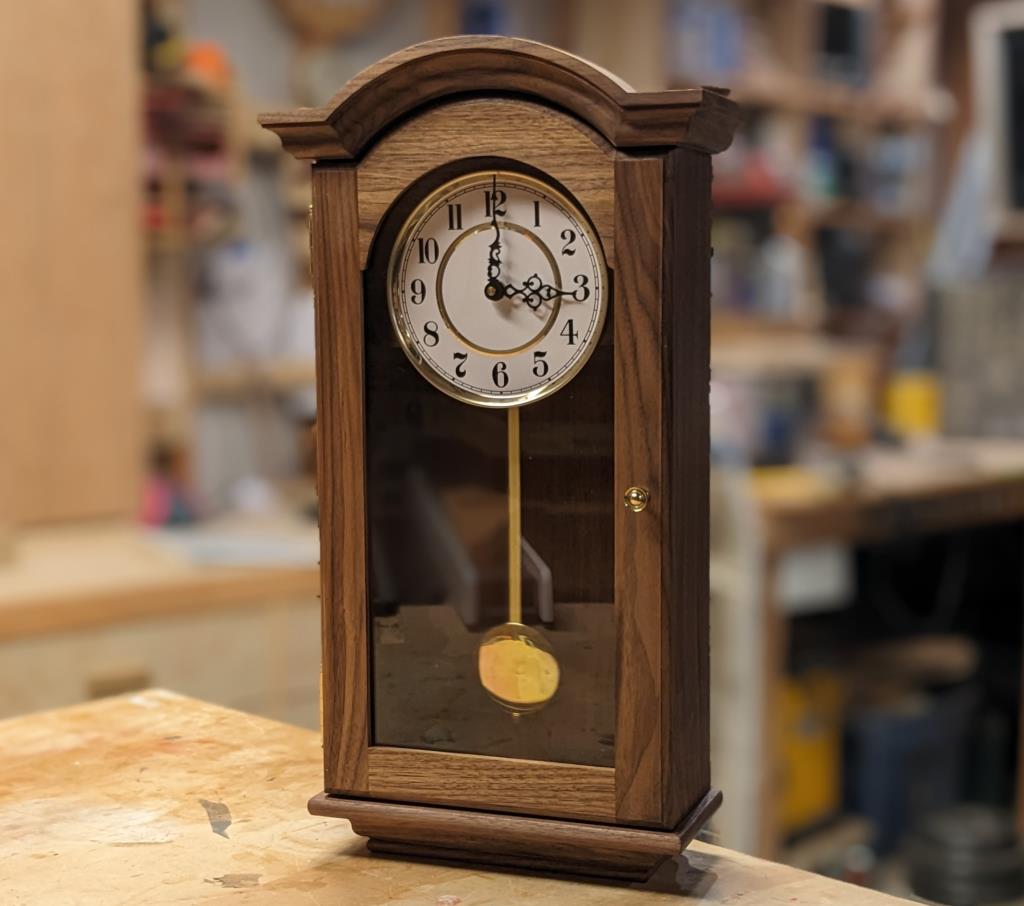
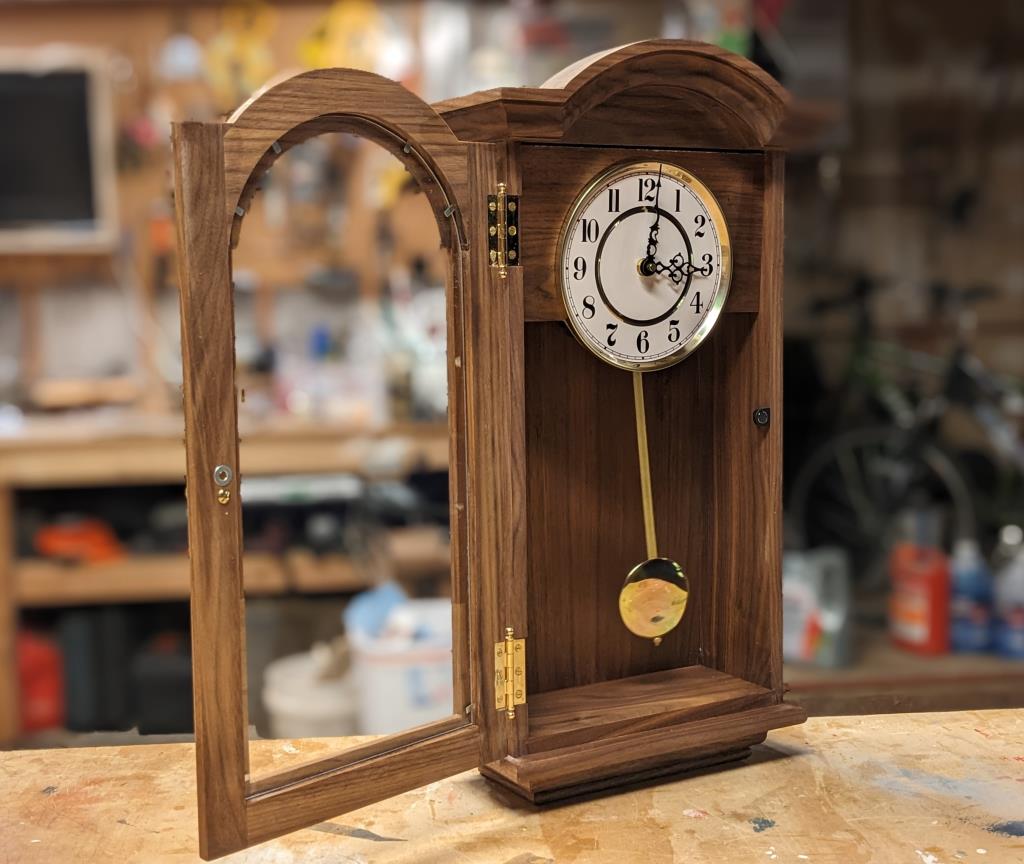
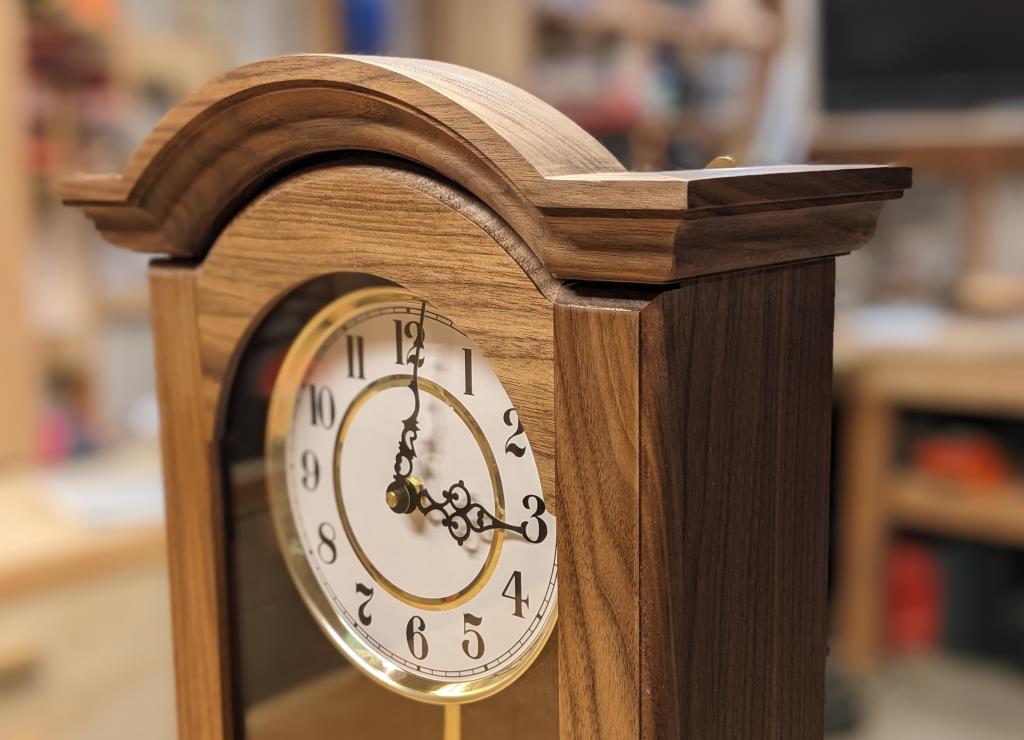
I remember reading that the traditional gift for a 10th wedding anniversary is a clock. I thought it would be a fun project and even picked out some plans that I liked from a back issue of Wood Magazine (Volume 38, Number 226.) We’ve now passed our 13th wedding anniversary and I decided it was time to get started making the clock.
A lot of the complexity in the project is just figuring out which clock movement to use, what kind of chiming sound you want, whether you want the chime to be electronic or mechanical, what type of bob to have swinging back and forth, what kind of hands to use, and which clock face to pick. Thankfully the plans I was using had specific part numbers and suppliers listed not just for the clock parts but also for the door hardware. I followed that all pretty closely but I did choose a different clock movement. We didn’t expect to use the chimes much so I didn’t need anything too fancy.
The project construction was fun. After building the main case, it was a straightforward process of building up specific molding pieces on the top and the bottom. Some of them did require a giant new router bit which was a bit scary to use but the result was worth it.
The door is designed to have a piece of glass sitting in it. The glass has a curve at the top and then gets etched with a design on the front. Finding a glass shop and/or learning how to cut curved glass all seemed like something I wasn’t excited to tackle right now, so instead I visited TAP Plastics. I bought some non-glare acrylic that didn’t end up working because the distance between the clock face and the door meant that the clock face looked blurry. So now it’s just a regular piece of cast acrylic. Some day I might take it to the laser and etch a design on the front, but we both know that’s unlikely to happen any time soon. It looks great as-is.
The clock face and the movement are held on via magnets so it’s easy to remove them to change the time. A magnet also holds the door closed.
The finish I used was Arm-R-Seal from General Finishes. I’ve used lots of different finishes in the past, but Matt Cremona has been building gorgeous furniture for many years and he uses this one finish for everything. I love the way his stuff looks and I love the simplicity of just having one finish instead of trying to find the latest and greatest thing that might or might not work well. This was very easy to apply and it looks great!
This clock now hangs in our kitchen and I love looking at it! We don’t use the chimes at all but they are there if we ever choose to flip them on.
I documented a lot of this process along the way in Instagram stories @martenswoodworks so follow me there if you want to see behind the scenes for the next projects.
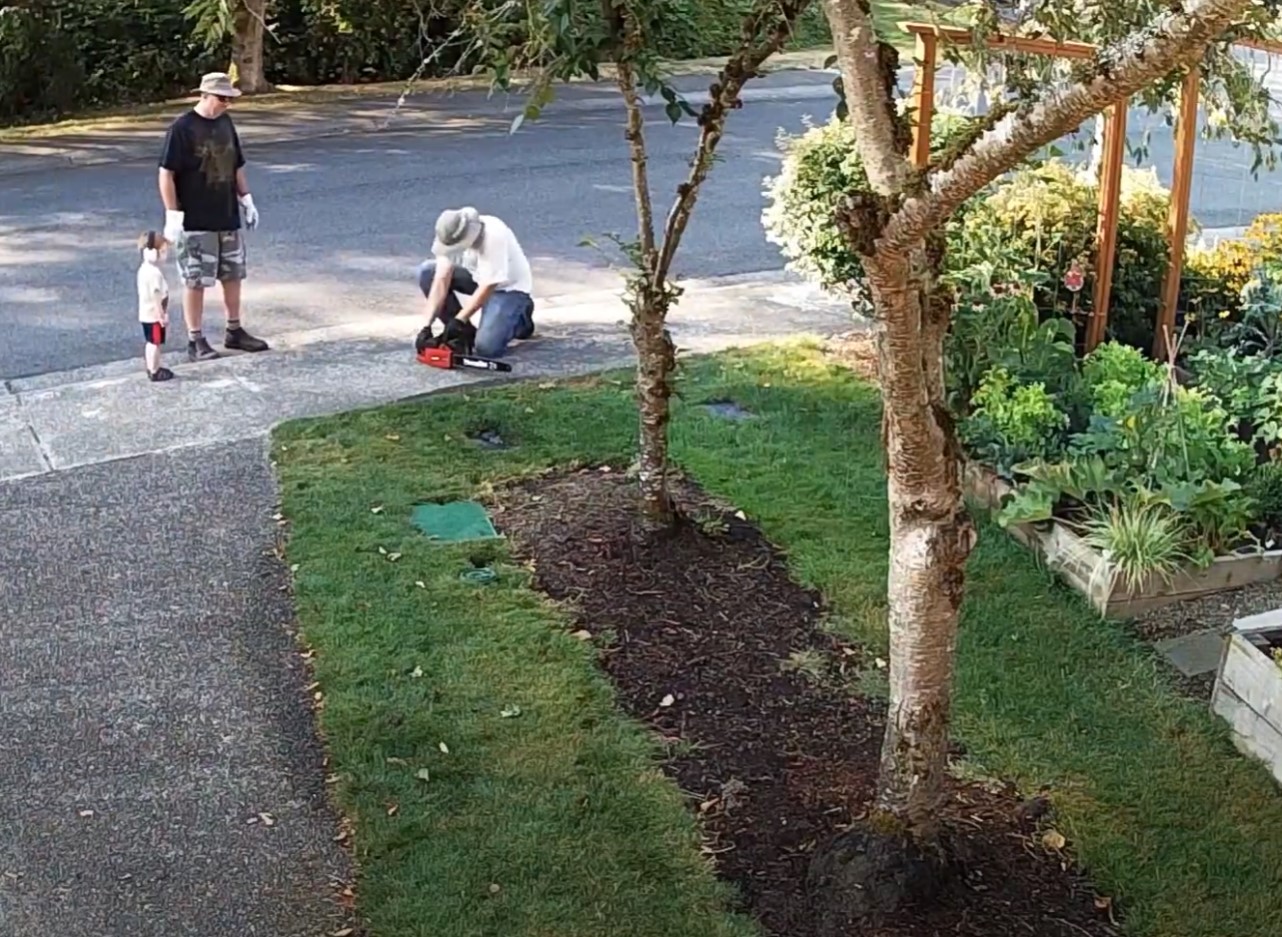
In 2016, we decided to take down two scraggly cherry trees along our driveway. Check out 3-year-old Elijah looking on as Logan and I took the trees down.
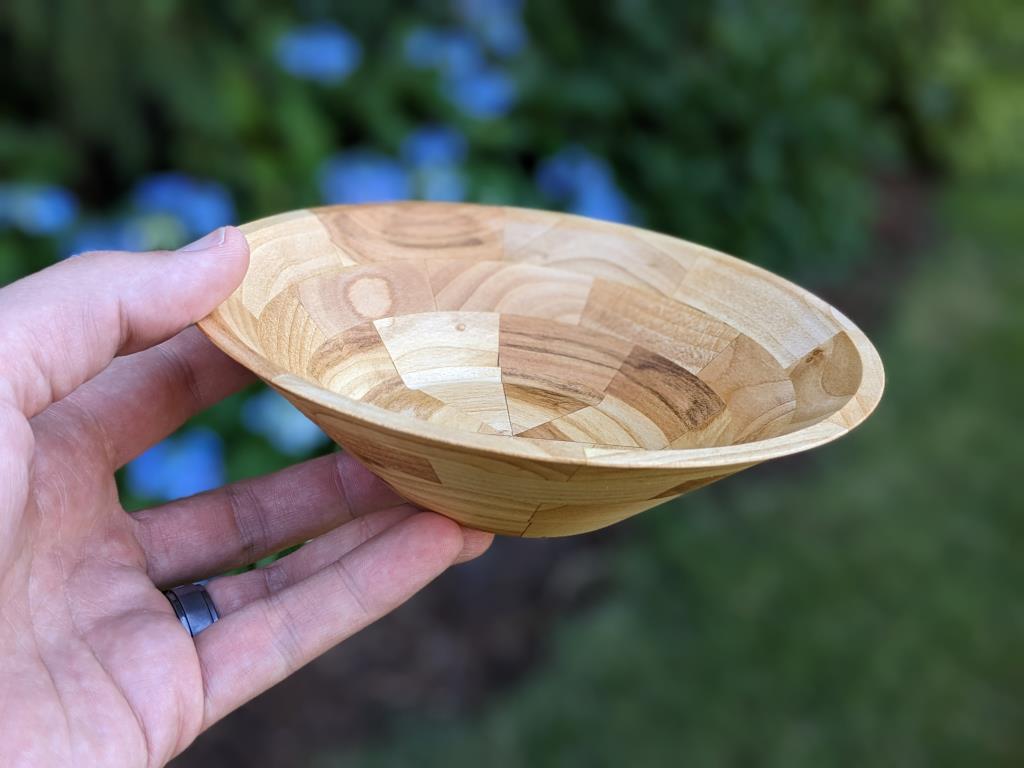
There was hardly much wood in them, but I saved some of the bigger pieces anyway. After drying out, one piece of the wood got turned into a cross that hangs in our front entryway. But I had another half dozen or so pieces sitting around with no plan. I had been thinking about trying to make a bowl on the CNC anyway, so I decided to use this wood for that project.
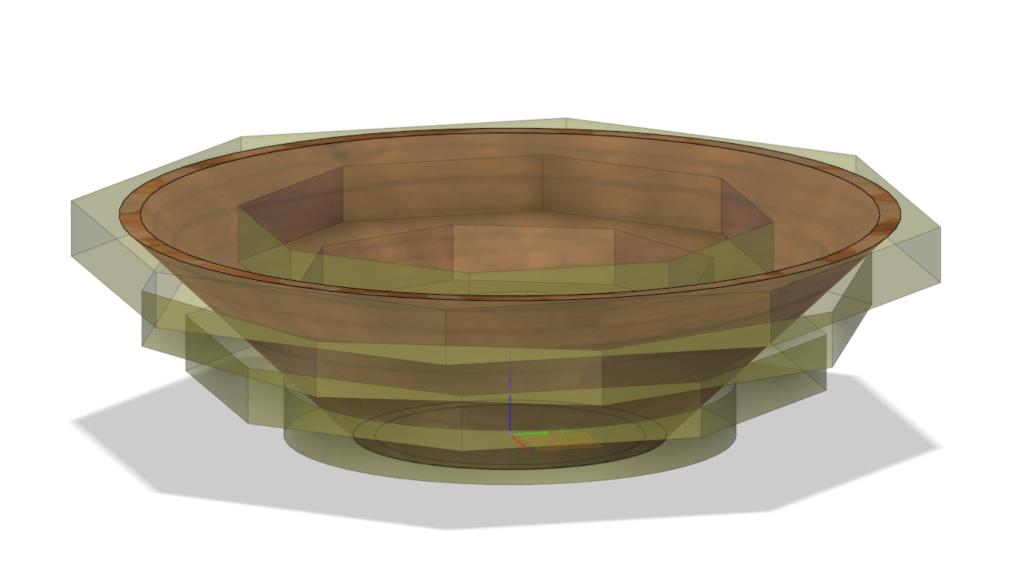
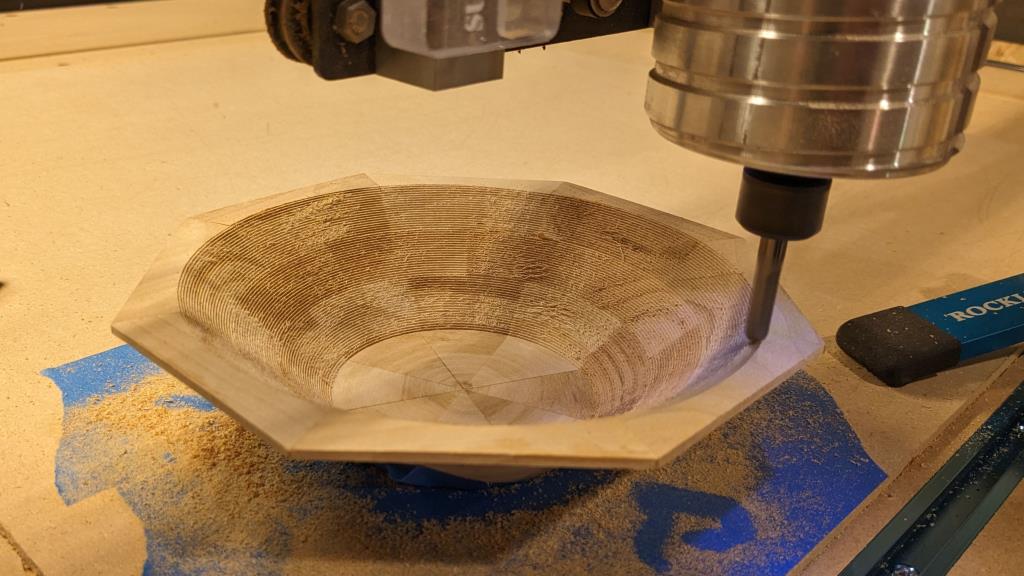
I spent a lot of time with a segmented bowl calculator trying to figure out the specific angles I’d need to cut 8 trapezoids for each layer. Eventually I felt good about the calculations and since that program spits out SVG files, I decided to just cut them on the CNC and know that the angles would be perfect instead of trying to do it on the table saw. The table saw would have been a lot faster, but one bonus of the CNC was that I could do a facing operations on each board to get them to exactly the same thickness. Using the planer for that would have been difficult since the pieces were too short for the planer.
I glued each layer individually and clamped it with hose clamps. Once each layer was done, I glued them all together. Then it was time to model the actual bowl in Fusion 360. The trick was that I had to make sure that the bowl perfectly fit inside the blank. Here again, the SVG files from the calculator came in handy because I could pull them into Fusion and draw the blank pretty much exactly as it existed in the real world. I also had to be careful not to make the bowl too steep since my router body would crash into it while carving out the bottom of the bowl.
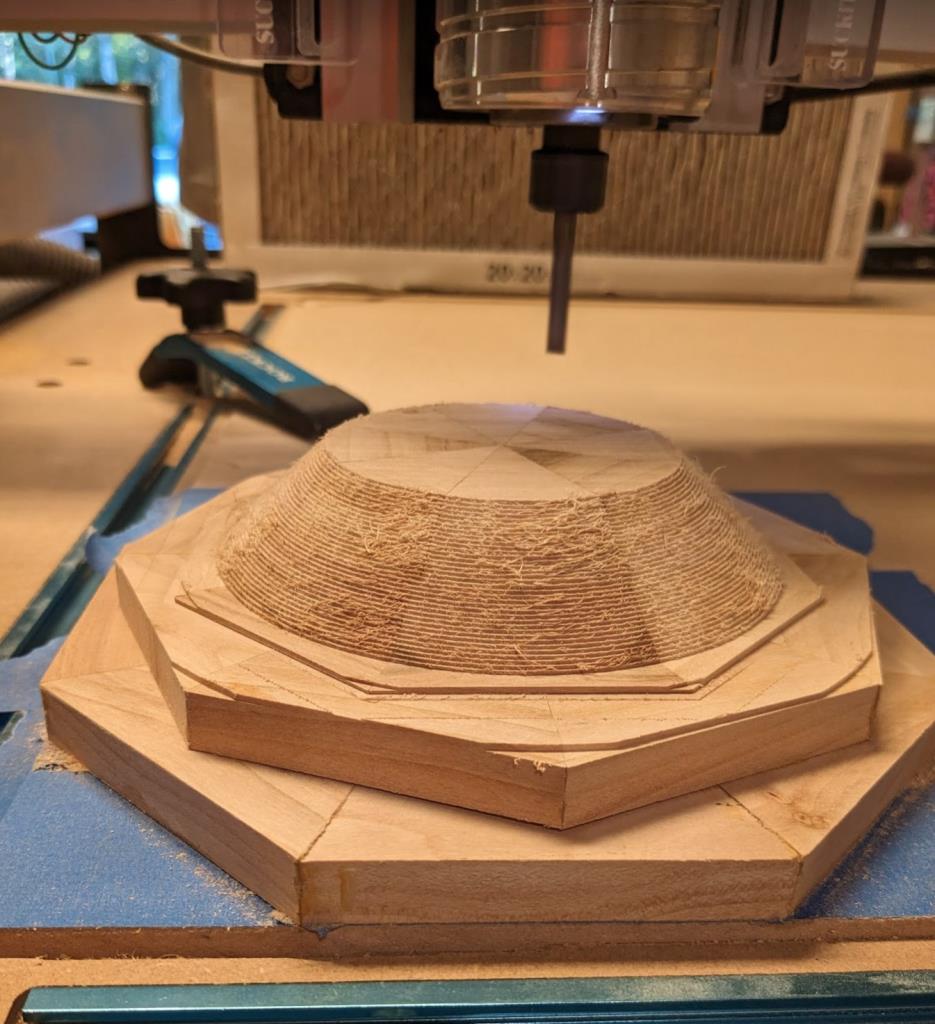
Then it was time to program the actual cut in Fusion. I started with the bowl upside down. I programmed a dummy cut around my stock which would give me confidence that I had things calculated correctly. Then I did a roughing pass with a 1/4″ end mill to get rid of the bulk of the material. The picture below shows that roughing pass about halfway complete. The whole pass took 1.5-2 hours.
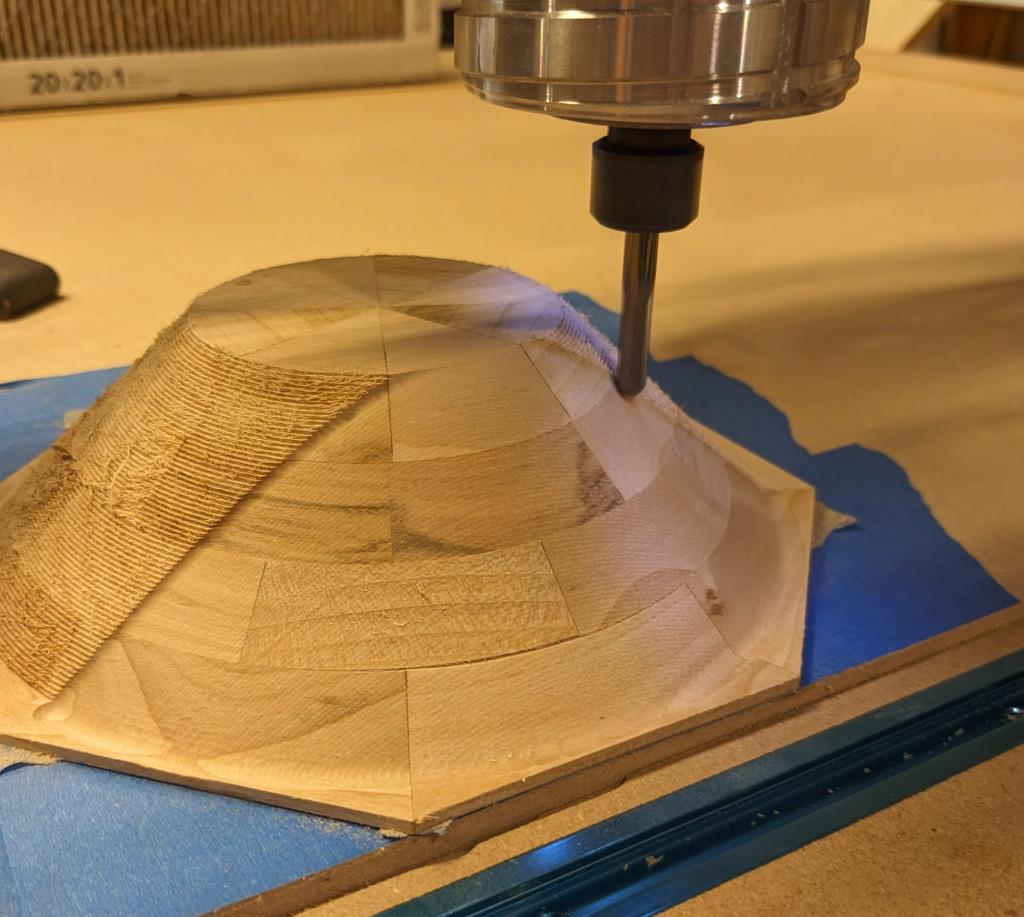
I then switched to a 1/4″ ball nose bit and took very small passes back and forth across the bowl to give a pretty smooth finish. It still needed sanding, but it was very close to the final surface.
Next I flipped the bowl over and did the same process on the inside of the bowl.
While doing the inside of the bowl, I had an accident where the bit plunged way down into the blank where it shouldn’t have. The origin of my model had been set incorrectly. Chatting about it with Luke, he suggested that I fill the hole with a dowel, and I happened to have a cherry dowel that was exactly the right size. Thankfully that whole mistake ended up getting cut away, so it didn’t impact the final product.
It was also a challenge to hold the bowl to the surface of the table. Since I was machining the whole surface, there was nothing to clamp to. So instead, I put blue painters tape on the bottom of the blank and on the table. Then I glued them together with super glue. It created a strong bond that I was able to break later without damaging the bowl or the CNC table.
I added some boiled linseed oil as the finish and now it’s done! I don’t have any big plans for the bowl, but I’m happy to have made it successfully through this project. I didn’t really have enough wood to make another one if I screwed up and I was too lazy to make a duplicate blank out of cheaper boards.
If I ever do this again, there will be a few changes:
I didn’t rotate the second layer correctly. The cracks line up with the base/first layer. It doesn’t look too bad from the inside of the bowl, but it looks goofier from the outside.
I should have taken more time sanding the layers flat before gluing them together into the blank. I thought I had them flat enough, but there are some segments that have a tiny gap to the segment above them.
I need to experiment more with the program and how fast I run the bit. This whole bowl was something like 6 or 7 hours of machine time plus all the setup time around it.
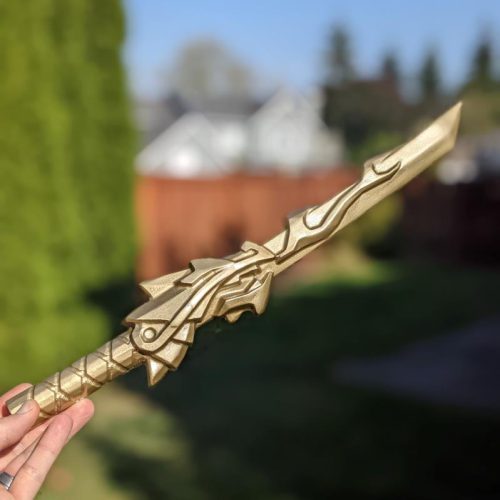
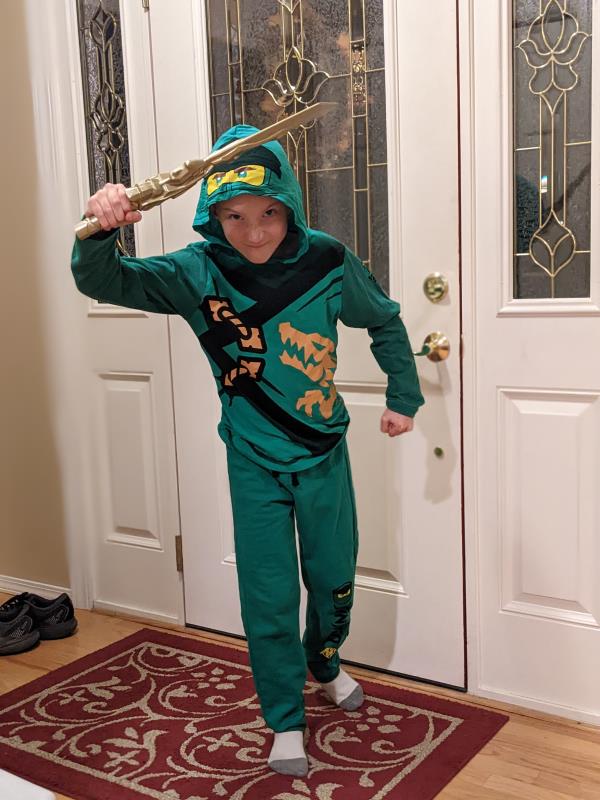
As we approached Halloween, we went through a lot of ideas for Elijah’s costume. Since we haven’t done trick-or-treating for the last couple of years, we decided to let him get an actual costume. He chose to be the green ninja from Lego Ninjago. I couldn’t resist making part of his costume so I set out to make a dragon sword to go with it.
I wouldn’t have gotten far if I hadn’t found an existing model, but luckily Thingiverse came through for me. I pulled that model into Fusion 360 and spent hours trying to figure out how to cut it nicely on the CNC machine without taking forever. I was able to apply a lot of learnings from my Luther Rose project.
The final product was carved out of a scrap 2×4 and I did it in two separate halves. If I had it to do over again, I think I would learn how to program in a cut that I can flip over halfway through because the seam between the two pieces was visible even in the finished product.
Once the pieces were glued together, I applied a few coats of a filler primer with sanding in between. The sanding took a long time with all the nooks and crannies. Thankfully, Elijah got interested in the project at this point and helped with the sanding.
We finished it off with a couple coats of high-quality gold paint. The final product looked amazing! It makes me want to do another one at the biggest scale that my CNC could handle…
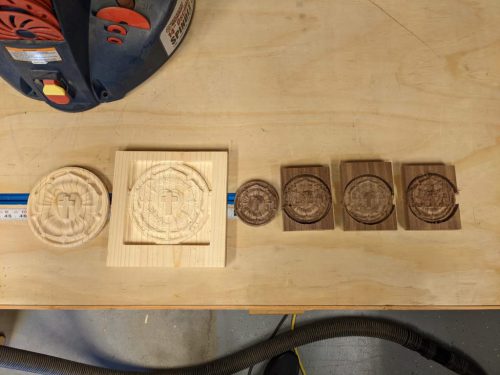
All of my CNC work up to this point has been two dimensional. I draw lines and then have the machine cut them to a certain depth. But there’s a whole other world of three dimensional carving that I have never tried so I invented a project to learn a bit about that.
For a model, I picked a Luther Rose model from Thingiverse. I brought it into Fusion 360 and spent a long time learning about all the different 3D tool paths that it has. I knew that I wanted to do one roughing pass to get rid of most of the material and then do a finishing pass with a much smaller bit to get the detail. I planned the first pass with a 1/8″ endmill and then a follow up with a 1/16″ ball nose mill. (I had to buy a special collect to hold the 1/16″ endmill because it only had a 1/8″ shank.)
From there it was off to the CNC to try it out. What followed was a long series of errors. The board would slip, I’d lose my zero when I changed bits and not be able to reset it, the bit would slip in the chuck etc. I started with some cheap pine boards and eventually moved to 3″ walnut squares.
These are all failures… err… steps in the learning process.
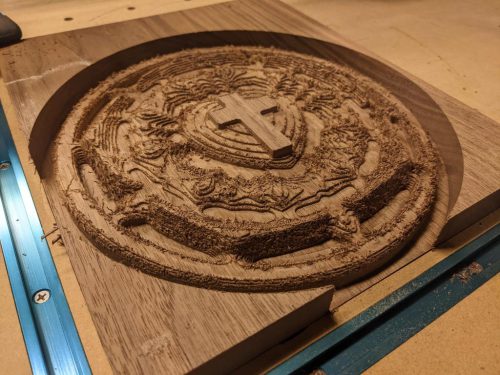
With much perseverance, I finally got it dialed in! On the 3″ walnut pieces, the first pass took about an hour and then the second pass would take 3-4 hours. Usually I stay in the garage when the CNC is running, but this was the first time that I let it run attended. I would go out and check on it regularly and I’d watch it via the camera in the garage. Working from home was a big advantage because I could run it throughout the day while I worked.
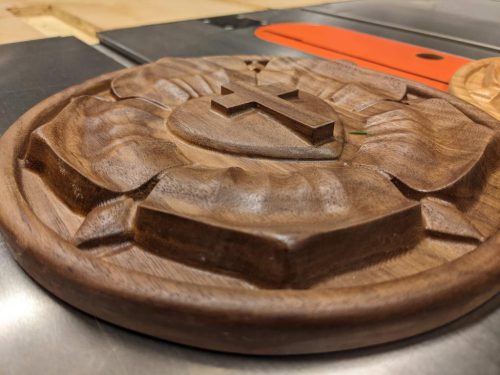
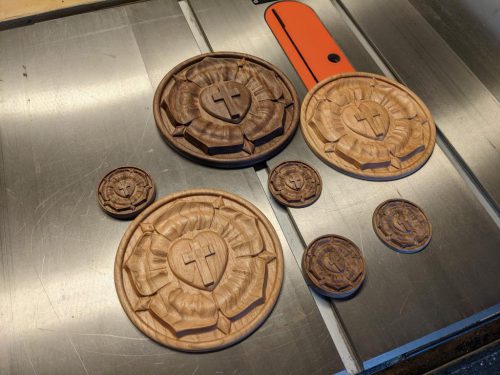
After I made four successful roses and ran out of the walnut board, I felt like I still had more to learn. I also had some very wide scraps of wood leftover from the dresser build. So next I set out to make a couple 8″ roses out of cherry. I switched to a 1/4″ endmill for the first pass and an 1/8″ ball mill for the finishing pass to keep the total time down. Neither one of those cherry roses was flawless, but with a lot of sanding afterwards, they look great. And then the pièce de résistance was a 9.5″ wide piece of walnut. That one started warping a bit as I cut it, but I was able to salvage it with a lot of hand sanding.
It was a huge learning experience, but it was also a lot of fun. I feel like I’ve unlocked a new woodworking skill! There’s still plenty to learn, but I won’t avoid a project if I need to do some 3D stuff on the CNC.
After the first pass with the big piece of walnut
Second pass
Follow me on Instagram @martenswoodworks. I usually post mid-project updates to stories and then make posts for the finished projects.
As mentioned previously, I lost control of my @martenswoodshop Instagram account. Since then, I’ve realized that I really do like having a single place that can easily function as a portfolio of my work. “Oh you build stuff? What do you like to make?” It’s a lot easier when I can just send a simple URL. And it’s also good motivation for me when I look and see how long it has been since my last project post. It makes me want to get out and do more!
So if you’re at all interested in this kind of thing, please follow @martenswoodworks. I reposted some of my projects to that account and I’ll be posting more going forward. I’m wrapping up a project soon that involves 3D carving on the CNC!