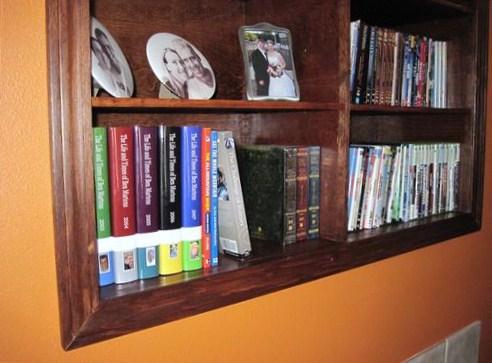
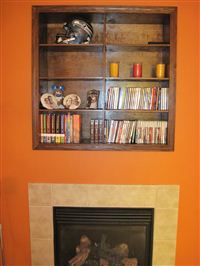
 I’ve had the last 1.5 weeks off from work, and other than a three day trip for Christmas, I spent most of it at home. My project over the break was some new shelves to go above the fireplace. I was no longer happy with the look of the old ones, and with Tyla living here starting in April, I wanted something more versatile.
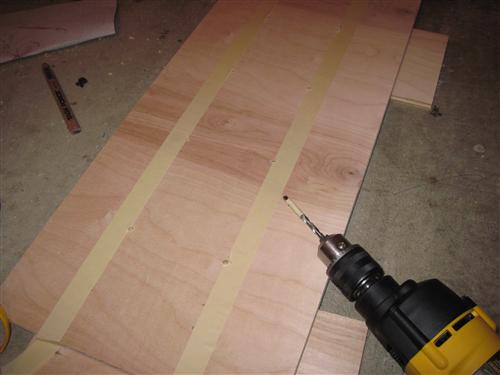
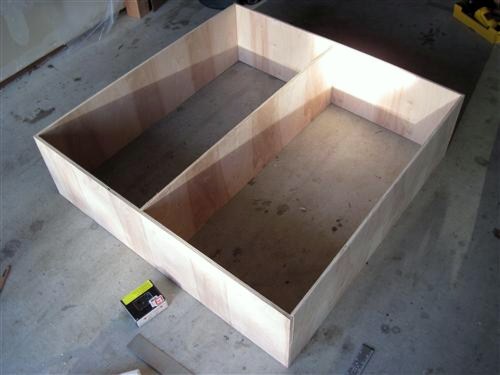
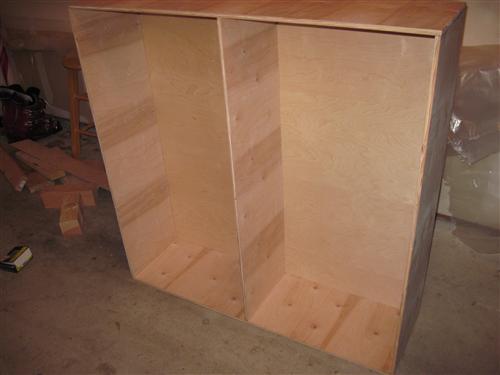
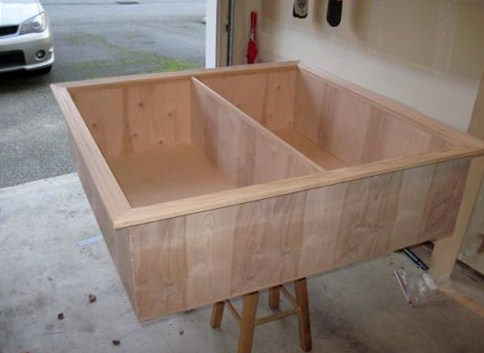
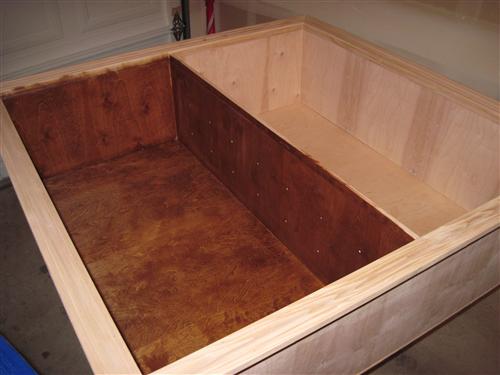
The project, of course, required about four trips to Home Depot, but all in all, I’m pretty happy with how it turned out. It’s a basic box design with a divider down the middle. The shelves are held up with adjustable pegs and there is molding around the edge of the box to make it look like the shelves are really built in. The end result looks nice, but when I look at it, I see a bunch of mistakes. I debated whether or not I should share them with you, but why not? By this point you know I have nothing to hide. Plus, it’s a good reminder for the next time I do a similar project.
- I used plywood and then faced it with solid wood trim. I faced everything on the front side of the shelves, even the edges that are covered up with the molding. That last part turned out to be a mistake. I thought it would be simpler, but putting molding on top of the facing on top of the plywood wasn’t the best choice.
- Trying to make a picture frame effect out of molding is TOUGH.
- I forgot to glue some of the pieces. They are only held in with nails.
- I used 1/2” plywood. Putting 1.5” finishing nails into plywood that thin was difficult for me. Too many times the end of the nail would pop out the side of the plywood. I know that’s a lack of skill on my part, but maybe I can use it as an excuse to buy a compressor and nail gun.
- If I was doing it again, I wouldn’t put the divider down the middle. It meant twice as many peg holes and there are one or two holes that are off by a fraction of an inch. The end result is that the shelves on each side of the divider don’t always line up perfectly.
- For some reason, the polyurethane on the back wall of the shelves never dried completely. It’s still a tiny bit tacky as I write this. I only put one coat on because I was afraid if I sanded the rest, I’d get dust drying into the back wall.
- I missed some spots of glue when I was wiping it off. When you stain, those areas don’t take the stain as well and it really shows up.
I could probably continue, but you get the idea. As I sit across the room looking at the shelves, I really can’t see any of these problems so I’m still happy that I built them. I look forward to doing more projects like this and shortening my list of mistakes.