Studio711.com – Ben Martens

Instagram Photo Frame

A while back I stumbled across a coupon for 100 free 4″x4″ prints. I’ve had a project in the back of my mind that involved something about displaying a bunch of Instagram photos. This seemed like a good match so I ordered them. (By the way, I later discovered that if you use the Shutterfly app on your phone, you get unlimited free prints so this wasn’t much of a coupon.)

The 100 photos arrived and sat around for a while as I thought about how to do this. My initial thought was to get a ton of practice making frames and pump out 100 identical simple frames. That sounds painful, but what stopped me was realizing that I had no good way to attach them all to the wall without making at least 100 holes in the wall. Then I thought about making a single frame that could hold 100 photos. I’ll take you along the project in more detail that I have in the past. If you follow my woodworking Instagram account, some of these pictures will look familiar.

The first step was to figure out how big to make this and what aspect ratio it should have. I started laying them out on my table and quickly realized that a 10×10 grid of 4″x4″ prints was going to monstrous. I settled on a 6×6 grid.

Also sitting on the table in that picture, you can see a jig for making photo splines. I made that jig as well as a miter jig. Both came from David Picciuto over at makesomething.tv.

I figured out the spacing between the pictures and the resulting dimension of the frame and started milling up the walnut to make the outer frame. I cut a rabbet in the back to hold the glass and the plywood backer and then did a very slight chamfer on the inside of the frame. Then it was time to cut up the walnut into the individual frame pieces.

I thought I had nailed the miter jig, but with a frame this big and wide, even the tiniest error was amplified. My frame wasn’t even close to fitting.

I almost threw in the towel at this point, but ehh, it was already kind of ruined so why not try to fix it? I basically free handed the miters and nibbled away with tiny increments to all the corners until somehow it all came together! If you look closely, you can tell that I’m still off by the tiniest of margins, but hey, it’s not bad considering how I got there. I used blue painters tape for clamps and glued the pieces together.

The next step was to try out my spline jig. It looked pretty wild, but in reality, I felt like the whole setup was pretty safe. Everything was clamped on place and all I had to do was move the sled through the blade. But if I was going to do frames this big on a regular basis, I might make a bigger jig.

I then used a bunch of trial and error to cut splines that were exactly the right thickness. Those got glued into place, trimmed with a flush cut saw and sanded smooth.

At this point, I felt like the project was really going to work so I headed to TAP Plastics and had them cut a piece of 5/64″ P99 non-glare acrylic. They can cut very precisely there and when I brought it home, it was a perfect fit. I left the protective paper on until the end though.

The “only” thing left was to cut a grid of very thin maple strips to hide the seems between the pictures when I put them down in a grid pattern. <insert tire screeching sound> How was that actually going to happen? When I originally thought this up, I envisioned a system of interlocking tiny dado cuts, but I had also planned for these pieces to be 1/8″ thick. Have you ever tried to cut 1/16″ deep dados that are perfectly positioned? My tests were not promising so it was back to the drawing board.

As I lay in the dark waiting for my son to fall asleep one night, it dawned on me that I could double up the grid pieces. So imagine a grid made out of 1/8″ thick by 1/4″ wide pieces of maple. Then make another grid and rotate it 90 degrees. Glue the two grids together and it should hold together pretty well.

That plan worked but wow, there were a LOT of extremely precise cuts to make. Thankfully my wonderful new table saw was able to slice consistent 1/8″ thick pieces off of a 2″ thick block of maple, rip them down to 1/4″ wide and then, with a crosscut sled, make all of those tiny little pieces to fit together. Any gap at all was very noticeable so I took my time and did it right. Now comes a long montage of 4 or 5 nights and voila! The grid was done.

As I assembled the grid, I used a combination of CA glue and wood glue. The CA glue acted like a clamp and the wood glue gave it strength. I also used a couple pin nails to hold it in place against the walnut.

At this point, I finished the frame with a 50/50 mixture of boiled linseed oil and mineral spirits. I wiped on the finish, waited about 10 minutes and then wiped off the excess. I let it dry for 1 day between coats and I applied four coats. The final step in the finishing process was to apply clear Briwax and then buff it out. (This photo was taken before the wax was applied.)

I cut a 1/4″ sheet of plywood to size and used spray adhesive to attach 36 pictures. To align them, I first placed the plywood under the grid and used a pencil to trace out all the boxes where the pictures should go. This process went pretty quickly and I took extra care (and lots of changes of disposable latex gloves) to make sure I didn’t get any adhesive on the pictures.

I put all the pieces together and then secured it all in place with a new point driver tool. That thing was a joy to use, but I feel like I need to make some more frames to make it worth the cost.

For the final step, I rolled out some fresh brown paper, traced out my frame, sprayed adhesive down on the paper and then set the frame on top of it. I cut around the frame with a knife and voila, I had a nice dust shield on the back. I have a couple very nice frames and I always wondered how and why they added that paper. Now I know. Thank you, again, David Picciuto for teaching me that trick!

The back of the frame also got a wire picture frame hanger and little rubber bumpers on the bottom of the frame so that it would sit straight on the wall.

I don’t know yet exactly where this will end up in our house, but for how many times I thought the project was doomed, it turned out great! At some point I feel like we’ll want to replace the pictures, but all I have to do is cut out another piece of plywood and glue on some more pictures. I think next time, I’d probably do the collage on the computer and then print off a single large photo. That would be a lot easier to align.

Best Of YouTube

I posted about this one before, but I’m loving “The Q” YouTube channel. He is making loads of interesting stuff out of cardboard and cheap materials. This is an awesome channel for kids of all ages to watch and try at home. The latest video really caught my attention. He makes a digital microscope out of a cheap webcam, a cheap light and some cardboard.

The “This Old House” YouTube channel is kind of hit or miss for me, but their recent video about diagnosing a plumbing problem was pretty enlightening.

And for the third video, let’s stay with This Old House because if you ever need to paint a window, you’re going to want to know about this trick for masking off the glass.

CLPAK End Of Year Program

Last night was the end of year program for Elijah’s school. The kids sang some songs, Pastor shared a devotion, and there was a graduation ceremony for the two kindergartners. It’s always fun to see the church so full of people who don’t normally attend! The program went well. A huge thanks goes to Mandy, Grace and Linda for all their hard work preparing the kids for the program and to the parents who helped with the rest of the night too.

Amazing Live Streams

The other morning I stumbled across the NASA live stream and they were doing a space walk. I threw the video onto the TV and Elijah and I watched live video of someone in space. Then later at work I read the day’s xkcd comic and it referenced a live video stream from a robot that is exploring the ocean. The future is now!

Mother’s Day Excursion

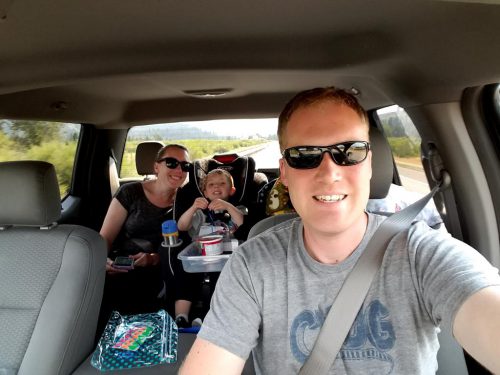
Since we were spending time on Tyla’s family on Sunday, we decided to celebrate Mother’s Day with just our family on Saturday. While Tyla was showering on Saturday morning, Elijah and I made a run to the donut shop. He picked out the biggest donut with sprinkles that he could find.

After that it was off for another ride on the Edmond-Kingston ferry. This is becoming one of our favorite family activities. We park in Edmonds (street parking is free east of 6th Ave) and then walk onto the ferry. Kingston has a number of little restaurants near the dock along with a park. Kudos to Elijah for snapping a picture of us.

We stopped at a new place for lunch, Main Street Ale House and had a great lunch. We had previously eaten at Drifters, and while that was fine, I think the Main Street Ale House will take precedence. For dessert we walked across the street to Mora Ice Creamery. That was delicious and filling.

The timing worked out well and a ferry was leaving so we got back on and rode back home. The weather was much nicer than we expected and I think we all had a great time!

Mother’s Day Gifts

Tyla and I don’t usually exchange gifts for Mother’s Day and Father’s Day, but I’ve been wanting to try out the vinyl cutter in the maker space at work and this seemed like a good excuse. You can easily buy a very similar sign on Etsy, but I wanted to see how hard it was to make one myself.

I had quite a bit of extra 8/4 maple laying around so I cut it in half and got it down to the approximate size of the finished sign. Then I spent some time on the vinyl cutter and cut out a couple versions of the sign, figuring that I’d screw one up and need to try again.

I stuck the vinyl down on the wood and the peeled up the letters, being careful to leave the interior of letters like A and O. Then I applied two coats of purple spray paint and peeled up the vinyl. That part took quite a while because the paint had made the vinyl brittle, but eventually I was done and it came out pretty well.

The final step was using a keyhole router bit to cut a notch in the back for easy hanging.

Will I do this again? Ehh… maybe if it’s something really custom, but it did take quite a while. If the sign you want is on Etsy for $20, it’s probably worth just paying for it.

Elijah also made a sign for Tyla. Ever since he saw this piece of purpleheart, he has talked about making it into a sign for Tyla. I bought a white pen and he wrote his name on the board. I finished it up with “loves mommy” and added a couple coats of spray lacquer.

Happy Mother’s Day!

Safeway Monopoly Recap

A year ago, I wrote a post detailing the terrible odds of the Safeway Monopoly game. And yet I still played it this year.

I had a pretty good setup for processing the tickets. Now that I have an Android phone, I loaded the app that lets you scan the second chance tickets automatically instead of typing them all in. I also created an Excel spreadsheet to help me keep track of which game pieces I had received and figure out if I had any winners.

Here’s what I won:

  • About 6 free donut coupons
  • ~$30 worth of free or discount coupons for products that I actually use
  • $5 cash
  • $5 Safeway gift card
  • ~9 free movie rentals from Fandango Now

The last one was the most common one. Many of the second chance game pieces went towards free rentals on the Fandango Now service. It’s not a service that I use otherwise, but hey, free is good. We’ve used three of those free rentals while my parents were visiting and I don’t have any complaints about the service.

So was it worth my time? Definitely not. But I still had fun and won a little more than last year so I guess that’s probably enough to keep me going next year.

The only difference is that I saved a few of the game pieces and I want to write an app that will automatically detect which board game pieces I have. Those could all go into a database along with the pieces from any friends who want to play with me. It will save us all the time of typing them in and we can pool our resources.

Ford Android Auto

One big reason why I waited for a 2016 F150 instead of getting a 2015 was because the 2016s were going to come with the new Sync 3 system. Sync 3 includes options for Android Auto and Apple Car Play. I’ll be focusing on Android Auto because that’s what I use.

My truck came from the factory with Sync 3, and while that was an upgrade to the original Sync, what I really wanted was Android Auto and I didn’t have that version of the firmware. Late last year, a firmware update for Sync 3 which adds Android Auto and Apple Car Play leaked online. I saw hundreds of people reporting success installing it themselves, but I was a little nervous to brick an expensive piece of my truck. So I waited. And waited. And waited.

This week I finally saw the update appear on the Ford Sync website. I quickly downloaded it onto a USB key and headed out to my truck. The install took 20-30 minutes, but when it was done, I had Android Auto! It’s pretty slick. You can easily switch back and forth between Ford Sync or Android Auto. Maybe I should pause to explain what Android Auto is…

The common problem with fancy head units in vehicles is that by the time you buy one, it already feels obsolete. And in 10 years? It’s almost a joke how far technology has progressed leaving your fancy head unit in the dust. But we carry around phones in our pockets that get upgraded every few years, have internet connections, and have way more capabilities than head units. So why don’t we just use the head unit as a dumb display and use the phone as the brains of the head unit? That’s exactly what Android Auto does. When you connect, an app starts up on your phone and is displayed on the head unit. It’s a simplified interface with bigger buttons and a reduced set of capabilities for safety. But even with those restrictions, it’s AWESOME!

For example, I can touch the voice button on my steering wheel and talk to Google to send text messages, ask the internet a question, etc. I can pull up the maps and say “Find the nearest Dairy Queen”. A list shows up on the screen, I pick one, and it finds the route with the least traffic. My podcast app integrates with the system as does Spotify. It’s super slick and very snappy. If you want to see it in action, I’ve included a couple photos below but you can also head to YouTube and find lots of demo videos.

My only complaint at this point is that you have to plug in your phone to use Android Auto. They technically do support Bluetooth connections, but I don’t know if that’s just coming later or if it requires slightly different hardware. It’s not the end of the world because I often plug my phone in while I’m in the car anyway.

The best part is knowing that this interface will keep getting updated and improved, my maps will always be up to date, and I don’t have to pay any silly subscription fees to get live traffic on the maps in my vehicle!

Garden Update

Our garden is off to a shaky start. I started the plants indoors and I did it WAY too soon. The tomato plants took off but rapidly started crowding each other out. I moved some to solo cups and they are growing and some even have flowers on them. I’m trying to put them outside for a bit each day in hopes of a good transition.

The zucchini plants came up too and i had them in 5 gallon buckets. They grew in really weird shapes along the ground with very little elevation. After a few days moving in and out of the house, I put them in the garden. So far… ehh… I don’t have high hopes that they will succeed.

Lesson learned: forget starter plants. It’s impossible to predict the spring weather around here. I’m about ready to just throw the rest of this stuff outside, let it die, and then buy starter plants when the weather is warm enough. Next year I’m just going to copy our neighbor. She has a great garden!

Grizzly Bandsaw Riser Block Kit

Keeping up with the theme from yesterday, I realized that I haven’t written about the riser block kit for my bandsaw. I got the Grizzly bandsaw 1.5 years ago and have really enjoyed it. It gets used most often for curvy cuts and resawing thick stock.

I never really felt like I had the hang of resawing thick boards. I always got a lot of blade drift and I’d just try to free hand it to compensate for the drift. It sort of work, but I wasted a lot of material with wavy cuts.

For Christmas, Dad and Mom got me a riser block kit for the saw. The stock configuration gives you about a 5 3/4″ capacity but the riser block kit doubles that. I don’t usually work with 11″ boards, but I do regularly have 6 and 7″ boards so this is very handy. Getting the kit also meant that I had to get rid of my old blades and buy longer ones. I had learned a little more about blades by this point so I bought some nicer Timber Wolf blades. I have one for resawing and one for cutting smaller curves. I don’t know whether I have it all tweaked better this time or if the blade made all the difference, but wow, resawing with this thing is incredible! I can just set the fence to the thickness I want and watch the saw plow through. It has no problems going through 8″ of hard maple and when I’m done, I have a pretty smooth and straight cut. It means I no longer fret too much if I have to resaw a 1″ board into two 3/8″ boards. I know I can nail the cut right on the money.

P.S. If you follow my woodworking account on Instagram, you’d have already seen this picture.  @martenswoodworks