Studio711.com – Ben Martens

Home Improvement

Front Yard Project Recap

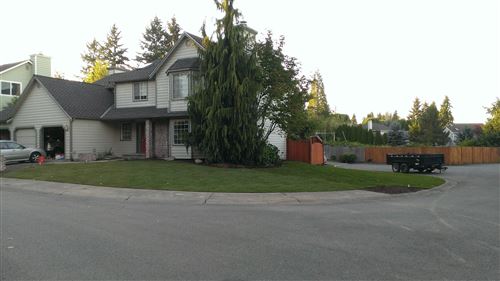
It was a wild week, but 9 days was all it took to polish off the front yard. We had taken a break after finishing the back yard to recover and also because Tim was re-siding his house. Here’s a rough breakdown of the front yard project:

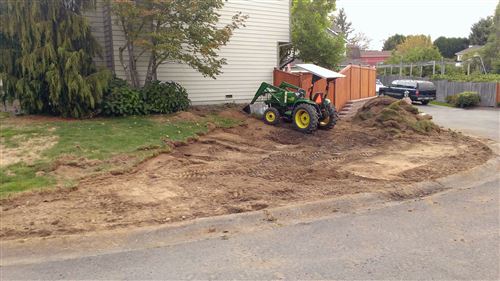
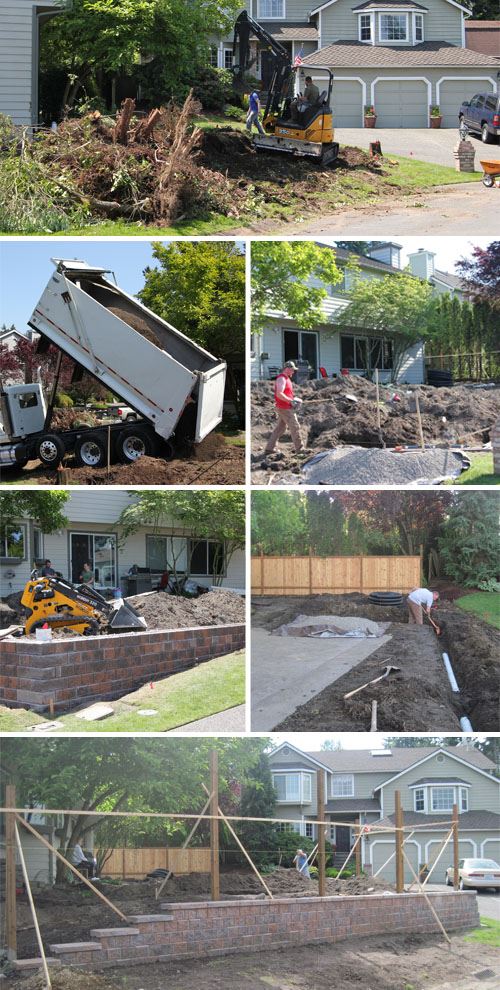
  • Dad and I started on Friday the 19th by digging a trench under the sidewalk. We picked up the tractor, truck and trailer. Then we used the tractor to fill up the trailer, make a run to dump it, and then scraped off some more sod.
  • On Saturday, Don, Logan and Tim joined in and we made huge progress. The trailer made non-stop runs all day long getting rid of the sod and the dirt that was being scraped off with the tractor. While that was happening, three dump trucks arrived with the new dirt that was replacing the old dirt.
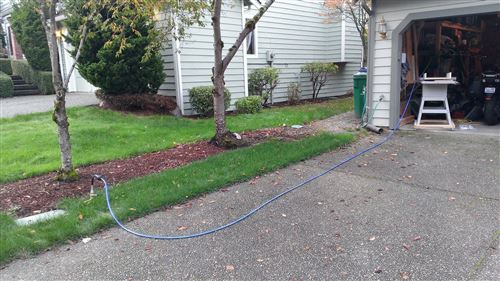
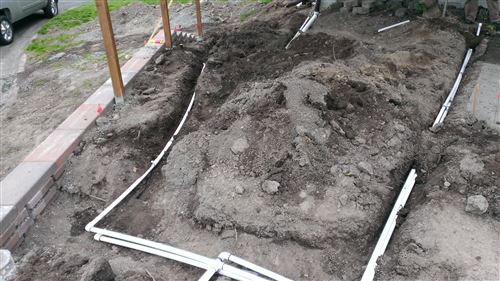
  • By the end of Sunday, all of the old dirt was gone and the new dirt was pretty much in place. We also rented a trencher and in just two hours, we had trenches for irrigation. It might seem silly to trench through new dirt, but we still had a couple more inches to go under the new dirt and it was almost like digging in concrete.
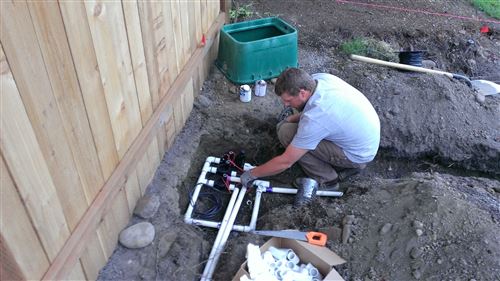
  • Tim and I spent Monday through Thursday evenings out in the yard plumbing for irrigation. It was a wet, soggy mess as we got over 2 inches of rain. I bought a hand pump to help clear out the trenches but there were big sections of the yard that were just completely saturated.
  • We took Friday off in hopes of letting it dry out just a little more. All I did was pick up a few more yards of dirt and left it sitting in the trailer for later.
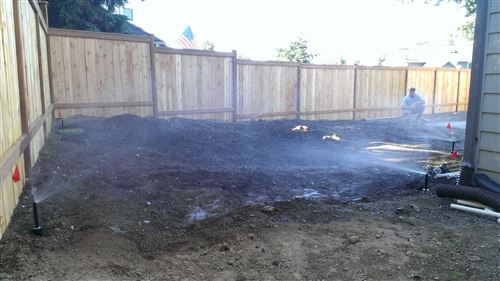
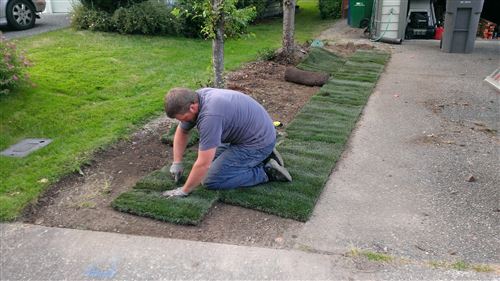
  • Saturday we started by spreading the remaining dirt to really level everything out. 2600 square feet of sod was delivered, and, with the help of two guys Tim knows, we had it almost all in by 2pm. We returned the tractor, spread one more truck load of dirt, finished off the sod, and then tested out the irrigation.
  • I spent Sunday by myself cleaning up the yard, washing the truck, returning tools, etc.

It’s incredible how much work got done in such a short amount of time. Here are some stats:

  • The front yard added up to 117 hours of labor (compared to 310 in the back yard.)
  • Each load from our house to the spot where we dumped the sod took about 75 minutes round trip
  • 14 trips with the dump trailer to remove the old sod, and there was 3-4 yards in each load
  • 53 yards of beautiful new “supreme mix” dirt added, including three 15-yard deliveries via dump truck
  • 500 miles on Don’s truck for this project
  • 10.6mpg average for the truck while we were making the runs to dump the old sod
  • 3.4 gallons of diesel used in the tractor over the many many hours that it was running

Because our scheduled was so compressed, I didn’t stop to take as many photos or do fancy timelapse videos. Thankfully Tyla and Mom snapped a bunch of photos and one of my security cameras caught some of the action.

THANK YOU once again to all of the friends and family that helped out! We had exactly the right amount of help to get this done. And a huge special thank you to Tim. Without you, this project would never have been attempted. We couldn’t have afforded to pay a contractor to do this, and I don’t know nearly enough to attempt something like this on my own. I loved learning about all this stuff and it was awesome to spend so much time out in the yard working with you. Thanks for putting up with all of my questions, my stress, and my mistakes!

Outlets

You can never have too many outlets in your shop. I finally got fed up with running extension cords all over the place so while Dad was visiting, we got our electrician on. Three new outlets were added inside: one near the bottom of my shelves to power the air compressor and the battery tender for the motorcycle, one by the irrigation clock, one up in the rafters by the IR light and the security camera. We also added two more outside that are on the same timer circuit as my outdoor lights: one is near the ground and one is up under the eaves. Why do that? For Christmas lights of course! I’ll have easy places to plug them in and then I’ll be able to control them with our fancy timer switch from inside the house. Thanks for the help Dad!

Front Yard Plan

My neighbors have had to look at quite a mess for the past couple months. The back yard is beautiful but all we did in the front yard was tear out all the plants and leave 4-5 yards of dirt piled up in the side yard. We took a break from that project to give Tim time to put new siding on his house. The siding is done so it’s back to the yard project!

The front yard should go much quicker than the back yard did because we’re doing a lot less work. Here’s what is on the agenda:

  • Scrape off all the sod and the top ~6” of dirt
  • Bring in new dirt
  • Add downspout drains out to the street
  • Extend the back yard irrigation system into the front yard.
  • Install new sod

If all goes according to plan, we’ll be done in two weeks. I can hear you laughing now. When’s the last time Tim and I worked on a project together and had it go “according to plan”?

Irrigation Cost

As I ran the irrigation system for the first few times, I had no idea how much money it was costing me. We’re only billed every two months so it would take a while to find out and I didn’t want a big surprise. To get a rough idea, I ran each zone for a few minutes and then took a reading from the water meter. Thankfully we have very accurate water meters so I was able to get good readings.

Coupled with that effort, I also put some jars around the yard as the irrigation ran to see how much water it was putting down. The books and web sites I’ve read say that you should give your yard 1” of rain per week spread over either one or two sessions. This encourages the grass to build up a better root system than they would if you watered a little bit every day. Each zone in my system needs to be on for 30 minutes to give the grass 1” of water.

Putting all that info into a spreadsheet tells me that it costs about $4/week to water my lawn. That will probably be closer to $10 once we get the front yard done. For a huge portion of the year, it’s either cool or wet enough that I won’t need to water, but during those few hot dry weeks we get in July and August every year, it will be awesome to have a healthy green lawn.

Backyard Completed!

It has been a long road and this will be a long post, but Tim and I are finally done with the back yard. I got the two gates built, installed and stained and on Saturday at noon, I declared the project done. “Done” here means that all the big pieces are completed and the yard can be locked up again. There are still plenty of smaller items like making one final dump run, adding bark chips, etc but those aren’t as urgent and I’ll just work them into my normal home improvement projects. The front yard is still a mess too, but that will sit for a couple months until Tim is available again. The front yard should be a lot smaller project too. So with all those caveats, I’m done!

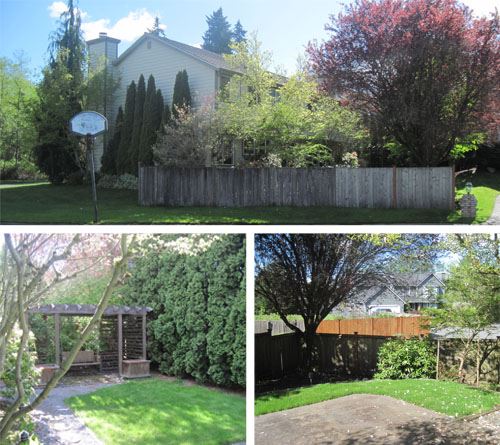
When I show people photos of the finished project, it’s kind of anti-climactic. They look at the before photo and wonder why we changed anything. So let me go back and list out the reasons why we weren’t thrilled with our old back yard:

  • Any time it rained, the yard was muddy. Drainage was horrible/non-existent and water would sit in the yard for days after a heavy rain. From roughly November through May the grassy area was pretty much unusable.
  • The cedar swing was nice but it took up a big chunk of our yard. We only used it once or twice for photos because it was a giant spider web. As I started tearing it down, I also learned that it was very rotten and probably would have caused some serious injury before too much longer.
  • The fence was rotten and falling over. I had propped it up with some extra supports but those weren’t enough to hold it anymore.
  • The pine trees (arbor vitae) along the fence were getting close to the end of their life and were starting to brown. The thundercloud plum in the corner was disaster. Please don’t ever plant one of these trees.
  • Most of the bushes in the back yard were not pruned well by the previous owner and were overgrown.
  • The “retaining wall” appeared to be constructed with old concrete from the patio that was there before the new one was put in. It was about two feet high and I can’t tell you how many times it crumbled underneath me. We would have constantly been pulling Elijah back from it as he toddled around (if he could even make it there in the mud.)

So yes, on the surface it looked ok, but as we got more familiar with the yard, we knew it’s time had come. Now we have a beautiful new yard!

[UPDATE: These links are broken now, but I’ll leave the text] I made a Photosynth of the back yard in it’s current state. If you forgot what it looked like before, you can check out this previous Photosynth. Honestly I do like the way the old yard looked like it had been lived in and wasn’t brand new. This new one has so much more space though and it will grow in like the old one did (but without getting out of control!)

It should come as no surprise that I was collecting a lot of data about this project as we went. Here are some facts:

  • Major features completed: French drains, irrigation, retaining wall, and fence
  • Square feet of grass before: 475. Square feet of grass after: 1175
  • Number of retaining wall blocks: 441
  • Linear feet of fence: 152
  • Gates: 2
  • Posts: 21
  • Cedar fence panels: 332
  • Gallons of stain: 13.5
  • Nails: 2200
  • Yards of dirt added: 34
  • Home Depot Transactions: 32
  • Project calendar duration: 44 days
  • Actual days spent working: 41 days (only 3 days with no progress!)
  • Days affected by rain: 1
  • Estimated savings by doing it ourselves1: 58%
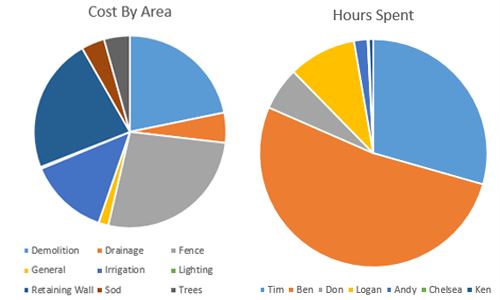
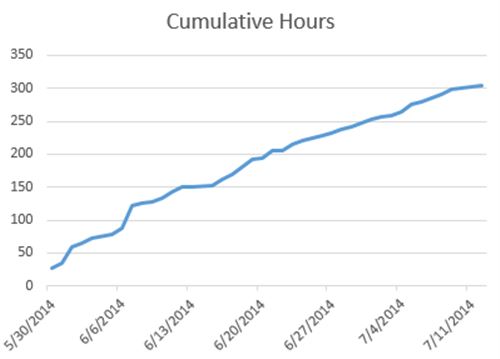
  • Total Hours spent: 310

1 This calculation was done using a standard contractor markup for materials and then assuming that professional labor would work 30% faster than we did (except for Tim.)

Here are a couple charts breaking down the cost by feature of the yard and then another one showing how much time each helper put into the yard. Thank you everyone! The cumulative hours chart shows that we kept the rapid pace up for the whole project. I don’t think we could have done it quicker without taking more vacation or hiring more help. Nearly every available hour was spent working on the yard.
And finally, here are some photos, starting with before:
During:
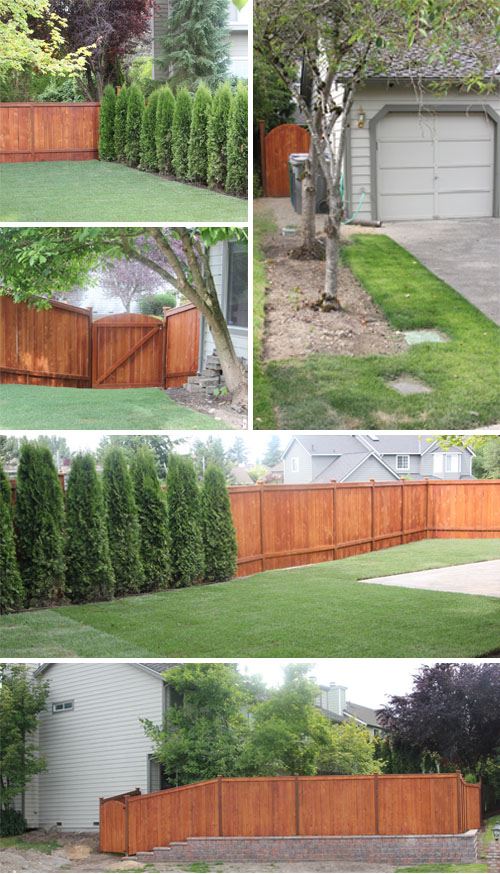
After:
And finally, here’s a complete list of all the timelapses I made along the way.

This is the last you’ll see of the yard updates for a couple months until we start on the front yard. Until then you’ll find me in the back yard admiring our work with meat on the grill and a beer in my hand.

Links to previous updates 1, 2 , 3, 4, 5, 6 and 7

UPDATE: The front yard is done now too!
Yard Project Update 7

Everything is coming together! This week is all about the finishing touches. To get started, we put down two more yards of dirt on Monday.

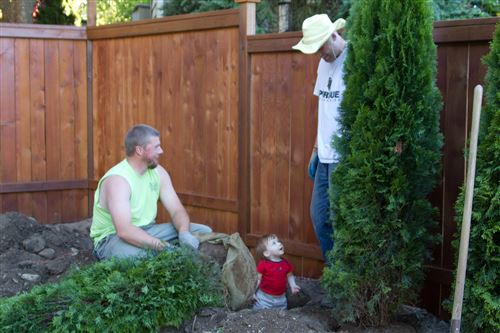
On Tuesday, we planed 10 emerald green arborvitae trees along the fence line. We got 7 foot trees so that they were just taller than the fence now and they’ll grow ~6” per year until they’re back up at the height we had before. The old trees that were there really helped to hide the fact that the neighbor’s house is so close. There’s a drip irrigation line running around the trees so I set up the controller to keep them well-watered while they are adjusting to our yard.

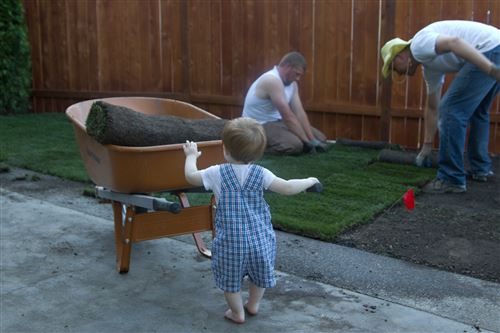
Wednesday morning we had sod delivered all the way from Oregon. It’s a mixture of fescue and rye and it looks beautiful! Tim and I laid it all down on Wednesday night. The irrigation is a huge help again here because the sod really needs a lot of watering to recover from it’s journey. On top of that, it’s supposed to be 90+ degrees for the next 7 days. Hopefully everything stays green and healthy and puts down good roots. If that all goes well, we’ll be able to use the yard in just 2-3 weeks!

There is a seemingly endless list of small things that I can keep doing on the yard, but I’m calling it “done” once I finish building the second gate, install it, and then stain both gates. At that point we’ll have a closed back yard with everything planted. Dump runs, mulching, etc can be handled much more slowly as I have time. The next update you get on this project should be the grand finale! (At least for the back yard… the front yard starts in a couple months.)

Links to previous updates 1, 2 , 3, 4, 5 and 6

Yard Project Update 6

Tim and I put 2 more yards of dirt and leveled out the yard. It’s sitting for about a week to compact and get ready for sod. I got the fence stained (see the timelapse below). Don and Logan came over on Saturday to help set the remaining three fence posts. There’s one short fence that sticks out from the east side of my house with a gate on the end and then the other post was for the gate on the west side of the house. I got the short fence built, posts cut off and capped and started building the first gate.

This is an exciting week as we’ll be putting in trees along the back fence between our house and the neighbors (same basic type that were there before) and then we’re going to put down sod! The original plan had been to seed but given the small size and our desire to be DONE we are just going with sod.

I did some calculations and we in more than doubling the amount of grass we have in the back yard! The new grass area will be about 250% of what we had before.

Links to previous updates 1, 2 , 3, 4 and 5

Yard Project Update 5

These updates are coming fast and furious now. Lots of items are getting crossed off the list which feels great! So much of the work up to this point has been digging and doing early stages of tasks.

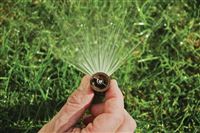
The sod that Tim put in by the front cherry trees is looking really healthy. The irrigation was all connected so I went out morning and evening and turned the valve by hand to water that section. A few days later, we hooked up the irrigation controller so now it’s all done automatically on a timer. The back yard irrigation is done and wired too. All the nozzles are in. We tested to make sure coverage was good and it was such a joy to see the whole area get perfectly covered with water. I used to spend so much time dragging sprinklers around and trying to get it all aligned correctly!

I finished putting up the fence rails and most of the planks. There’s a timelapse of part of that work below. Then Ken and Logan came over on Saturday to help me cut the final boards and attach all the tops rails. I also got all the post tops chopped off and the caps put on. The next phase there is staining and hopefully I’ll be doing that this week. That’s a tricky proposition though because I have to be really careful about overspray. If it isn’t feasible then I’ll be hand rolling the fence which isn’t the end of the world.

A couple other smaller tasks got crossed off too. I connected the sump pump to the drainage system, installed metal flashing along the fence that borders the neighbors yard to keep their higher dirt/pine needs from coming in direct contact with the bottom ~8” of fence, and I dug out part of our old rock pathway where we will now have sod.

Remaining tasks are adding a few more pickup loads of dirt to level out the yard, planting trees, installing sod, and building the gates.


Links to previous updates 1, 2 , 3, and 4

Yard Project Update 4

While it might not look that much different than a week or two ago, we’re crossing some major work items off the list. The drainage is completely done and covered up. We dug trenches for irrigation, laid the pipes, installed the heads, and filled in the trenches. All that’s left there is hooking up the controller. We even installed a bit of sod along the driveway. I think we’re going to sod the back yard instead of seeding. It’s a pretty small area so the cost isn’t huge, and it will get us a nice result sooner. Don and Logan stopped by to help me set three more fence posts along the wall.

The biggest remaining puzzle piece is the fence. I’m hitting that hard now and hope to make good progress over the weekend if the weather cooperates.

We are 227 hours into this project and doing pretty well with the budget. It’s a ton of work but it’s fun to see it start coming together. My life right now is pretty much wake up, go to work, come home, work in the yard until 9 or 10, go to bed. Tyla has been great putting in extra hours to take care of Elijah when I’d normally be helping out! We’re both eager for the project to be done so things can return to “normal” and we can enjoy the fruits of our labor. I’m able to list out the remaining work in quite a bit of detail which means that we’re getting closer to the end. At least it’s measurable with a pretty high confidence rate.

Links to previous updates 1, 2 and 3

Tips For Building A Fence

I am far from an expert on fence building so after reading a bunch of articles on the web and enlisting some help, I built one wall of my fence before starting on the rest of it. This turned out to be a good decision because I could make all my mistakes on a smaller scale and then move more quickly on the rest of the fence. Here are some of the tips I picked up along the way:

  • I used 10ft pressure treated 4x4s. You can get away with shorter posts but you have to be really careful about the depth of your hole. I prefer to leave them long and then saw off the tops at the very end of the project.
  • Set the corner posts first. This allows you to string a line between them and make sure the interior posts are all perfectly aligned.
  • Once you’ve determined where your posts sit (roughly every 8 feet), dig a hole that is roughly 10” in diameter and 3 feet deep. Dig so that the post will be centered in the hole once it’s lined up with the string.
  • Put a few inches of pea gravel or clear aggregate at the bottom.
  • You’ll need two people to line up the post. Attach a cheap 8ft piece of wood to the post, pound a stake in the ground and then screw the wood to the stake while holding the post perfectly straight in that direction (use a 4ft level.) Repeat for the other direction. Do this all the way down the line.
  • Mix your concrete and pour it in being sure to push the concrete around the post and work out any bubbles. Let them dry for at least a day before continuing.
  • I bought pressure treated wood for the rails, but you can probably get away with something else if you want to save money.
  • String two lines between your corner posts at the height of each rail. The bottom rail is about a foot off the ground and the top rail is right at the top of your planks.
  • Make sure you get those rails level or you’ll have a goofy looking fence. I used a nail gun to attach the rails to the posts. I was able to do this step by myself because I screwed in a temporary board on the opposite post to hold the rail in roughly the right spot until I attached both sides.
  • Attach the planks. This is where a nail gun really comes in handy. I’m using a 15-gauge finish/trim nailer with 1-1/2-in. galvanized nails.
  • If your planks but up against trees or bushes, consider staining that side of the planks before installing them. Some sites recommend staining ALL of your boards before you install them but I’m not going that route.
  • Once everything is installed, let it sit for a week or two. The boards will dry out and shrink quite a bit. You should have installed the planks so they were tight against each other but after they dry, there will be 1/8-1/4” between them.
  • Stain! I won’t give any tips since I haven’t stained the fence yet, but my plan is to use a sprayer with a semi-transparent natural cedar color stain. I’ll have to rig up some tarps to avoid overspray in our tight quarters.