Studio711.com – Ben Martens

Maker

From Batteries To Plugs

This year we received a gift of some battery powered ceramic Christmas tree decorations. (I’m not sure if this is the exact model, but it’s very similar.) They have a built-in timer that turns them on for 8 hours and then off for 16 hours. It’s very rudimentary, but it worked… for a few days. Each tree takes 3 AAA’s and we’d have to swap them out every few days.

After the Christmas season, I decided to convert them to plug power. I’ve done this type of thing before, but I’m not super confident in my abilities yet so I decided to purchase some parts to make life a little simpler instead of doing it from random scraps around the house. I bought a 4.5V power supply with three barrel plugs coming out if it and everything had white cords. I also bought power jacks that were the same size as the plugs and came with wires already connected.

From that point, I was able to figure out exactly where to connect the new wires. I did this with the continuity tester on my multimeter. This helped me figure out what was the start and end of the battery tray. I plugged in the power supply, connected to one of the jacks, touched the wires to the correct battery terminals and voila! Light! From there, soldering the wires onto the terminals wasn’t too difficult.

The trick was that without major surgery to the trees (or using a different connection), I wasn’t able to fit the jack into the footprint of the tree. And since the trees spend the rest of the year in styrofoam holders, I couldn’t modify the size of the tree. So the plan was to have those wires and jacks soldered in place but then the base would be removable.

I turned to Fusion 360 and modeled a base that is about 3/4″ tall and has a lip that surrounds the base of the tree. There’s a cutout in the bottom to feed the wires out to a hole for the jack. Since Fusion 360 is parametric, I was able to just adjust some parameters for each of the three trees and print out three different sizes. That worked but my initial design was a pure cone shape. It looked a little awkward, so I made the edges of the bottom wavy like snow and that improved things dramatically.

Thankfully the trees still work after this adventure and I’m excited to set them up next year. They will get plugged into the same setup and go on/off with the timer that controls the rest of the village. No more batteries to swap!

Automatic Cat Feeder Improvements

We are blessed to have quite a few people who can help take care of our cats while we are gone, but when we are gone for less than 48 hours, it seems like overkill to coordinate that and take time out of their day. We have an automatic cat feeder which works pretty well, but it only takes one failure to lose a lot of trust in it.

When we were in Yellowstone last summer, we had planned to only have Megan come over every 2 days and just use the automatic feeder. But one of the first nights, I checked our cameras (yes we have a camera in the cat room) and it looked like the feeder was jammed. I don’t know why the cats weren’t eating it but something was clearly wrong, so not only did we then need Megan over there every day, but she also had to make a late evening run over to our house to immediately fix the situation. (Thank you Megan!) Ultimately I think the problem was that the divider chute didn’t meet up with the bowls well but there might also have been an issue with the food not having enough room to drop out of the machine and onto the chute.

We haven’t used it since then but we have a coule more quick trips coming up so I decided to improve it. Through a LOT of trial and error in Fusion 360 and lots of 3D prints, I eventually designed a new attachment for the dispenser which not only shouldn’t jam as easily, but it is the perfect height for the bowls we like to use, it holds the bowls securely in place so they don’t slide away from the feeder, and it holds a piece of cardboard between the bowls so that one cat doesn’t get intimidated by the other. It even has a little hook on the back that fits into a spot on the feeder to securely hold it in place.

I learned Fusion 360 through Bob Claggett’s awesome Fusion For Makers class, but this was the most complex design I’ve ever attempted and I had to learn a lot along the way. I was 20 versions into my first attempt before I trashed it and started a new one that ended up at 15 versions. But now I have a super custom solution that should work great! I’ve run a lot of cat food through it to verify my solution and so far so good.

Fusion 360 is very intimidating, and I have a long way to go, but I’m slowly getting to the point where I can bring more complex ideas to life. Being able to model anything and then print it out is amazing!

If for some reason, you want this specific model, it is posted on printables.com.

Painting 3D Prints

I don’t know what inspired it but I decided to try my hand at printing 3D prints. We had just watched Inside Out 2 and I found a model of Anger on Printables.

My first attempt used red filament and then I used some of Elijah’s acrylic paints with brushes. Never having done this before, I had no idea what I was doing. The end result was pretty rough. I hadn’t done anything to fix the layer lines in the print, the paints very thick, and the brushes were cheap/damaged. It turned out so badly that I wanted to try again. (And I just now noticed that I forgot to paint the mouth.)

For the second attempt, I took more time. I started by doing four or five layers of filler primer with endless sanding in between. I bought some new (but still cheap) acrylic paint and brushes. The new brushes and paint worked so much better than my first attempt, but I still lacked skill and I was never able to get a brush free appearance, but this was a significant improvement from the first attempt.

The red and the black colors hid the brush strokes pretty well but it’s very obvious on the white parts. Maybe next time I’ll have to get a basic air brush setup and give that a shot?

DIY LED Panel Revisited

In May, I built my own 36×16 LED panel. The project was a lot of fun to build and taught me a lot, but honestly, I haven’t used it much since then. The original plan had been to build two of them and use them as Christmas decorations, but I can probably count on one hand the number of times I’ve turned it on. The software side of things was a mess which is a bit ironic given my profession. I had improved on the tutorial by writing my own app that ran on the desktop and communicated directly with the ESP8266 board. The board had very simple firmware which just received a stream of bytes and displayed it. That worked ok and I got a pretty good refresh rate, but the main issue was that after a few minutes, the board would stop updating and I couldn’t figure out why. After a long day of coding for my day job, I could never convince myself to spend time debugging this.

Fast forward to late November when I was watching a video from “The Hook Up” on YouTube about his Christmas light setup. It was at that moment that I realized that most of these Christmas light displays and lots of maker projects run on an LED control package called WLED. It’s free and open source and it’s very customizable. Could it work with my custom matrix?

About an hour later, I had it working, and most of that was me just fumbling around learning things. There was already a version of WLED that was compatible with my ESP8266 board so I loaded it on and instantly had a webserver that I could access from my desktop or phone. The built-in software is fantastic but there is also a big ecosystem of projects built on top of WLED if you want, for example, to display an animated gif on the matrix.

In the last week I’ve had it on more than I did in the previous six months. While it’s too late to build another one to use for the front window for Christmas, it has me thinking about next year.

Top 3D Prints

It took a while to convince myself to dive into the world of 3D printing. I wasn’t sure it would be worth it so I kept a list of every time I thought it would be nice to print something. Once I had a big enough list, I went for it. I quickly burned through that list and haven’t stopped! I surprise myself at how often it comes in handy, and how often I use it just to print something fun. Here are some of my favorite prints.

LUCKY 13 Printable Jointed Figure
This model prints in about 100 pieces and then has assembly instructions. The parts fit amazingly well and it’s a fun, poesable figure to have on my desk. There is a community of people that have made funny accessories for the figure too.
Articulated Axolotl
I didn’t know about axolotls when I was growing up, but they’re neat animals. Elijah loves to carry this one around the house and even takes it to school sometimes.
Pull Copter Finger Ring
I figured this would break pretty quickly, but they work amazingly well!
Drilling Tool and Dust Collector
I usually tape a paper lunch bag to the wall before I drill, but this is a lot easier to throw in my tool bag as I’m going around the house to do various jobs. I don’t waste time looking for paper bags and tape.
Motorola Two Way Radio Knob
This was one of my first custom designs to replace a cap that we lost. It looks great and sticks on so well that I took off the knob on the good radio and replaced that one too!
Camp Cot Foot Pads
I used to try and put cardboard under the cots in our tent to keep them from damaging the floor of the tent but these custom pads that I designed work a lot better!
Bandsaw Dust Adapter
One of my favorite 3D printer uses is making custom connections for my dust hoses. So many tools have slightly different sizes of dust ports and they’re hard to connect to my shop vac. Now I can get a perfect fit on every tool.
Grenade MK2 WW2
This one turned out so much better than I expected! I filled it with sand to give it a good amount of weight, added a cotter pin, and included a spring so that when you pull the pin out, the top flies off. It’s a great desk toy.

I’m not a 3D printing expert and there are a ton of options out there, but I’ve been very happy with my Prusa Mini. It’s a good entry level price and I just print and walk away. I think of all the prints I’ve done, I’ve maybe had one or two that didn’t come out correctly. It’s a quality product from a company with good customer support.

DIY LED Panel

If you saw my OneNote page for project ideas, you’d find a multi-year section with ideas for some kind of custom LED installation. My goal was to have every LED be individually addressable so I could make color patterns.

A couple of months ago, I was watching the weekly “Maker Update” video which shows interest projects going on in the maker community and was turned on to this LED wall project by Tech Random. Price has always been a major breaking point for me in the past when I’ve researched this along with confusion about exactly what kind of power supply I need. This project looked good enough to follow so I gave it a shot. All the materials and instructions are in that link so if you’re interested in doing it yourself, I recommend you use that as your shopping list.

If you read the link to the project above, you’ll see all the steps that I followed, but basically it consisted of the following:

  • I 3D printed a bunch of grids where each cell was perfectly sized to the spacing of the specific LED strips that I bought. I had to adjust the provided STL files to fit into my smaller printer. I ended up making 4×4 grids because that fit easily on my printer and tiled nicely into my 36×16 panel size.
  • The four LED strips that I purchased got cut down into strips of 36 lights and laid across a piece of cardboard. In retrospect, I wish I would have glued down some aluminum foil and then put the lights on top. That would have increased reflectivity and provided a little fire protection.
  • Each strip has positive, negative, and data wires and I had to solder connections between each wire in a snake pattern across all 16 strips. That was almost 100 solder joints but thankfully they all worked.
  • I bought ESP8266 boards to be the drive the display. I had never worked with these before, but they were amazingly powerful for only a few bucks each. Their main feature is that they have a WiFi chip built in. One of those boards got hooked up to the start of the panel and I was able to make a light move through all the lights in the strip.
  • Those boards couldn’t provide enough power for the whole strip though, so I used a 5v power supply to inject power at three points along the panel. This resulted in even power distribution across the panel so the colors looked the same in each LED.
  • The grids got hot glued on top of the LED strips and then a layer of diffuser cloth was upholstered on as well.

The software for this was a challenge. The project page includes some programs for the ESP8266 boards as well as a custom version of LMCSHD. The original design is that LMCSHD does the calculations for displaying whatever you want onto a grid of any size. Then it sends individual pixel instructions over a COM port (USB) to an ESP8266 which sends it over WiFi to another ESP8266 which is connected to the panel. I got that to work ok, but as I was debugging some issues with frame rate, I realized that I could simplify things if I just made the LMCSHD program talk over WiFi directly to the ESP8266 on the panel. I forked my own copy and got it working.

So at this point, I have a panel sitting behind my desk that plugs in for power but communicates wirelessly with an app that I run on my desktop to feed data to it. The frame rate is good for my purpose, but it still feels a little clunky to get set up and occasionally, the panel stops updating. I think I’m going to work on a simplified console app that sends some pre-programmed patterns to the panel and that’s probably what I’ll use most often.

“Use most often.” What does that mean? I don’t know. I can see it being a fun gimmick on some video calls or maybe I’ll get around to making a second panel and putting both in my front window for Christmas decorations. But even if it doesn’t get used a ton, I’m glad I built it because it has been a fun learning experience and it’s one of those things that I can continue to tinker with.

Ninjago Sword Prop

As we approached Halloween, we went through a lot of ideas for Elijah’s costume. Since we haven’t done trick-or-treating for the last couple of years, we decided to let him get an actual costume. He chose to be the green ninja from Lego Ninjago. I couldn’t resist making part of his costume so I set out to make a dragon sword to go with it.

I wouldn’t have gotten far if I hadn’t found an existing model, but luckily Thingiverse came through for me. I pulled that model into Fusion 360 and spent hours trying to figure out how to cut it nicely on the CNC machine without taking forever. I was able to apply a lot of learnings from my Luther Rose project.

The final product was carved out of a scrap 2×4 and I did it in two separate halves. If I had it to do over again, I think I would learn how to program in a cut that I can flip over halfway through because the seam between the two pieces was visible even in the finished product.

Once the pieces were glued together, I applied a few coats of a filler primer with sanding in between. The sanding took a long time with all the nooks and crannies. Thankfully, Elijah got interested in the project at this point and helped with the sanding.

We finished it off with a couple coats of high-quality gold paint. The final product looked amazing! It makes me want to do another one at the biggest scale that my CNC could handle…

Gridfinity Organization System

I have a pile of random screws, nuts, bolts, and washers in my shop. I buy little bags or boxes of random sizes of things, use a third of them, and then the bags sit around forever because they are such a mess that I can never find them when I need them. The whole thing seemed so random that I never really put much time into looking for an organization system, but now that I have 3D printer, I have the ability to custom make exactly what I need!

A couple of months ago, Zack Freedman released his “Gridfinity” system. The system is based on a grid of baseplates and then each bin/holder can be easily stacked in various combinations. I was downloaded exactly the bins I wanted, customized his model to make some new bins, and made a series of prints that resulted in a lot more organization. This is a project that I’ll keep adding to, but for now it feels good to have brought some order to the chaos. Not bad for ~$10 in filament!

3D Printer Enclosure

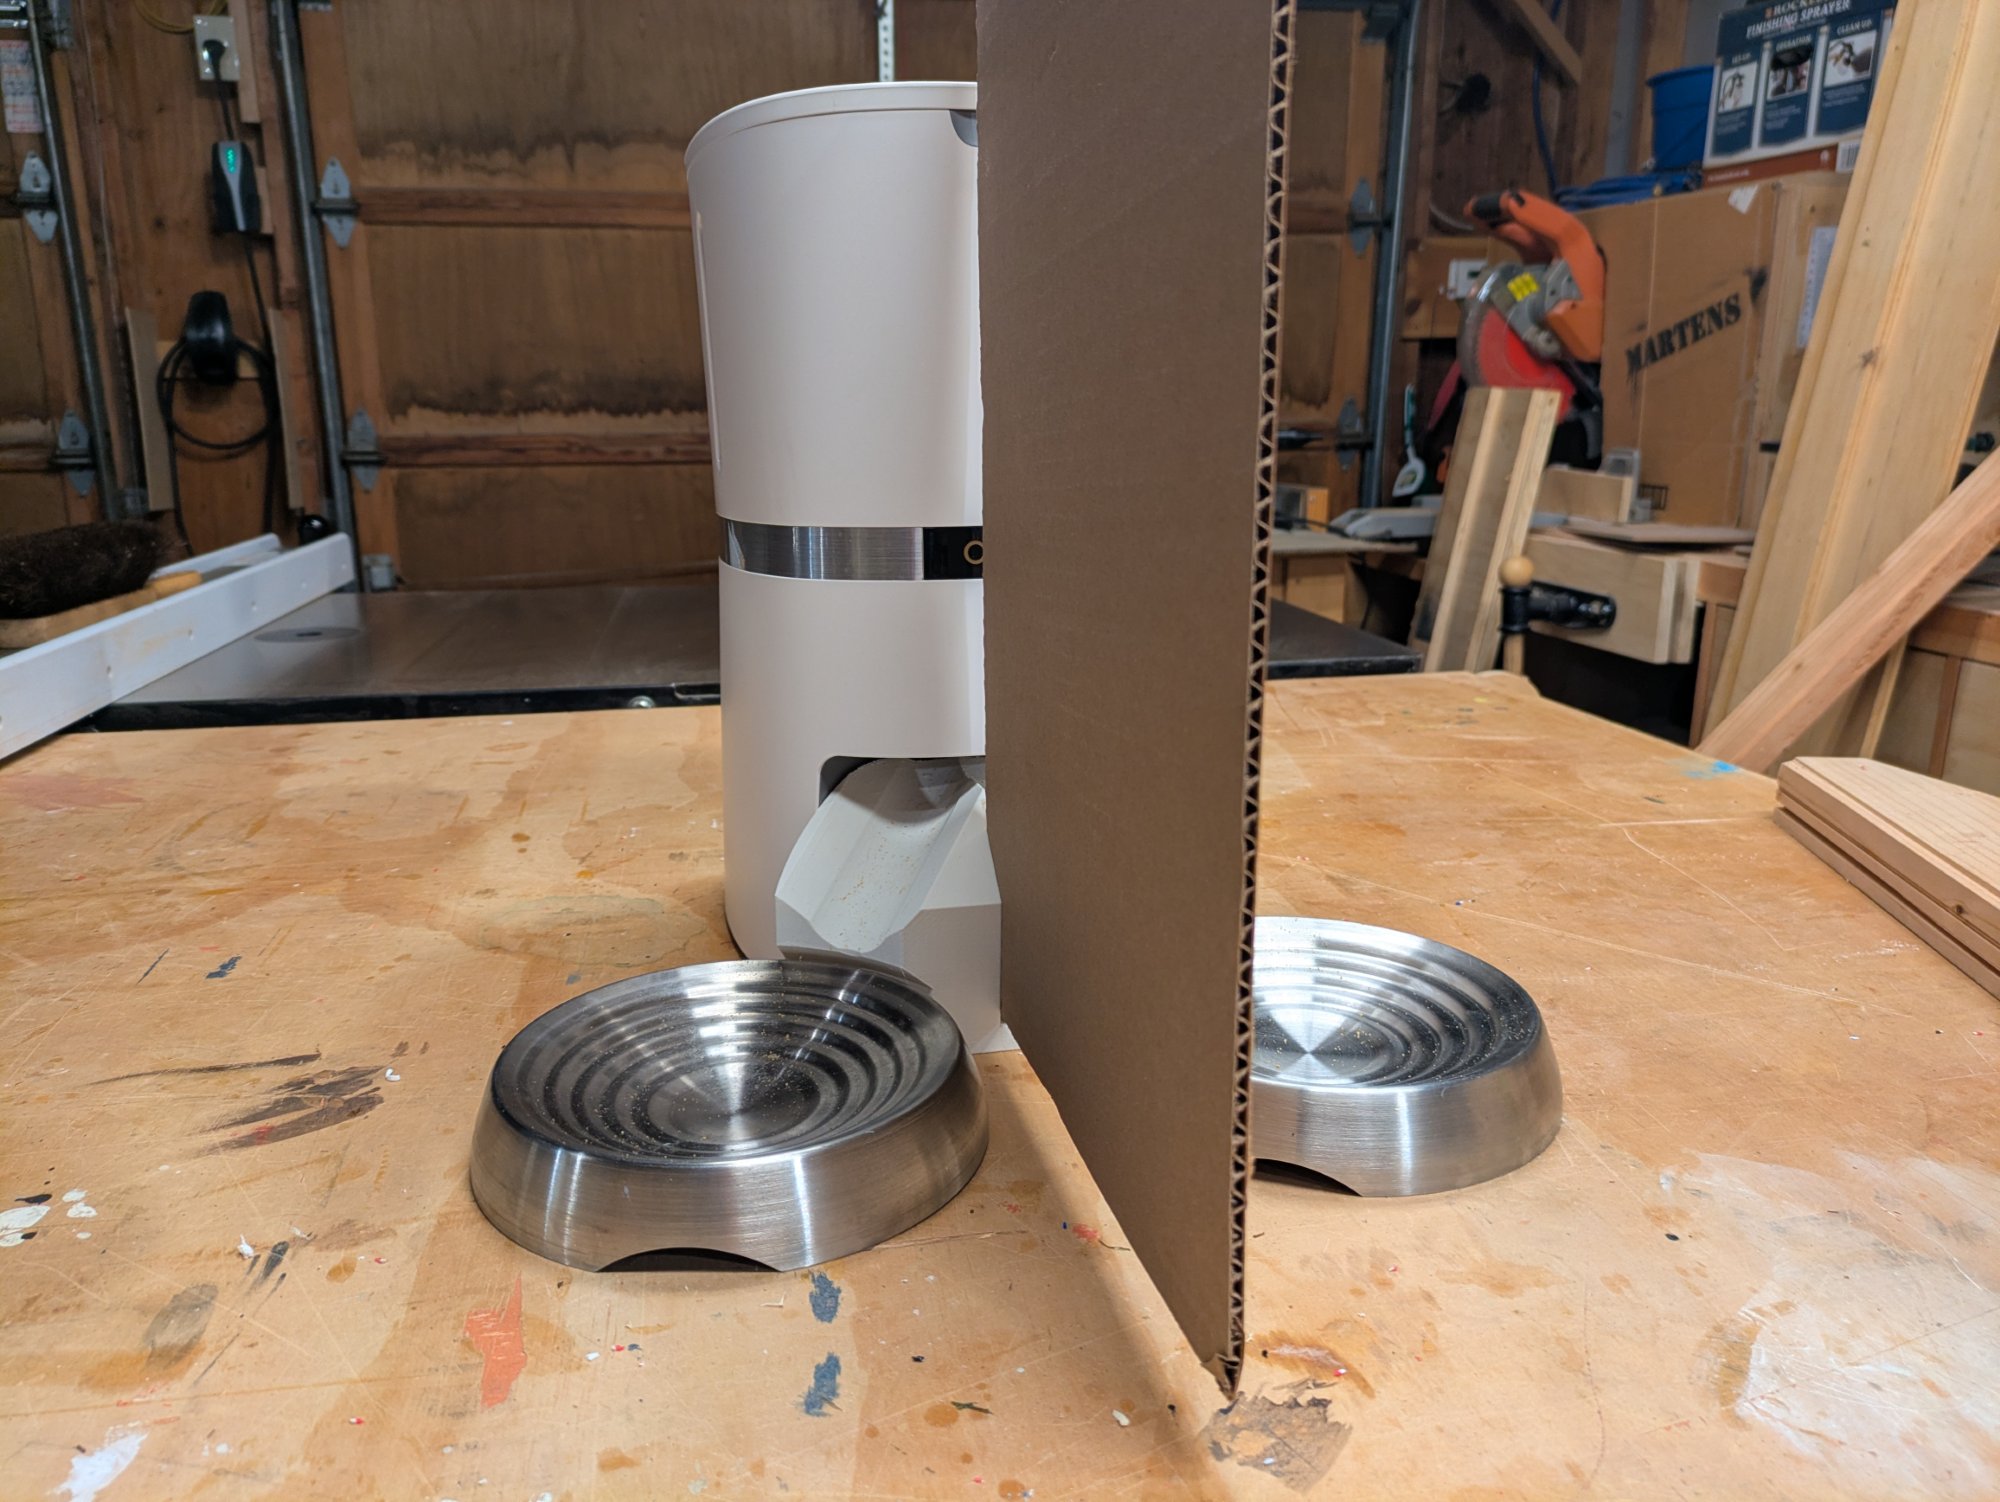
Some people build elaborate 3D printer enclosures to do things like control temperature during prints. I haven’t done anything that complicated yet, but I do like keeping dust and cat hair off the printer. So when it’s not in use, I have been setting a cardboard box over the top of it. It works, but it looks ugly.

The other problem I needed to solve is that filament is hydroscopic. If it sucks up too much moisture from the air, it can cause print problems. I’ve been storing the filament rolls in Ziploc bags with desiccant packs in them. Again, this works fine, but it looks messy and when I want to print, I have to pull the roll out of the bag and get it set into the rollers so it will feed into the printer, etc.

I set out to make an enclosure and dry box that would solve these problems. I’m not sure I’m there yet, but I’m at least at a stopping point for now.

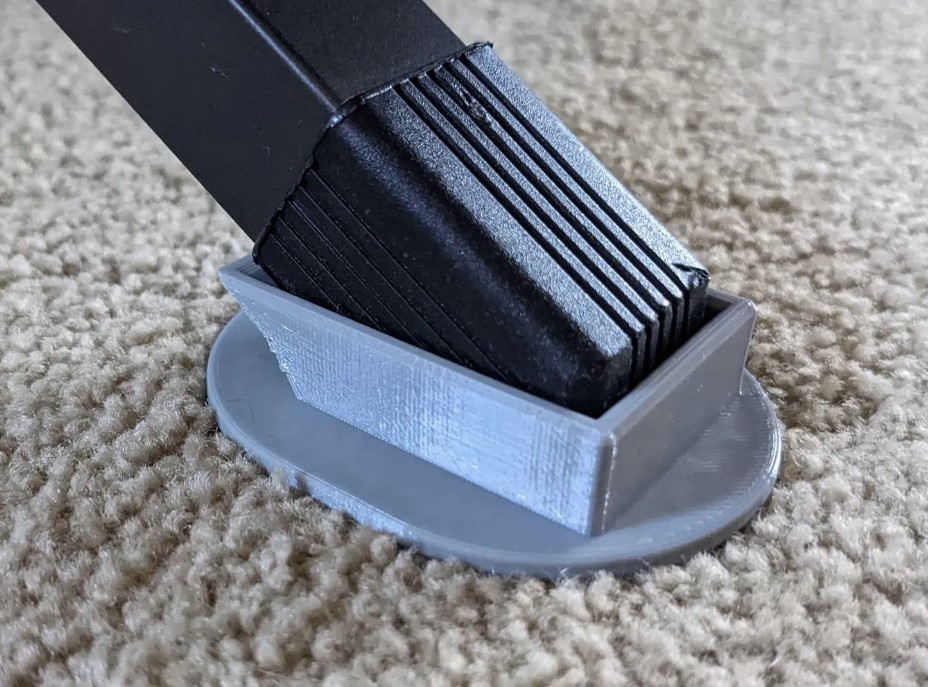
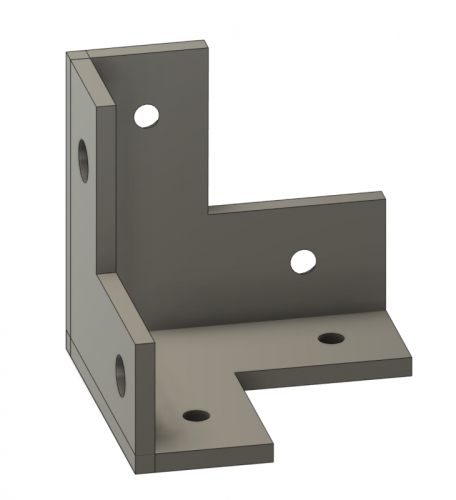
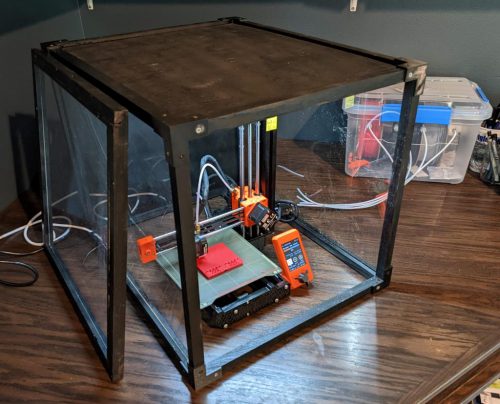
For the enclosure, I decided to go with a minimalistic design. I just wanted to have sticks making a cube and then fill in the panels with either plywood or plexiglass. I modeled up corner brackets in Fusion360 and 3D printed them.

Acrylic seemed a bit expensive, and I thought I could save myself some money by purchasing cheap poster frames. That choice ended up making this a very frustrating project. The plastic frames technically did work but they were extremely thin and difficult to work with. They got scratched up and cracked during the project.

I further complicated the box by making it the wrong size the first time. I forgot how much the bed of the printer slides back and forth so I had to take it apart, cut some of my extra plastic, and try again.

The door was the last piece of the puzzle and by that point, I was tired of the project so I made a frame to hold a plastic sheet and then used rare earth magnets so that it would stick to the face of the enclosure but be easily removable.

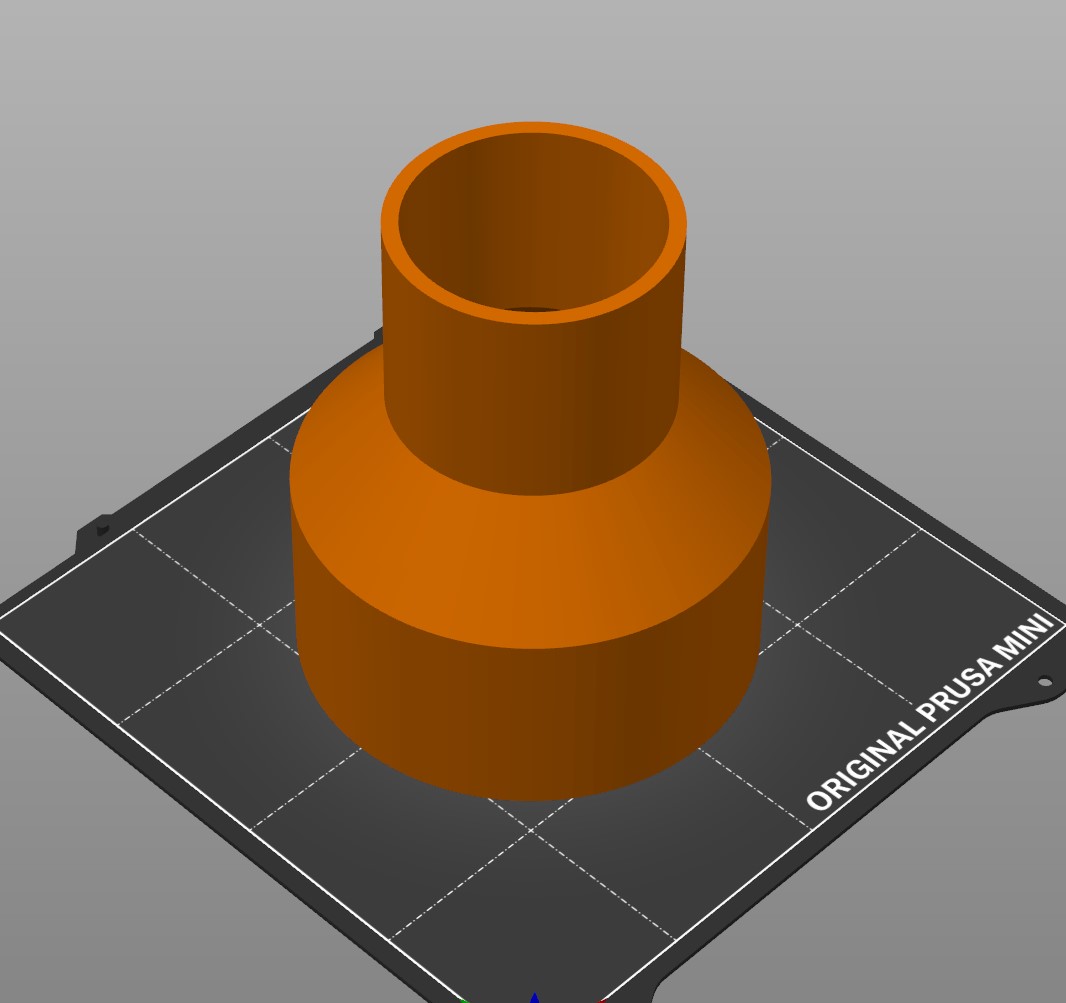
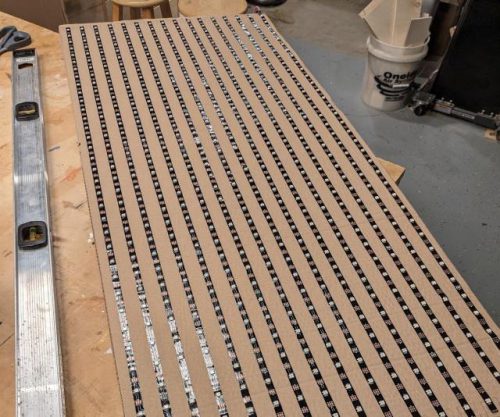
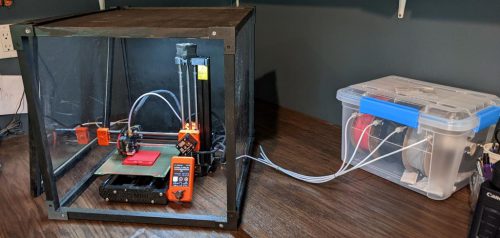
Next up was the dry box for the filament. That part went much smoother because Becky Stern has an excellent Instructable article. I 3D printed my own nuts and bolts (with a hole down the middle for filament to feed through) and also printed hangers for the PVC pipe that the filament rolls sit on.

After what seemed like forever, I attached a battery powered LED light to the roof of the enclosure and called it good for now. Maybe this will last me for years, but I could also see getting frustrated with it and wanted to redo it. The basic design is ok but I do want to change the plastic panels, the way the door works, and give it a better paint job. I do really like that I can just leave the filament in the machine instead of unloading it and storing it away every time though.

Printable Posable Figure

Getting a 3D printer while working from home has been a great combination as I can easily have prints going throughout the day. I’ve done a lot of “for fun” prints and a couple useful prints, but the one that impresses me most is LUCKY 13.

Before I could ge started with the print, I had to buy some PETG filament. Printed PETG is tougher than the PLA I had been using so far, but it can be a bit more finnicky to print well. My first, and so far only, roll of PLA filament came from Prusa and it has worked marvelously, but since they’re located in Europe, shipping a roll or two of filament is cost prohibitive. I waded into the endless options for filament and ended up choosing Polymaker PETG. It took a few test prints to get it dialed in, but it worked very well on my Prusa Mini.

The downloaded model files for this print were meticulously laid out and they all printed great the first time. I used the gray PETG for the skeleton and blue PLA for the outer skin and face. There were some accessories too which I did in black PLA.

Having done little to no calibration on my printer out of the box, I didn’t know what to expect, but everything snapped together with almost perfect tolerances! The only sanding I had to do was to remove some little fuzzies that were leftover after printing. This figure now sits on my desk and gets repositioned every once in a while using the plethora of different hand shapes and accessories. I got some red PLA and I think I might need to print him a sparring partner!