 I’ll tell you up front that this is probably going to be a long post, but I want to record every minute of this trip. When I moved to Seattle, I thought, “I should climb Rainier.” I still remember the first day that the clouds parted and I saw Rainier on the horizon. I quickly realized that this thing is enormous. Ever since then, Mt. Rainier has filled my sunny days with taunting.
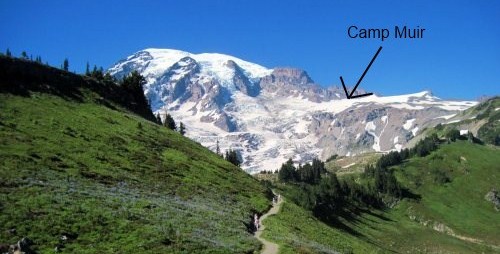
Camp Muir is located at just over 10,000 feet on the south side of Mt. Rainier. The parking lot at Paradise is 6,000 feet and the summit is 14,400 feet. Muir is halfway up and is on the path for most of the major routes to the summit. Most people who are headed for the summit will get up to Camp Muir on Day 1 around noon and will try to fall asleep as early in the evening as possible. They’ll get up very very early on Day 2, leave some gear at Camp Muir, reach the summit, come back to Muir for their gear and descend all the way to Paradise. Mike and I set out to ski down from Camp Muir back in June of 2008 but got turned around by a blizzard and my poor conditioning.
I’m still interested in getting to the summit, but before I invest the time and money in that trip, I wanted to do a day hike to Muir and back to see what it felt like. But every year, the summer would disappear without a trip to Muir. This year, I put a date on the calendar, found a group to hike with, and started some training.
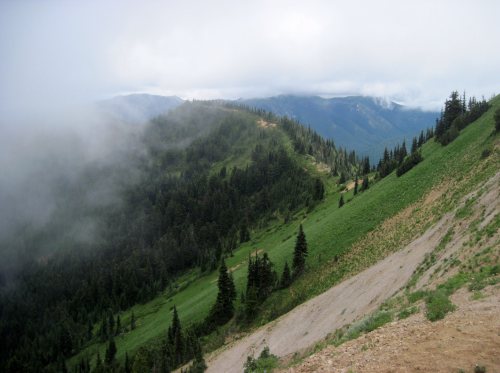
We had planned to go last Thursday, but as the day approached, it became clear that the weather would be much better on Wednesday. It turns out that Wednesday was absolutely perfect. Visibility was so good that we could easily see Mt. Adams, Mt. St. Helens and even Mt. Hood which is 100 miles away! It was about 50 degrees with 20mph at the top which was perfect for a strenuous hike. On Thursday the temps were right around the freezing mark with rain and 40mph winds. We chose well.
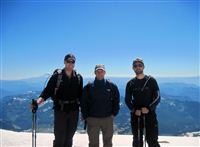
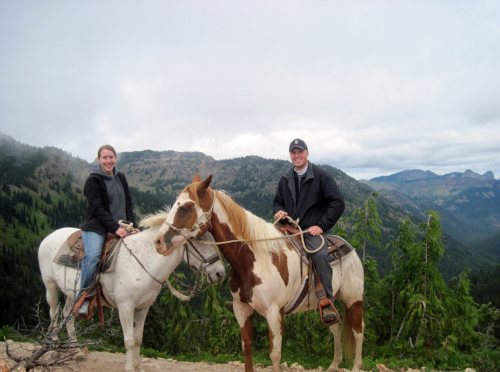
AndyD and AndyM made the trip with me. Tim had planned to come along but had to bow out due to work. I met the two Andy’s in Renton at 6am and we headed for Paradise. We hit the trail at 9am. The first 2.3 miles up the Skyline Trail to Pebble Creek went very quickly. The views were extraordinary and the path is very well travelled. After crossing Pebble Creek, we were on the Muir snowfield and our ascent slowed dramatically. Trekking poles are a must. I can’t imagine doing it without them.
The snowfield does have some bits that are steeper, but it’s generally a relentless 2.2 mile slog up 2700 vertical feet of snow. The total vertical and length aren’t that terrible, but doing it at altitude is a whole different ballgame. By the time we got to about 9000 feet I was really feeling the effects. My muscles weren’t getting tired but my feet wouldn’t always go where I told them to go and I felt short of breath. At 10,000 feet you have 30% less oxygen than you do at sea level! Two hiking tricks really helped me out. The first is pressure breathing where you purse your lips together and forcefully expel all the CO2 from your lungs. The second was the rest step where you take one step forward, lock out that knee and rest on your skeleton. Then repeat with the other foot. Finding a good pace with this method was what kept me going. The Andy’s were quite a bit faster than me. I don’t know how much faster they would have made it to the top if they hadn’t waited for me (although they said it wouldn’t have been much difference.)
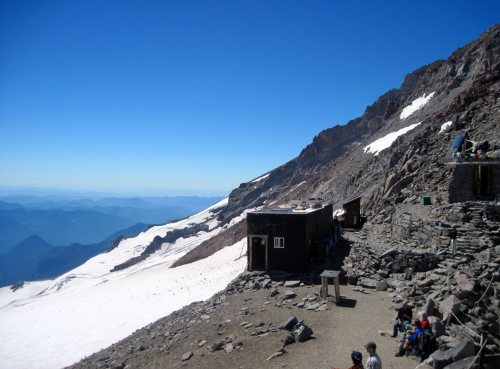
We reached Camp Muir in four hours and ten minutes which is a good/average time for summit groups. The difference is that I had a 25 pound pack and not a 40-50 pound pack like the summit groups. We kept pace with most of the other people that left around the same time as us and even left a few in our dust.
We spent about 45 minutes at the top enjoying the view, relaxing, putting on various bits of dry clothing, and eating. Then it was time for the descent. We had all brought trash bags along so we punched our legs through the bags and made hilarious looking shorts out of them. There are long glissade chutes down the slopes and we made good use of them. The first person would be sort of slow because they were re-breaking trail. The second was a bit faster and the third person would fly almost uncontrollably down the hill. It was a fun reward for such a tough hike. Once we got off the snowfield we hoofed it down to Paradise very quickly.
The sights and sounds were incredible: huge waterfalls poured over cliffs, the stark contrast of the wildflowers below to the snow and rock above, marmots running through the fields, chatting with climbers who had summitted that morning, and the thunderous sound of rock falls higher up the mountain (one of which we spotted.) Any one of those things would have been enough for a normal hike, but they all combined to give me an experience I’ll never forget.
One of my biggest concerns before the trip was what to take. I got the REI Flash 50 backpack for this trip, but what should I put in it? I ended up with two Camelbak bladders. The 3L one contained water and the 2L one was filled with the powdered Gatorade mix. I wore shorts and a dry hiking shirt. In the bag I carried an extra shirt, fleece, pants, gaiters, Under Armor shirt and pants, emergency first aid kit, emergency blanket, flint, a knife, two pairs of extra socks, sunscreen, a camera, jelly beans, 3 Power Bars, an apple, carrots, Tyla’s homemade trail mix and two sandwiches. If I had it to do over again, I would have brought less food. The jelly beans were really helpful. I kept them in my pocket and munched them regularly on the way up. I also went through all my liquid, taking the last sip as we got to the car. If/when I do this again, I want to look into waterproof boots (or at least I’ll carry a second set of shoes) and a bandana for some extra sun protection. Also, there are “bathrooms” at Muir but no toilet paper. Bring a bit along or bring a roll and leave it there. If you have to poo along the trail you are required by law to bag it and take it with you. In the cold weather and altitude, it would take hundreds of years to decompose.
I’d also say that you cannot leave too early in the day. Get up as early as you can and get on the trail early. We left at 9am but by the time we were coming down, it was getting really slushy and wet. It would have been even harder to climb up in those conditions.
Two things surprised me on the trip. First, there were bees on the whole way up the snow! They never really caused any problems but there was a constant buzzing as they followed us the whole way up. The second was how much of this hike was mental. On other tough hikes, I’d go until I couldn’t physically take another step. On this trip, I really had to focus on not letting the lack of oxygen get to me, not thinking about how far I had left to go, and on finding a good pace that I could sustain.
I owe a huge thanks to Andy and Andy for making this trip a reality! This has been on my list for a very long time (I mentioned it in the 2007 year in review) and it’s a major accomplishment for me!
You can view all the photos in the photo gallery.

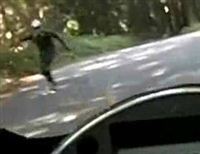 I recently picked up a Panavise 809 Camera Window Suction Cup camera mount. It’s for my little car timelapse video hobby, but it dawned on me that it might also work for the motorcycle. I was able to stick it onto the gas tank and get a pretty good view with my Kodak Playsport Zx3. There is a significant amount of vibration, but by bringing the footage into Adobe Premiere I was able to use some filters to remove some of the vibration effect.
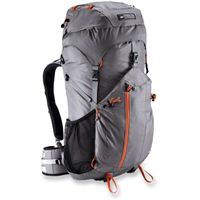 My main backpack for hiking is a
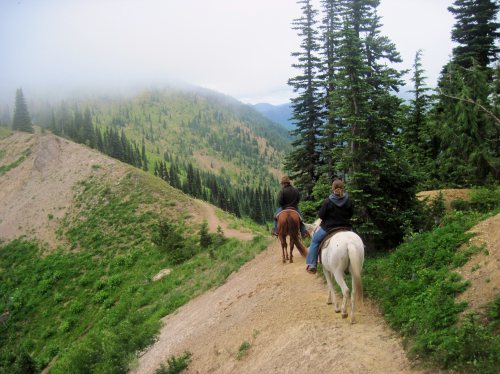
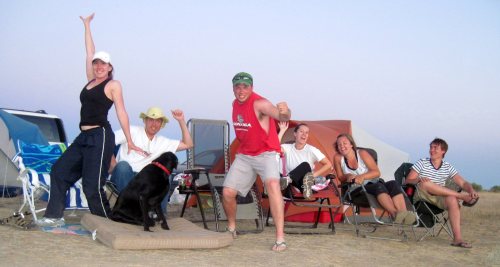
 This is the fourth annual big summer camping trip where Matt, Laura, Andy, Stephanie, Tim, Chelsea, Tyla and I head out to a state park for a weekend. We make the reservations around Christmas time to make sure we can claim a weekend on everyone’s busy summer calendars. This year’s adventure took us to Birch Bay State Park up north near the border.
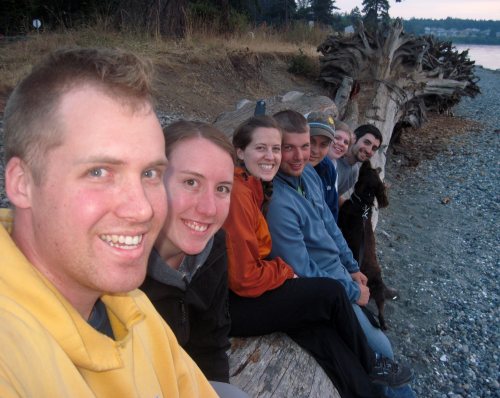

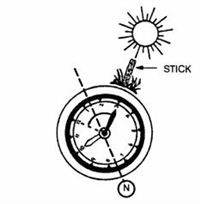 Let’s say you’re lost in the woods and you didn’t pack a compass. Now what? There are ways to determine direction based on the way trees grow and moss growing on trees but there are various situations where those aren’t available or reliable. What then? If you can see the sun, you’re in luck.
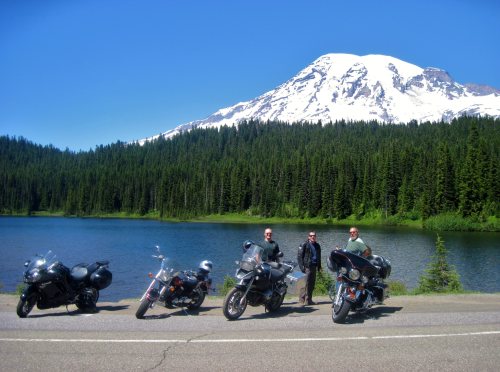
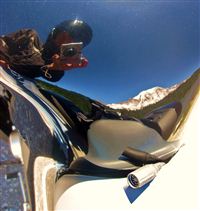 Saturday (7/24) was the perfect day for our ride, if not a little bit warm. It was sunny and around 85 degrees. While I thought we might get a few riders from other area churches, it ended up being a group of four from Calvary: ScottK, DougW, FrankL and myself.