
![]() The fun part of Legos for me was usually putting them together. Grabbing random pieces and building from your imagination is fun, but building an actual kit was always special. There’s a great service that I just learned about called Pley. You set up a queue from about 250 different Lego sets and for $15/month, they will send you one of the kits. When you’re done, box it back up and send it back. Then they send you the next one. And yes germophobes, they are cleaned and sanitized before they go out again.
The fun part of Legos for me was usually putting them together. Grabbing random pieces and building from your imagination is fun, but building an actual kit was always special. There’s a great service that I just learned about called Pley. You set up a queue from about 250 different Lego sets and for $15/month, they will send you one of the kits. When you’re done, box it back up and send it back. Then they send you the next one. And yes germophobes, they are cleaned and sanitized before they go out again.
Fantasy Football – Week 5
 The Seahawks came off their Monday Night east coast showdown with a win, but it wasn’t very pretty. They seemed to struggle against the injury-ridden Redskins. The Seahawks were their own worst enemy with 13 penalties for 90 yards, including three Percy Harvin touchdowns that all got called back for unrelated penalties. While I’d love to see the Seahawks win another Super Bowl, I don’t think they’re on that path right now. Last season they were unstoppable with endless interceptions. This year they look a lot more mortal. Only three teams in the league have fewer interceptions, seven have fewer sacks, and six have fewer fumbles forced. That’s a far cry from the dominating defense they had last year. In fairness that does include a bye week that most other teams haven’t had yet, but still…
What Seattle lacks in league dominance, Tim is showing in spades. He’s two games ahead of second place and has yet to lose a game. He has over 100 season points more than the average of the rest of the league. Jim and Luke are now tied for second with Jim having a very strong week (160 points.) The matchup to watch next week is #1 vs #2, Tim vs Jim… the battle of the “ims”.
The automated roster reminders seemed to work ok this week, or at least I didn’t get any complaints. Hopefully this is a handy tool to help us all keep our rosters full and healthy.
Now on to the weekly awards.
- Highest Team Score
- This Week: Jim had 160.52
- Season: The previous record was in Week 4, Dad had 154.98
- All-Time: In 2013, Tim had 195.50
- Lowest Team Score
- This Week: Dad had 74.40
- Season: In Week 3, Luke had 55.04
- All-Time: In 2011, Luke had 47.01
- Biggest Blowout
- This Week: Tim beat Dad by 81.60
- Season: The previous record was in Week 3, Tim beat Luke by 64.34
- All-Time: In 2010, Luke beat Andy by 113.02
- Closest Win
- This Week: Jim beat Austin by 21.47
- Season: In Week 2, Austin beat Ben by 1.7
- All-Time: In 2012, Jim beat Ben by 0.12
- Highest Scoring Player
- This Week: Peyton Manning had 38.96 for Andy.
- Season: In Week 3, Andrew Luck had 40.30 for Ben
- All-Time: In 2013, Peyton Manning scored 60.28 for Andy
- Longest Winning Streaks:
- Active: Tim has a 5 game winning streak
- Season: Tim has a 5 game winning streak
- All-Time: In 2011, Micah had an 8 game winning streak
- Longest Losing Streaks:
- Active: Austin has a 3 game losing streak
- Season: Austin has a 3 game losing streak
- All-Time: In 2011, Kyle had a 14 game losing streak
No “Manning-face” from the opposing QB for the Seahawks this week. Kirk Cousins did much better than people expected him to and had some incredible plays. I should have done this photo thing last year because there haven’t been many awesome defensive Seahawks games this year.
Somebody’s Gotta Do It
 Mike Rowe has a new show coming out and it’s called Somebody’s Gotta Do It. There is an article posted about how this landed on CNN and why it’s different from Dirty Jobs. I’m excited to see this new show because it sounds like it really aligns with Mike’s focus on the hardworking people of America. If you want a primer on his viewpoints, check out his TED talk from 2008.
I have almost everything turned off in my Facebook feed, but I do follow Mike Rowe. He writes some excellent articles that I wish more of our government leaders would read and take to heart.
“Somebody’s Gotta Do it” debuts Wednesday at 9pmET on CNN.
Bixler 2 Review
 My entry into the RC flying hobby has been quite slow. It started a year ago, but I took most of the summer off while I worked on the yard and other projects. And even when I’m not working on projects, I don’t have much time to actually get out and fly.
I started by building my own planes out of foam board with lots of help from the guys at FliteTest.com. That was a low-cost entry into the hobby. When I crashed (and I crashed A LOT), fixing the plane meant a short trip to the dollar store. But in the evenings I was always looking around to figure out what my first “real” plane would be.
I ended up setting my sights on the Bixler 2 (named after one of the hosts at FliteTest), and I was thrilled when Tyla got it for me for my birthday! I took quite a while to get it put together and along the way, I made some modifications to account for common problems that people have with the plane. The biggest one is adjusting the way that the wings are held together. I added some 3M hooks and a rubber band through the fuselage. That doesn’t look quite as pretty but it’s a lot easier to use and doesn’t affect the flight characteristics.
The other change was adding flaps to it. The plane comes with flaps but does not include the electronics for it. Wiring it up was easy, but because of the way they have the cutouts for the servos, it took a lot of fancy transmitter programming to get them to function right. (Basically you need to set up a mix between your Gear switch and your AUX1 switch so that they both operate together but opposite which moves both flaps down.)
Blah blah blah how does it FLY!? Honestly, part of the reason I took so long to fly it is because I was afraid of crashing it. Pretty much every plane I’ve built up to this point has had a first flight of about 5 seconds. It inevitably crashes into the ground in a spectacular manner. Thankfully, this one flew amazingly. Takeoff is a little bit tough as you have to hand launch, and, because of the way the pusher prop is mounted, the plane wants to dive a little under full power. But I succeeded on my first attempt and after about 30 seconds, the butt clenching disappeared and I was just having FUN.
Thinking back over the best flights I’ve had with my hand built planes over the last year, this one trumped them all. It was all trimmed out perfectly and I could take my hands off the transmitter and not lose control. Here are some of my favorite parts of that first flight:
- It glides like a dream. In fact, I had a lot of fun just climbing up to altitude and then shutting off the power.
- I put a 2200mah 3 cell in it and after 16 minutes of throttle time (plus more time gliding around), I still had 37% battery left. My little foam planes were lucky to get 7 minutes per flight. I think I’ll be able to comfortable set the timer at 20 minutes for this plane.
- The flaps were a great addition. There’s no landing gear on it. A belly landing without flaps would be possible, but the flaps slow it down to a crawl and it only slides for 3-4 feet before stopping. Engaging the flaps gives quite an abrupt elevation increase though so I might end up mixing in some down elevator with the flaps in my transmitter.
- It’s a little hard to explain but it was the closest thing I’ve felt to flying in the RC flight simulator program. In that program, everything is so smooth and controllable. My previous foam board planes were often a handful and I never got that relaxed feeling with them.
I feel so comfortable flying this plane that I’m already thinking about putting a GoPro on it. This is a very popular plane for aerial footage and people do a lot of FPV (First Person View) flying through video goggles with it too. I don’t have gear for that but it might be an option down the road.
In case you couldn’t tell, I’m really happy with this plane. It’s definitely still in the trainer category, but it’s the fanciest and best thing I’ve flown yet. While the little foam board planes were frustrating at times, I think it’s good that I started with them instead of this “real” plane. My first flight with it would certainly not have gone as well.
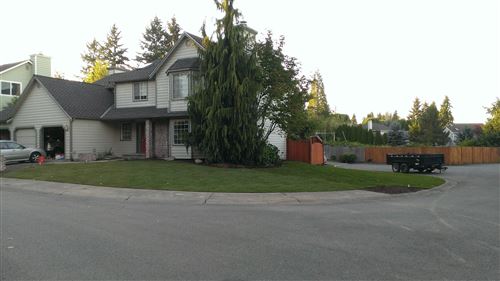
Front Yard Project Recap
It was a wild week, but 9 days was all it took to polish off the front yard. We had taken a break after finishing the back yard to recover and also because Tim was re-siding his house. Here’s a rough breakdown of the front yard project:
- Dad and I started on Friday the 19th by digging a trench under the sidewalk. We picked up the tractor, truck and trailer. Then we used the tractor to fill up the trailer, make a run to dump it, and then scraped off some more sod.
- On Saturday, Don, Logan and Tim joined in and we made huge progress. The trailer made non-stop runs all day long getting rid of the sod and the dirt that was being scraped off with the tractor. While that was happening, three dump trucks arrived with the new dirt that was replacing the old dirt.
- By the end of Sunday, all of the old dirt was gone and the new dirt was pretty much in place. We also rented a trencher and in just two hours, we had trenches for irrigation. It might seem silly to trench through new dirt, but we still had a couple more inches to go under the new dirt and it was almost like digging in concrete.
- Tim and I spent Monday through Thursday evenings out in the yard plumbing for irrigation. It was a wet, soggy mess as we got over 2 inches of rain. I bought a hand pump to help clear out the trenches but there were big sections of the yard that were just completely saturated.
- We took Friday off in hopes of letting it dry out just a little more. All I did was pick up a few more yards of dirt and left it sitting in the trailer for later.
- Saturday we started by spreading the remaining dirt to really level everything out. 2600 square feet of sod was delivered, and, with the help of two guys Tim knows, we had it almost all in by 2pm. We returned the tractor, spread one more truck load of dirt, finished off the sod, and then tested out the irrigation.
- I spent Sunday by myself cleaning up the yard, washing the truck, returning tools, etc.
It’s incredible how much work got done in such a short amount of time. Here are some stats:
- The front yard added up to 117 hours of labor (compared to 310 in the back yard.)
- Each load from our house to the spot where we dumped the sod took about 75 minutes round trip
- 14 trips with the dump trailer to remove the old sod, and there was 3-4 yards in each load
- 53 yards of beautiful new “supreme mix” dirt added, including three 15-yard deliveries via dump truck
- 500 miles on Don’s truck for this project
- 10.6mpg average for the truck while we were making the runs to dump the old sod
- 3.4 gallons of diesel used in the tractor over the many many hours that it was running
Because our scheduled was so compressed, I didn’t stop to take as many photos or do fancy timelapse videos. Thankfully Tyla and Mom snapped a bunch of photos and one of my security cameras caught some of the action.


THANK YOU once again to all of the friends and family that helped out! We had exactly the right amount of help to get this done. And a huge special thank you to Tim. Without you, this project would never have been attempted. We couldn’t have afforded to pay a contractor to do this, and I don’t know nearly enough to attempt something like this on my own. I loved learning about all this stuff and it was awesome to spend so much time out in the yard working with you. Thanks for putting up with all of my questions, my stress, and my mistakes!
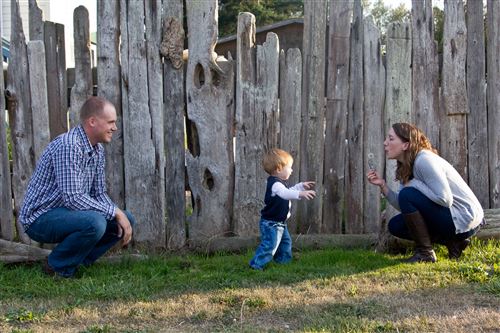
Family Photos
While we were out on Lopez Island, we took the opportunity to snap some family photos. I know these don’t stack up to some of the really good professional photos, but it shows how far you can go with the key pieces: a reasonably nice camera, good lighting (one hour before sunset or one hour after sunrise), and a nice location. Thanks to Dad for snapping the photos that I’m not in!


Fantasy Football – Week 4
 The Seahawks were on a bye this week. Now they have 13 straight weeks to make their run at back to back Super Bowls. I actually didn’t get to watch any games this weekend, but I did peek in at our league a couple times. The big story in our league is Tim’s continued undefeated domination. Dad is having a pretty strong season and gets the next crack at Tim in Week 5.
I wrote a new app for our league. If it works, it will monitor the league and send emails to people who have players that are Out, Questionable, or on a bye week. (It does not notify for Probable players.) If someone on your team gets flagged by the tool, you’ll get an email on Thursday morning and/or Saturday evening. Don’t rely on this tool! This is the first week and I’m sure there are some bugs that I haven’t found. If you have comments about the tool, please share them. For example, I wasn’t sure if it should email for Questionable players. Also, if you want to opt out of the emails, let me know.
Now on to the weekly awards.
- Highest Team Score
- This Week: Dad had 154.98.
- Season: The previous record was in Week 1, Ben had 137.85
- All-Time: In 2013, Tim had 195.50
- Lowest Team Score
- This Week: Logan had 69.53.
- Season: In Week 3, Luke had 55.04
- All-Time: In 2011, Luke had 47.01
- Biggest Blowout
- This Week: Tim beat Austin by 37.95.
- Season: In Week 3, Tim beat Luke by 64.34
- All-Time: In 2010, Luke beat Andy by 113.02
- Closest Win
- This Week: Dad beat Luke by 17.53.
- Season: In Week 2, Austin beat Ben by 1.7
- All-Time: In 2012, Jim beat Ben by 0.12
- Highest Scoring Player
- This Week: Eli Manning had 40.10 for Andy.
- Season: In Week 3, Andrew Luck had 40.30 for Ben
- All-Time: In 2013, Peyton Manning scored 60.28 for Andy
- Longest Winning Streaks:
- Active: Tim has a 4 game winning streak
- Season: Tim has a 4 game winning streak
- All-Time: In 2011, Micah had an 8 game winning streak
- Longest Losing Streaks:
- Active: Luke and Austin have a 2 game losing streak
- Season: Dad, Logan, Luke, Austin and Andy had 2 game losing streaks
- All-Time: In 2011, Kyle had a 14 game losing streak
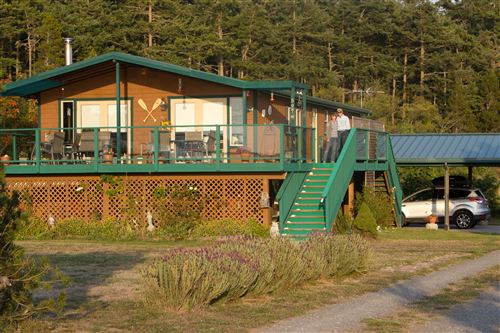
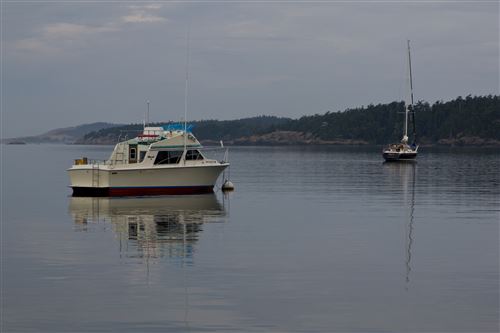
Lopez Island
While Dad and Mom were visiting, we spent a couple nights in a rental house out on Lopez Island. It was the first time any of us had been there and I really enjoyed it. It’s one of the smaller islands, and while none of the islands are “busy”, this one was very quiet/local. Highlights included some nice, quiet beaches and a short hike out to a rocky bluff where we could watch a LOT of seals. Our best meal was at Southend General Store and Restaurant. It’s not a place you would drive by and expect to have good food, but I think we would all be happy to eat there again.
I took a bunch of Photosynths. There’s the view from the deck, the park with the seals, and one showing the inside of the house.
Thanks to Dad and Mom for renting the house and letting us crash the party!


NASCAR On YouTube
 For quite a few years, NASCAR has had internet subscription models for watching and listening to the races. But now, for the first time, NASCAR surprised me by offering all of the remaining races this season for free on YouTube (after the race is over.) That’s an especially cool deal for me since some of these races are on ESPN which I don’t pay for anymore. You can check out the New Hampshire race from last week. It’s exciting to see more and more sports embracing the Internet.
Choosing Slower Delivery