JimM got me interested in Arduinos. They are simple electronics boards that contain almost everything you need to get started with your project. When it arrived in the mail, I connected it to the computer via USB, opened up the development environment, uploaded a small program to the board and boom, I had a blinking light. Simple, yes, but the time to results was extremely low.
My overall plan was to build a display for the Media Center PC in our living room. I wanted to be able to easily see when it was recording something or when one of the tuners was being used by one of the extenders. There are some premade solutions that would have probably worked, but this seemed like a great starter Arduino project and I would end up with something that was completely customizable.
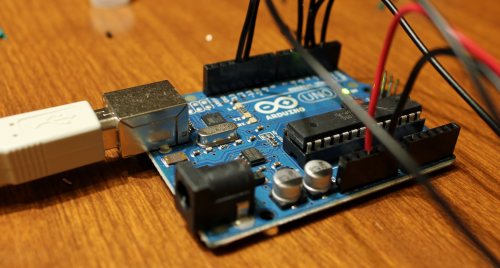
In addition to the Arduino, I got a 20×4 character LCD screen and some small supplies like resistors, wire, buttons, and a potentiometer. This is the point where I should show a schematic for the whole thing, but honestly I never drew one. I built little portions of it as I went and ended up with something that works and hasn’t burned down the house yet.
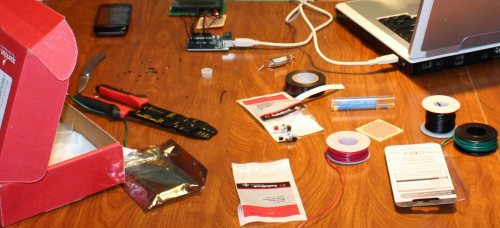
Basically, the Arduino Uno sends power to the LCD and a 10K potentiometer controls the contrast of the screen. The board also sends the text for the screen through four wires along with a couple extra wires for enabling the screen, etc. The board powers the backlight for the LCD but I hooked up a resistor there to dim the backlight a bit. I had originally planned to have the backlight be controllable from software but I gave up after a couple failures trying to get a transistor hooked into the circuit. There is also a simple button hooked in, but I haven’t needed to use that in the software yet.
Once I got it all soldered together, I stuck it into a plastic hobby box from Radio Shack. I had to cut out a rectangular hole in the front for the LCD. That was done freehand with a Dremel and looks pretty bad when you get up close. Luckily it hides in the shadows and you can’t really tell. I have ideas to do that better next time.
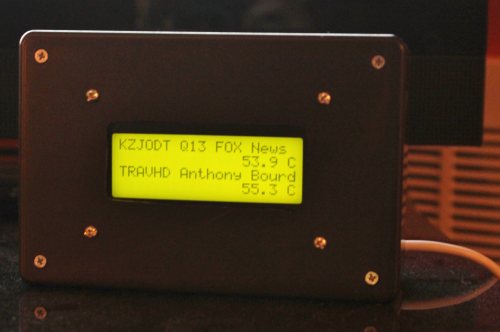
The box now sits by the Media Center and is connected to the PC via USB. That cable provides power and communications. A C# application gathers status from the Ceton InfiniTV tuner and sets the display for the LCD in the box. (For the curious, there is a JSON interface to get to the InfiniTV status.) When a tuner is in use, the box displays the channel call sign and the name of the show that is being recorded. I get that info by mapping the channel number from the tuner to a call sign and then looking for the corresponding file in the Recorded TV folder. That file has the show name. When a tuner isn’t in use, it shows the temperature of that tuner. I’ll probably come up with something better for unused tuners in the future.
This was my first real electronics project so I learned quite a few things that are probably obvious to other people:
- Use a bread board. Soldering everything to see if it worked was a pain.
- Use header pins so you don’t have to solder directly to the LCD screen.
- This whole thing could have been done in a couple minutes by buying a pre-made LCD shield that plugs in on top of the Arduino. I’m glad I did it manually the first time, but next time I’ll probably go for the shield.
- Buy an introductory electronics book.
- Take more pictures along the way! I was so excited to get this working that it somehow slipped my mind.
What’s next? I have quite a few project ideas but I think the one I’ll tackle next is making a tilt/pan mount for my camera that is controlled by an Arduino and will automatically take big panorama pictures. I’m also going to build an intervalometer into it for time lapse. This project will involve more buttons, motor control, and power from a battery.
 The Skagit Valley Tulip Festival is a pretty big shin dig in these parts. Imagine 100,000 of your closest friends driving up I-5 and then getting off on some tiny exit to sit in traffic in fields. Usually Tyla and I head up there on the motorcycle with ~100 other riders for the annual Tulip Ride, but we missed it this year because it fell on our one year anniversary. So this year we headed up there with Tim and Chelsea and had a blast! When we’re there on the bikes, we’re going on a prearranged date and we have a schedule to stick to. This time we waited for a glorious sunny day and took our time.
 For our first anniversary, we headed out to San Juan Island to stay at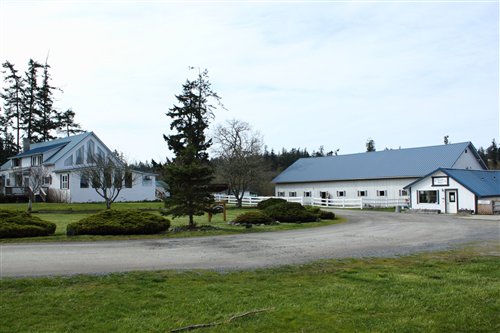
 There is a relatively new (at least to me) website called dailyhiker.com that I’ve been following. The guys who run it are local to the Pacific Northwest but the blog covers hiking around the world. They ran a contest recently for the best lake photo so I submitted my photo of MattM skipping rocks into the Puget Sound (technically not a lake I guess) on last summer’s camping trip. I didn’t win but I did make it into the top 13. Interestingly it’s the only photo in that group that has a person in it. This photo was taken with our little point and shoot. I’m really looking forward to hiking around with the T2i this summer.
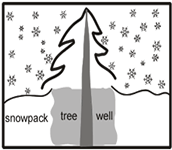 It’s time (or too late) for a Public Safety Announcement about deep snow safety. When I moved out to the Pacific Northwest, I learned about something called a tree well. Because of the large pine trees we have around here, snow doesn’t accumulate around the base of trees as quickly as it does on other parts of the hill. Also, normal snow gets packed down by skiers while snow around the base of a tree remains light and fluffy. What you’re left with is a black hole waiting to suck you in and kill you faster than you can ever imagine.
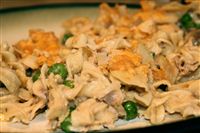 “Tuna” and “casserole” are not two words which usually excite people, but for some reason it sounded good one night. I must say, it turned out to be quite delicious. The recipe comes straight from
 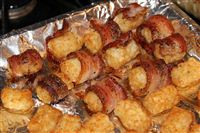 This is barely a recipe, but I’ll post it anyway because it was so delicious. Take a strip of bacon, cut off part of it and wrap it around a tater tot. I didn’t do this, but it might be a good idea to stick a toothpick through it to hold it all together. You might want to soak the toothpicks in water first so it doesn’t catch fire in the oven.
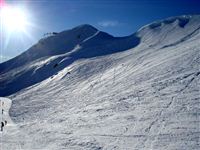 While we were bopping around Whistler a couple weekends ago, Jay and I pondered the history of Whistler Blackcomb. Once I got back home to my precious internet connection, I was able to educate myself. Since I love bulleted lists, I’ll present the history in that form. Feel free to read a
South Shore Train Crash NTSB Report
If you don’t know that I was in a train crash in 1993, you should get caught up by reading this blog post. If this had happened 10 years later, the internet would be full of stories and photos about the event, but as it is, it’s almost impossible to find anything. Back in college, I wrote to the National Transportation Safety Board and requested a copy of PB93-916304 NTSB/RAR-93/03. It came to me as 25 photocopied pages. The quality isn’t great, but it’s the best I have to work with. I scanned the whole thing in so you can download the PDF and read it for yourself. (UPDATE 2023-07-17: I see the NTSB has posted it on their website now.) I know many of you won’t be interested in this, but I’m posting it mostly so that other people can find a copy of it if they need it.
These two photos from the document are the only ones I have. (Maybe Mom saved some newspapers?) I’m not positive, but I believe the top picture is the first of three cars on our train and the bottom picture is the third of the three cars.