 Shopping for CFL or LED bulbs instead of incandescent light bulbs can be confusing. Do you want bright white, warm white, or one of the other white colors? Forget the names. There’s a more precise way to know what you’re getting and it’s called the temperature of the color. Color temperatures are measured in kelvins. A standard incandescent bulb is between 2700 and 3300K. So if you want a CFL or LED bulb that matches that color, look for the color temperature on the box. Some of the bulbs are much whiter, and to my eye they’re very unpleasant.
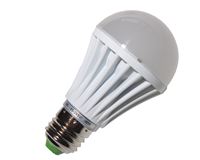
LED bulbs have been around for a few years but they’ve been cost prohibitive. They’re better than CFL and incandescent in pretty much every way. They use less power, warm up instantly, produce less heat, are dimmable, and last forever (or ~25,000 hours, whichever comes first.) You can find good LED bulbs for $10-15 each at your local store so there’s still a pretty big premium.
On Earth Day, my employer teamed up with PSE to off us a four pack of LED bulbs for $10. It seemed like a good way to test the waters with LED bulbs. I put one of them in the lamp in our living room and three of them in our outdoor lighting since those are the lights that are on the most in our house. It’s really an anticlimactic event. I excitedly screwed in the bulbs, they work, and we rarely think about them.
But it got me to wondering, are they finally getting cheap enough that I should be replacing all my bulbs with LEDs as the old bulbs die out? What’s the break even point? It’s time for some math!
With our fancy GPS-based outdoor light timer, I know that my lights are on specifically between sunset and sunrise every day, even as those times shift. I looked up a full table of rise and set times for Seattle and then calculated how long the sun is up. That in itself was interesting. It turns out that in Seattle over the course of a year, the sun is up 51% of the time. But for our purposes, we just need to know that the sun is down for 4290.75 hours in a year.
Here are how 60 watt equivalent bulb costs would play out over the course of 10 years. Note that I’m prorating the cost of the bulbs that are used so the cost of the remaining lifetime of the last bulb is not included in the total cost.
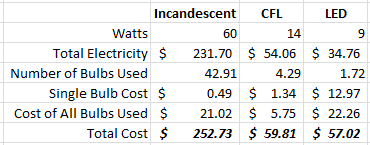
I didn’t know what to expect when I started those calculations, and I’m impressed that the LED bulb came out ahead! It takes many years for the LED to overtake the CFL, but eventually it at least breaks even. Also note that I was basing the LED numbers on this bulb. Different bulbs have different power requirements, but this is a respectable model/brand.
So from all this we can conclude that at the current prices, CFL and LEDs are just about a break even on cost at least with the models and prices I used in my calculations. In terms of actual use, the LEDs come out ahead because they don’t have the same warmup period as the CFL bulbs and they are dimmable. And the cost tradeoff will vary depending on what you’re comparing. The other caveat is that I don’t know if these bulbs are rated for the temperature swings associated with outdoor use so it will be interesting to see how long they last.
Don’t go running around the house throwing away CFL bulbs since that’s a waste of money, but as they die, you can replace them with LEDs and know that you’ll get your money back over time assuming the LED bulbs live as long as the makers claim. If you want to see it for yourself, check out one of the many online bulb price calculators. We have a stockpile of various sized CFL and incandescent candelabra bulbs, but as those run out I think we’ll be switching to LED.

 We’re about four months past the end of our bathroom model and I’m still very happy with the result. There’s not much, if anything, that I would change if we were doing it again. One of my favorite features is turning out to be the Moen Posi-Temp shower valve. I didn’t think much about it when I picked it out, but this thing works wonders.
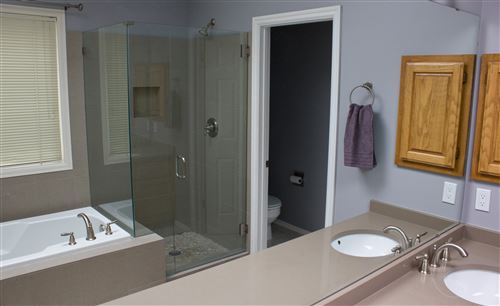
 For the last couple weeks, I’ve been painting doors. The closet doors for the nursery were stored up in the rafters of the garage when we bought the house and they were all scratched up. The door to the nursery had a bunch of screw holes in the back of it and then we also didn’t pay the contractor to do any painting when they worked on our bathroom so the new door was unpainted.
 When we started getting some warm weather at the beginning of April, I jumped the gun and tried to start the garden. A tomato plant and two strawberry plants which I put under a homemade hoop house and some volunteer cilantro and rosemary plants from last year are doing very well, but none of the seeds I planted came up.
 Last year, Mom and Dad were out here during the tulip festival so we headed up that way. I purchased a few tulips in a pot for Tyla who wasn’t able to come along with us. When I purchased them, I asked if they could be replanted. She said there wasn’t much chance of that working because they were raised in a greenhouse, yada yada yada.
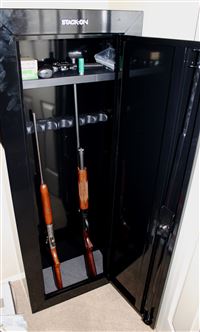 With a munchkin arriving soon, I figured it would be a good idea to have the guns behind some kind of a lock. I don’t have anything special enough to worry about theft, so I went with a fairly inexpensive cabinet from
  The room we picked for the nursery seemed perfect except that the floor had a HUGE squeak in it. It was so loud that Tyla walked in there one night and the squeak woke me out of a deep sleep. I want our baby to be able to sleep through anything, but that squeak might have been asking too much.
 When we lived at the condo, the association scheduled dryer vent cleaning every two or three years. Our current house was built in 1990, and after seeing how some other maintenance was done, I wondered if they’d ever taken care of the dryer vents. Left untouched, it will reduce your dryer efficiency or even provide a great starting point for a fire.
 When I bought the condo, I wanted to change the locks so I called a locksmith and paid him something like $100 to change a couple locks. Since then I’ve learned that this is a super easy project to do on your own.