
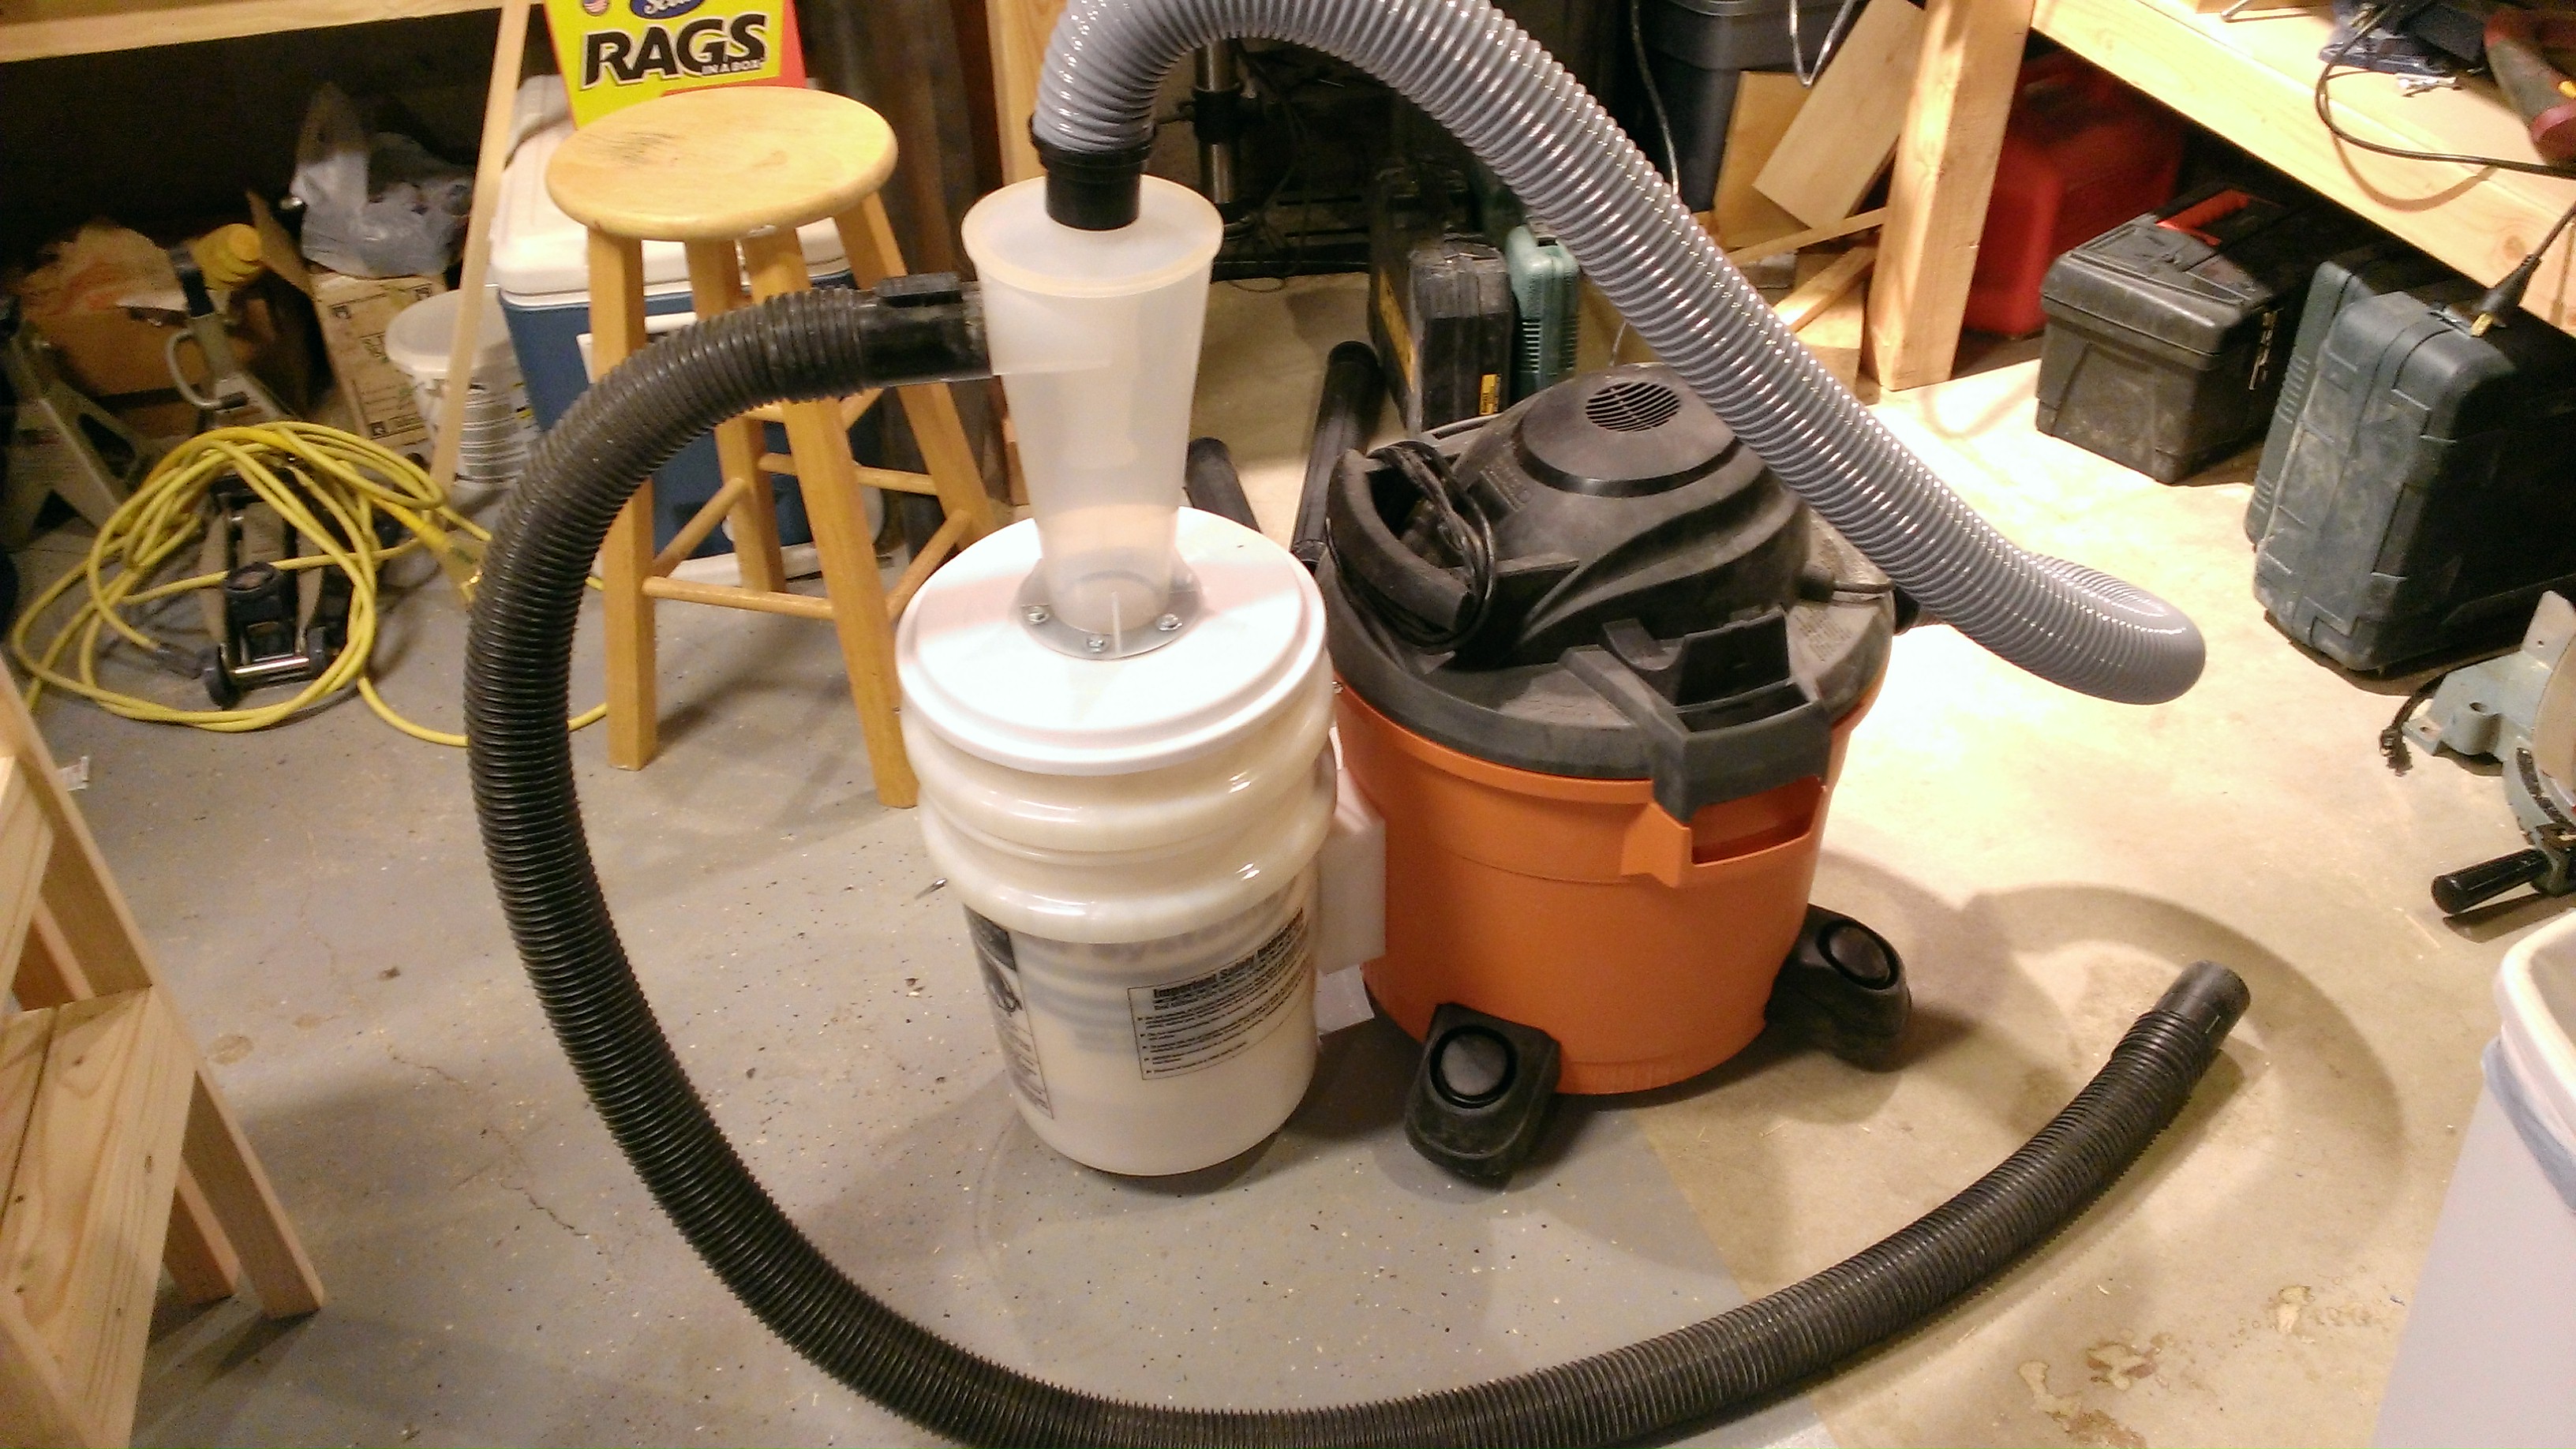
 With recent woodworking projects, I have been putting more effort into keeping the dust under control. That has been going well, but it means I’m going through filters on the shop vac very quickly. You can only knock the dust out of them so many times before they aren’t usable anymore and they fill up with dust very quickly. I’m also nervous about burning out the motor on the shop vac because it can’t pull air through the clogged filter.
Full shop dust collection systems are expensive, but I purchased a simpler solution. The Dust Deputy is a plastic contraption that spins the air before it enters the shop vac. Heavier particles fall into a 5 gallon bucket and clean air enters into the shop vac to get the final cleaning from the filter. There’s nothing too fancy or complicated about it. It’s just science. And boy does it work well!
After more than a month of use, my 5 gallon bucket is about half full and the inside of the shop vac is almost perfectly clean. You could run a white glove across the filter and barely get it dirty. That shiny new filter is going to last a VERY long time. Another bonus is that the 5 gallon bucket is much easier to empty than the shop vac container.
If you think about how many filters you’re going to buy to keep your shop vac working smoothly, the cost of the Dust Deputy isn’t too bad. This is definitely one worth considering if you use your shop vac for dust control.

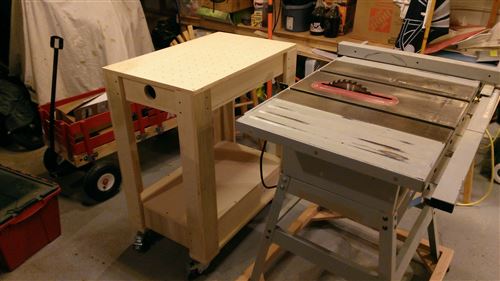
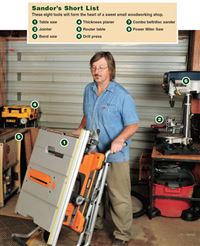 I don’t have room (or money) for full size woodworking equipment in my garage, so instead I buy the smaller versions. But there are lots of different things out there to spend your money on. Which tools do you really need?
  I mentioned
  Yesterday’s
  The monsoon season is upon us which means it’s time to retreat inside from the yardwork and RC planes. I’ve been busy making sawdust lately so I thought I’d devote a whole week to woodworking posts (except Wednesday which is the fantasy football update.)
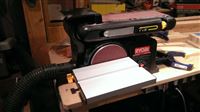 There’s a new tool in my workshop and it has already been extremely useful. It’s a bench-sized combination belt and disc sander. There are a LOT of companies that sell the exact same product (with their own color scheme and logo), but I got a