Usually by now the weather is cool and rainy and it would stay that way through next spring. We’re still completely dry (dryest Aug-Sept on record and second dryest July-Sept!) so Tyla’s parents decided to take advantage of the bonus sunshine and go camping. They headed up to Bay View State Park for the weekend, and Tyla and I visited them for the day on Saturday.
We let Oskar play in the water and went for a walk along the bay. It was a nice lazy day in the sunshine. Photos are in the photo gallery. Apparently it was an Oskar photo shoot.
As soon as FrankL, DougW and I got back from our British Columbia motorcycle ride, we started talking about the next one. We settled on a trip out to Dry Falls in central Washington. This past Saturday was the day that had been circled on the calendars but we woke up to rain. After the driest two month stretch in Seattle history where we only got 0.02 inches of rain, we got rain on the day we picked for the ride! We met at Doug’s house anyway, and, after checking the radar, decided to give it a shot.
The rain ended somewhere around North Bend and from there it was clear sailing. Our route took us up US 97 right through the Wenatchee forest fire. The fire has burned 143 square miles and there are firefighters from all over the country trying to put it out. It started as a series of smaller fires caused by lightning and quickly got out of control. A little bit of the smoke has been drifting west into Seattle, but it was nothing like we experienced over there. The sun turned to a dull red ball, visibility was greatly reduced and you could feel the sting of smoke in your eyes. At one point where the fire was the closest, they had closed down the road and were leading single lines of cars back and forth with pilot cars. The website says that “fire is approaching the highway from the east and crews are conducting burn out operations from the road. Firefighters and their equipment will be along the roadway and visibility likely will be reduced by heavy smoke.“ The fire’s page on inciweb.org shows just how close the fire is to the highway right now!
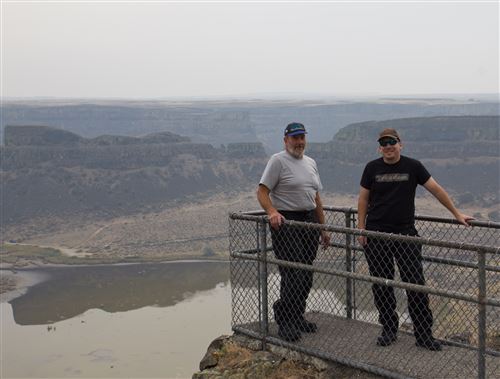
Once we were through that area, we headed east out to Dry Falls. It’s a big dry canyon/riverbed and the sign said it was once the largest waterfall in the world. After taking in the sights it was back on the bikes heading west through Wenatchee again, then Leavenworth, Stevens Pass, and finally back home.
All told it was just over 400 miles in one day. We were pretty sore during those last stretches, but what a day it was!
This was my first major test of the Go Pro camera. Instead of mounting it on my helmet, I mounted it on one of the wind deflectors over my right side mirror. I got just under 2 hours of video recorded before the battery ran out. I posted it all on YouTube if you really want to see the raw footage. I also edited it down to about 5 minutes, added a soundtrack (Eddie Vedder from Into the Wild), and recorded a little commentary to explain what you’re seeing. The version embedded below has the commentary but if you don’t like me talking, you can watch the edited version with no commentary. Confused yet? Just watch the video below!
Sometimes not paying attention to the news catches me by surprise. For example, a trip to Home Depot to buy a replacement 100w incandescent bulb left me confused. They didn’t have any 100w bulbs!
I mentioned it at dinner to Don and he said we had President Bush to thank for that one. Sure enough, in 2007, President Bush signed the Energy Independence and Security Act. 100W bulbs are gone this year, 75W disappear next year, and 60W and 40W bulbs are gone in 2014.
I’ve mostly converted to CCFL bulbs (good LED bulbs are still too expensive) but there are a couple places where I really want incandescent bulbs even though they are inefficient. Specifically,I want instant bright light in the garage and the motion sensor switch installed out there causes CCFL bulbs to flicker.
Luckily you can still find the 100W bulbs on Amazon so I bought a 24 pack. That seemed like a good idea until they arrived at my house in a poorly packaged box containing a million light bulb pieces. Amazon has a good return policy though so I sent it back and found 100w bulbs at Fred Meyer.
The bottom line is don’t miss out on buying these if you need them in your house!
For the second year in a row, we’ve had our annual church picnic at the Trenkamp home instead of in the back yard of church. They have a wonderful setting for the picnic and it’s so nice of them to host us all! This year was the first cloudy day in almost two months, but the rain held off and we had a wonderful time. There was plenty of food, cornhole, horseshoes, Kan Jam, and socializing. We hope you can make it next year! Instead of doing photos, I tried to put together a little video.
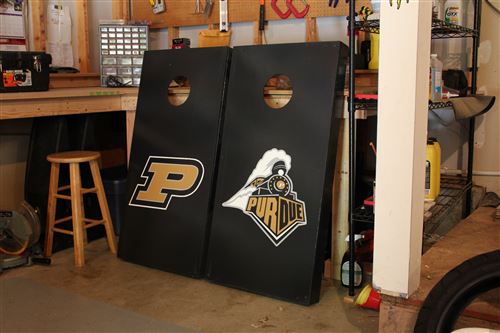
After putting the acrylic cover over Tim’s incredible paint job, I decided to give them a few more upgrades. First I drilled two rows of 22 holes (0 – 21) in the back of the board to use as a scoring system. You just move the golf tees along as you score points. It’s quick and easy and there’s nothing extra to carry along with the boards. I put some black paint in and around the holes, but it doesn’t match the rest of what Tim had there already so I might sand it down and redo it the same way he did. The paint makes it look like my holes are way more uneven than they really are. I need to get some white paint and draw a couple numbers or markers on there for easier counting.
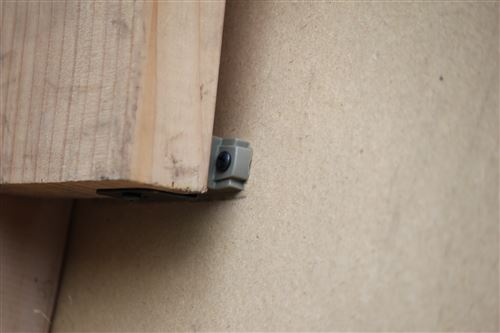
My boards have foldable legs on them so they don’t take up as much room in the car. They’re a great feature, but they can be a little difficult to slide in and out of the car as the legs are dropping down. Dad suggested some magnets. We picked up some cabinet magnetics latches and those are working quite well.
I don’t have any more immediate plans for them, but I have lots more ideas of things I could do. I’ve seen people add lighting around the bottom of the hole for when it gets dark, and I also think I could whip up a nice digital scoreboard that would attach to the back of a board for even easier scorekeeping. That can probably all wait though.
I posted a couple weeks back about the amazing paint job that Tim did on my cornhole boards. Yes, that’s really paint, not a decal!
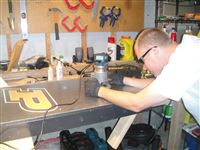
The paint didn’t adhere real well to the MDF and we were concerned that it would scrape off as soon as we started playing. So when Dad was here over the weekend, we bought some sheets of acrylic and applied them to the top of the boards. That involved securing the sheet to the boards with screws (countersunk so the bags wouldn’t catch), trimming the sheets to match the size of the boards and then cutting out new holes to match the existing holes. We weren’t sure how we’d do the trimming and cutting but after experimenting with a Dremel, we switched to the router and it worked remarkably well! I had a bit with a bearing on the bottom the same diameter as the cutting blade. That rode along the edge of the wood while the blade cut the acrylic. We were able to quickly cut an exact match for the boards!
The other concern with this plan was that the boards would end up being way too slippery, but surprisingly they were LESS slippery than before due to the static from the protective plastic that was on the acrylic. I think that will wear off over time and once the boards got a little dusty, they played very close to the original, unpainted boards.
The only downside to this approach was that as the boards heated up in the direct sunlight, the acrylic started to warp a bit. It doesn’t expand at the same rate as the wood underneath. That wasn’t a huge deal though so hopefully this will be the final solution.
Eventually the acrylic will get scuffed up but it should be a pretty quick job to replace them and keep the boards looking like new!
My parents were out over Labor Day for their annual visit. I’ll have a couple posts about our activities from the weekend, and this first one is about our trip to Crystal Mountain. I don’t get down there in the summer very often since we usually drive past and head to Rainier.
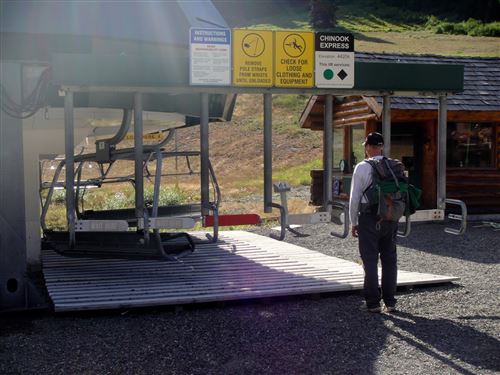
After a delicious breakfast at the Brown Bag Café in Kirkland, we headed to the mountain and purchased tickets for a gondola ride. The ride up was beautiful and the skies were perfectly blue. Mt. Rainier was there in all it’s glory. We paused at the top for a while to marvel in the view and for me to attempt another panorama. I attempted this one at maximum zoom which is more difficult, and it didn’t come out very well. There were quite a few gaps where I didn’t overlap the pictures properly. You can view it on the Photosynth site. While the overall image isn’t that great, it is pretty neat to see how far you can zoom in. I also added a marker (look on the right side of the page for the link) to the Mount Freemont Fire Lookout. I hiked there with my parents years ago and earlier this year with Tyla.
We decided to hike our way down heading around the backside of the gondola, under Powder Bowl, across Bear Pits, under the Forest Queen lift, along the southback border, and then over to Gold Hills and down to the base. Its somewhere between 5 and 6 miles and 2400 feet down. It’s a wonderful hike that shows a lot of different parts of Crystal. You start off with great views of the mountain, then go along some steep open hillsides, pass by a lake, and then walk through an old growth forest complete with an old gold mine.
As we were nearing the end of our hike, I spotted a couple up ahead that looked familiar. It was my cousin Jared and his wife Gayla. They live over in Moses Lake! We had no idea they were going to be at Crystal and the odds of bumping into them in such a huge area are astronomical. They were staying the night and having dinner at the Summit House. They must have had a wonderful view with the sun setting behind Rainier while they ate!
Kudos to Mom who did this all on a healing broken toe! Photos are posted in the photo gallery.
In addition to regular paper coupons, our grocery store has started a program called “Just For U” where you can clip coupons online. They intend for you to flip through the coupons and add certain ones to your frequent shopper card. Those items show up in the phone app and you are supposed to go buy those specific items. I’ve never been one for clipping coupons, but every once in a while, I go to the site and click Add on every single coupon. We use OneNote to track our shopping lists so their app has no appeal to me. I save a few bucks here and there, but it’s not really worth my time to clip these virtual coupons.
Then one day I had an idea: why am I manually clicking on all these buttons? I’m a geek and geek’s don’t do this sort of repetitive stuff. We write code to do it for us! So with a little ingenuity, I whipped up a very basic piece of javascript that runs over the whole page, finds all the coupon buttons and then clicks them. Within a second or two, I can clip hundreds of coupons. I even made this a button in my browser toolbar so it’s nice and easy to run.
javascript:(async function(){ function sleep(ms) { return new Promise(resolve => setTimeout(resolve, ms)); } async function scrollDown(count) { for (var i = 0; i < count; i++) { $(“.load-more”).click(); await sleep(1000); } } await scrollDown(10); $(‘.grid-coupon-btn:not([disabled])’).each(function(index,value){ value.click() });})()
This won’t help me save any more money, but it definitely means I spend less time clicking around on their website!
[11/23/2020] Updated Javascript to match the current website.
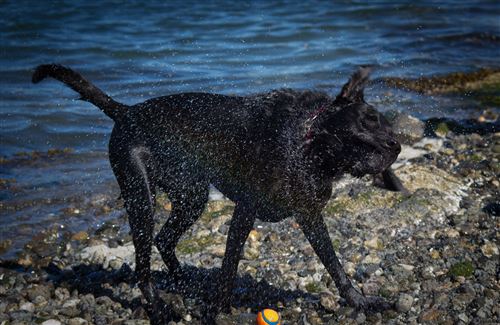
We headed out for a last minute camping trip to La Conner, WA with Tyla’s family a couple weekends ago. We’ve been to that campground once before, but the last time it was cold and rainy the whole time. This was a quick trip, but the weather was good and Oskar had fun playing in the water. I, of course, had fun playing with the camera. I finally succeeded in getting shots of Oskar shaking off where the sun was at the right angle and he wasn’t blurry. A shutter speed of 1/1000th is just barely enough to freeze most of him. I also attempted a timelapse of the sunset. That’s fairly difficult since the exposure changes so rapidly but you have to leave it fixed or else the sky never gets darker. This one is pretty short and not stellar, but I embedded the YouTube video anyway. More photos are available in the photo gallery.
Back when Tim and I were roommates, he had the idea to paint my cornhole boards. He started by drawing a John Deere logo on one but that’s as far as it got. He recently borrowed my boards and when I got them back, wow! I now have the best looking cornhole boards around! He did this all with tape and paint, not decals. It looks incredible! Thanks Tim!

 Usually by now the weather is cool and rainy and it would stay that way through next spring. We’re still completely dry (dryest Aug-Sept on record and second dryest July-Sept!) so Tyla’s parents decided to take advantage of the bonus sunshine and go camping. They headed up to Bay View State Park for the weekend, and Tyla and I visited them for the day on Saturday.
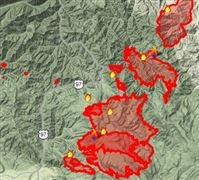 The rain ended somewhere around North Bend and from there it was clear sailing. Our route took us up US 97 right through the Wenatchee forest fire. The fire has burned 143 square miles and there are firefighters from all over the country trying to put it out. It started as a series of smaller fires caused by lightning and quickly got out of control. A little bit of the smoke has been drifting west into Seattle, but it was nothing like we experienced over there. The sun turned to a dull red ball, visibility was greatly reduced and you could feel the sting of smoke in your eyes. At one point where the fire was the closest, they had closed down the road and were leading single lines of cars back and forth with pilot cars. The website says that “fire is approaching the highway from the east and crews are conducting burn out operations from the road. Firefighters and their equipment will be along the roadway and visibility likely will be reduced by heavy smoke.“ The fire’s page on
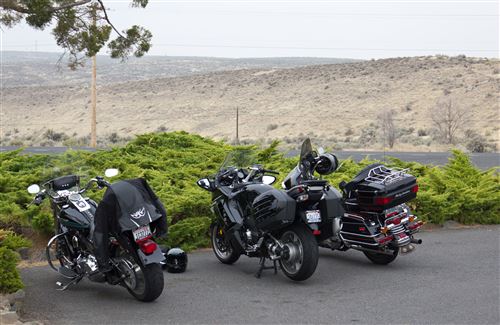
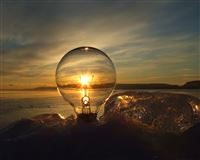 Sometimes not paying attention to the news catches me by surprise. For example, a trip to Home Depot to buy a replacement 100w incandescent bulb left me confused. They didn’t have any 100w bulbs!
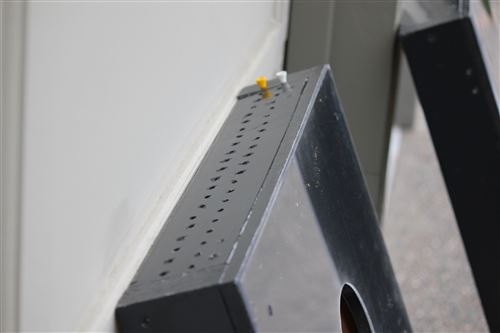
 I posted a couple weeks back about the
 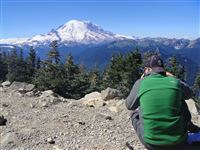 My parents were out over Labor Day for their annual visit. I’ll have a couple posts about our activities from the weekend, and this first one is about our trip to Crystal Mountain. I don’t get down there in the summer very often since we usually drive past and head to Rainier.
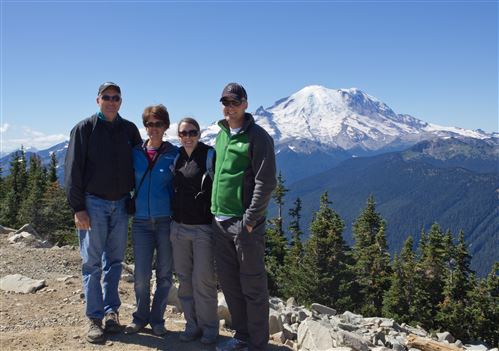
 In addition to regular paper coupons, our grocery store has started a program called “Just For U” where you can clip coupons online. They intend for you to flip through the coupons and add certain ones to your frequent shopper card. Those items show up in the phone app and you are supposed to go buy those specific items. I’ve never been one for clipping coupons, but every once in a while, I go to the site and click Add on every single coupon. We use OneNote to track our shopping lists so their app has no appeal to me. I save a few bucks here and there, but it’s not really worth my time to clip these virtual coupons.
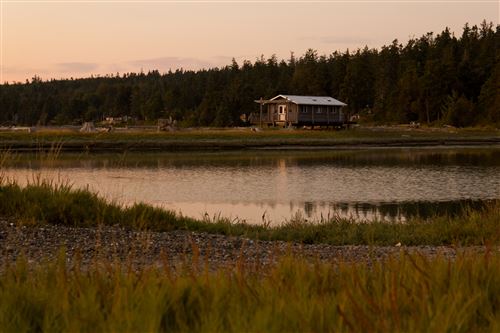
Church Picnic
For the second year in a row, we’ve had our annual church picnic at the Trenkamp home instead of in the back yard of church. They have a wonderful setting for the picnic and it’s so nice of them to host us all! This year was the first cloudy day in almost two months, but the rain held off and we had a wonderful time. There was plenty of food, cornhole, horseshoes, Kan Jam, and socializing. We hope you can make it next year! Instead of doing photos, I tried to put together a little video.