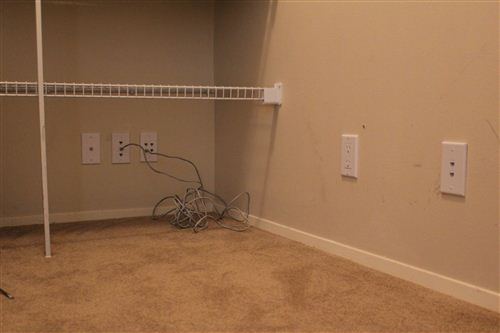
 When we bought this house, the inspector found a few outlets that didn’t work and quite a few that didn’t hold a plug very tightly. Since I had to replace quite a few, I decided to just replace them all. We chose to go with the Decora style outlets and switches. Those are the rectangular ones. I went for the tamper resistant outlets meaning that it’s difficult to shock yourself by sticking something in. Replacing the existing outlets and switches is a pretty simple process (once I picked up a device that helps me figure out which circuit I should shut off), but it’s time consuming.
Most of this is pretty boring, but it’s fun to look through the Leviton product catalog and see all of the interesting stuff that they offer. Here are some off the non-standard things that I’ve installed:
- Digital timer switch that calculates sunrise and sunset. Read more in a previous post.
- Bathroom fan timers. These come in 5-10-20-30 minute and 10-20-30-60 minute versions. I used the shorter ones for the bathrooms that just have toilets and the longer ones for the bathrooms with showers.
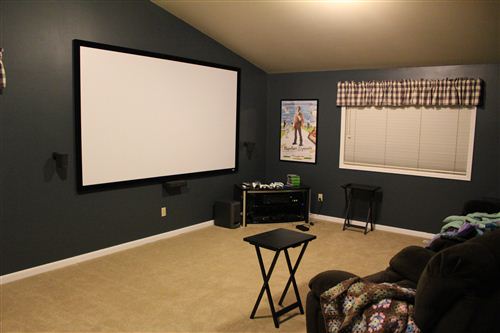
- Remote control dimmer switch. I have one of these in the theater room and one in the bedroom.
-
Nightlight outlet. This light isn’t very bright but it’s just enough to light up a dark area at night. It has a light sensor so it turns off during the day.
-
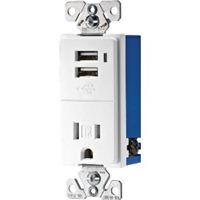
USB outlets. I put two of these in the bedroom for charging our phones and Kindles. There are a few different models around but these are UL approved.
-
Surge protector outlet. I haven’t installed one of these yet but I’m tempted to. It saves you from having a bulky surge protector lying on the floor for one or two devices. I’m holding off because I’m thinking about installing a whole house surge protector instead.
The other day I was standing in a bar with my boss and we were going back and forth rattling off different fun things we had seen in the Leviton catalog. That’s when I knew that unequivocally, I was an adult. A geek, but an adult.
 At our last homeowner’s association, a Woodinville police offer was a guest speaker. She talked about the types of calls that came from our area (there aren’t many), and the size of the Woodinville police force (only 1 or 2 officers on patrol at any given time.) At the end of the talk, she offered to come by our houses and talk about security. Most people seemed to ignore this line, but I got her card and a few days later, we set up a meeting.
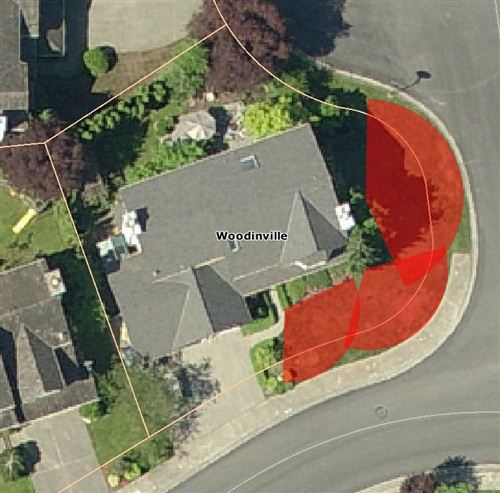
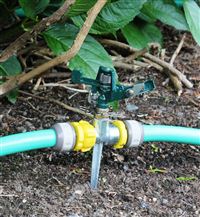 This setup fulfills my requirements of not having to move sprinklers around and I can leave it set up semi-permanently. The downside is that since each sprinkler is covering a different span, the yard isn’t watered evenly. Also, when we had a plumber add a pressure regulator valve to help with the water hammer in the house, he turned down our water pressure to 40psi. Now that I’ve installed arrestors on every termination point in the house, I was able to crank that up to 50psi. 40 wasn’t enough to power all three sprinklers but 50 is just enough.
  When I moved out on my own, my parents got me a 9V cordless Makita drill. It served me well through a ton of projects, but after 10 years, the batteries are worn out. It was either buy some new batteries or upgrade. After looking at the prices, I went with the latter and decided to keep the old drill around for smaller projects around the house.
 They say when you buy a house, the three most important things are location, location and location. I have about a five minute drive to Home Depot so I’d say our location is pretty great! The people there are starting to recognize me, and well they should. Here’s a breakdown of my transactions at Home Depot since we moved got the house at the beginning of October.
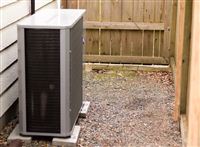 It’s so nice to have contractors that you can trust. For any heating question, I call up Chelsea’s Dad who owns PMG Mechanical (206) 624-5040. When we bought the house, I asked him to come over and inspect our equipment. He recommended replacing the water heater immediately and said the furnace would last us through the winter but not much more. These recommendations lined up directly with what we heard from our inspector.
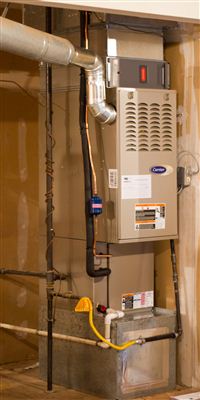 We ended up with a Carrier Infinity 80% efficient two stage furnace and a Carrier Infinity suitecase air conditioner. Brent recommended that we go with the 80% furnace over one of the high efficiency models because they just haven’t nailed the reliability of those models yet. The two stage furnace will give us a big boost because it only runs at partial power most of the time, but for the rare occasion when it gets really cold, the furnace kicks in full power. The fan is also incredibly efficient and costs almost nothing to run. The air conditioner is an extra small and quiet model that is normally installed in commercial locations where size and noise are a factor. In our case, it we only had about 5 feet to our property line and I wanted to still get yard waste bins and the lawn mower through. After it was installed, we still have 3 feet of clearance to the fence. It’s definitely a splurge but I’m betting we’ll think it was worth it as time goes on. Plus, we’ll be the party house when it’s hot outside! The final bit that we added to the bill was an electronic air cleaner. It increases air flow through the system, creates an allergy free environment, and is very easy to clean.
 For the first time in my life, I own dirt! Yard care is a chore for some people, but after years of living in apartments and the condo, I’m excited to have a chance at taking care of a yard. We’ll see long long that feeling lasts!