If that title wasn’t warning enough, you should know that this is going to be a pretty geeky post. I thought I’d do a little writeup of the project I’ve been toying with for the last couple weeks and I think a handful of you will enjoy it.
It all began when I started thinking about how you would write a program to find all the words on a 5×5 grid of letters (like Boggle.) There are many apps that do this already, but how do they work? How do you take a dictionary of 100,000 words and quickly apply to it to a bazillion possible letter combinations on a 5×5 grid and find all the valid words?
Radix Tree
 I started off by reading in all the words and storing them in a radix tree. There is one root node and then the children of that root node are the distinct first letters in your word list. For a full dictionary you’ll probably end up with that first level of the tree having 26 nodes, one for each letter. This pattern continues down the tree so if you grab any node in the tree, the nodes above it correspond to the prefix of a words and all possible routes down through the children correspond to valid suffixes. Take any path from top to bottom and you have a word in the dictionary.
Each node also contains a flag that we’ll call Terminal which is true if that node can end a word and false if it cannot. So in the example on the right, the “n” in “one” would have Terminal = true because “on” is a valid word.
This turns out to be a very quick way to determine if a string of letters is a valid word. But there is a lot of extra data in the tree. For example, in the diagram on the right, the ending letters in “one” and “three” are identical nodes. There’s room for improvement.
Directed Acyclic Word Graph
As I was thinking about ways to compress this tree a little bit, DaveM pointed me to DAWGs (Directed Acyclic Word Graphs.) To create the DAWG, I create an array of pointers to all the nodes in the tree sorted by their depth in the tree. Starting at the leaf nodes (depth = 0) and moving up to the root, I apply the following algorithm
For each pair of nodes at depth x, if the two nodes have the same character and the two nodes have the same terminal flag and the two nodes have identical subtrees then remove node2 from its parent and add node1 to the childlist of the parent of node2.
Done correctly in a large word list, you can throw away a half to two thirds of the nodes in you tree!
Storing the Graph
It takes a while to build and compress the graph so it makes sense to serialize the tree so that I can just read it in from disc and be ready to go. I encoded each node as a 32-bit number. The first 5 bits represent the character (enough to store the 26 letters in the alphabet), 1 bit represents the terminal flag on/off value, and the last 26 bits represent the array index of the list of the node’s children. I flatten the tree into a jagged array where each node has a slot in the array and the value of that slot is a series of 32-bit numbers which represent it’s children with the above encoding scheme. The algorithm looks like this:
Get a list of the nodes in breadth first order.
Foreach each node in the BFS list look at each of the node’s children. If the child does not have a slot in the array, create an array slot and store that index in the child node. Encode the child node into the 32-bit number and append it to the list of the parent node’s children.
So for any array index N, the list of 32 bit numbers in that array slot represent the children of that node.
Writing this out to disc is pretty straightforward. The only special steps I took were to start the file with the length of the array and then when I write each array slot, I start with the number of children at that position. This speeds things up when I read in the file because I can allocate the right sized array.
Putting It to Use
Now it’s time to put the DAWG to use. I begin by generating a random 5×5 board. I use a weighting scheme to favor the more common letters and produce boards with more words. I then start at look at each node and follow this algorithm:
If this spot hasn’t been visited and the current string plus the letter on this spot is a valid substring in the DAWG, mark this spot as visited and search again looking in all 7 directions. If the current string is a valid word in the DAWG, add it to the list of found words.
Once that’s done I sort the found word list for quicker lookup. Now the player can start the game. When they punch in a word, it’s a simple lookup in that sorted list to determine if it’s a valid word. Since I know what all the valid words are, I can tell the user they have found X% of the words and then show the full word list at the end of the game.
Performance
The speed of the DAWG generation and serialization doesn’t really matter since it only happens once, but I can plow through 100K words in roughly 30 seconds. I’m writing this game for my phone which has a 528MHz processor in it. I can read in the DAWG from disc and load the array into memory in about 9 tenths of a second. Generating the random board and finding all the words happens in only 1 tenth of a second!
The next step is to give this game a little nicer GUI and add a timer, but I always get sidetracked playing the game instead of trying to improve it. This might be as good as it gets before I move on to the next hobby project.

 A couple weeks ago, I mentioned I was about ready to pull the trigger on the new computer. That day finally arrived and I carved out some time to put it together on Wednesday.
  I’ve had key lime pie on my mind for quite a while, and, while standing in the grocery store last weekend, I decided it was time to give it a shot. I pulled up a recipe on my phone and was shocked at how simple it was. Key lime juice, egg yolk, and sweetened condensed milk. But what is a key lime? Can I use regular lime juice? I ended up finding a bottle that said it was key lime juice so I went for it. It turns out that key limes are a lime variety thought to have originated in the Florida Keys.
 This post assumes that you’ve read at least the
 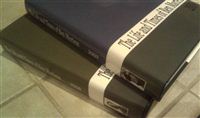 Two years ago, I
  I bought my black 2009 Kawasaki Concours 14 ABS
 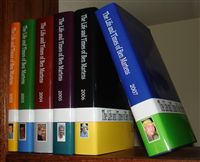 I’m finishing up the editing for blog volumes 2008 and 2009. The technical process is pretty quick because I have a tool that does the following:
 I love chili, and when I make chili, I generally say the spicier the better. I made it last week and I think I finally made it too spicy even for me. I won’t go into details. You should just be thankful you don’t live with me. Here is the basic recipe I use and I’ll point out where you can adjust the heat.
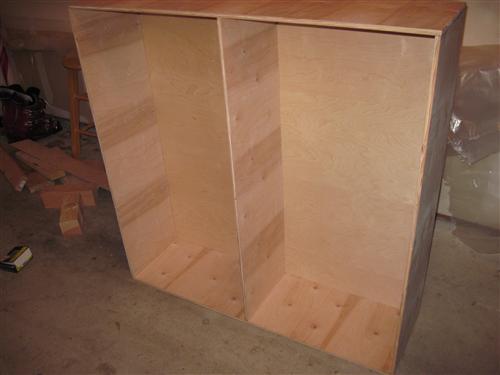
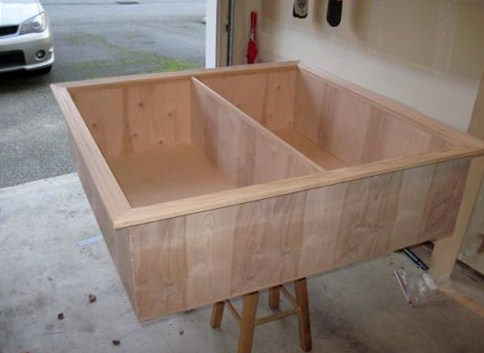
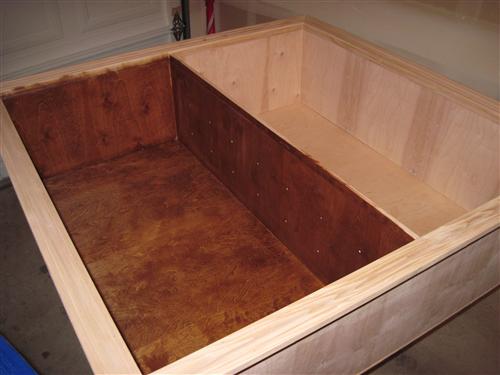
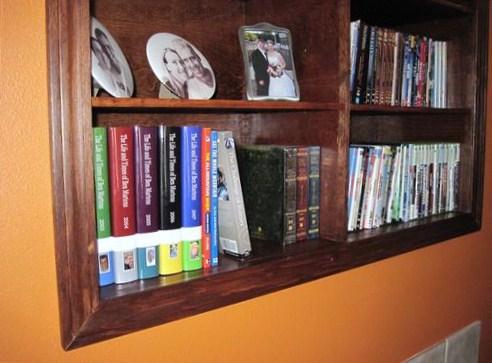
 I’ve had the last 1.5 weeks off from work, and other than a three day trip for Christmas, I spent most of it at home. My project over the break was some new shelves to go above the fireplace. I was no longer happy with the look of the old ones, and with Tyla living here starting in April, I wanted something more versatile.
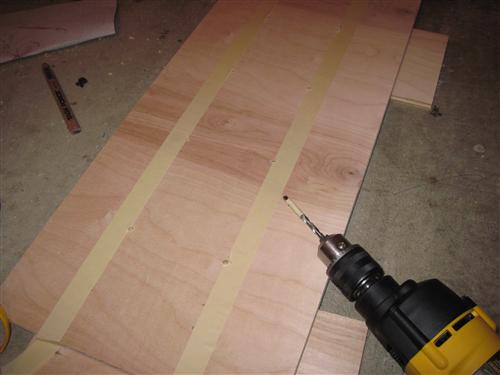

A Trip To The ER
Before this weekend, I had never been to the ER as a patient. (Don’t worry, this has a fairly happy ending.) It all started at a party at Tim and Chelsea’s house. I took a backwards/sideways step off the deck while I was talking to someone and my right foot went directly into one of the holes that their dog digs. I heard a pop as my ankle rolled.
I’ve had lots of sprained ankles and wrists in the past, and for a while it didn’t seem much different. I even played a couple more games of cornhole. After a while, I asked Tyla if we could leave the party a little early because it was starting to get sore. By the time I got back to her apartment to drop her off, it was hurting pretty bad so I decided to ice it there before driving home. Eventually it became clear that it wasn’t getting better and I couldn’t put any weight on it. With the impending wedding, I didn’t want to mess with a potential break so Tyla drove me to the ER.
I was extremely impressed with Evergreen Hospital. Upon entering the ER, we were immediately met by security who directed us where to go. We had a private triage room, friendly nurses, and the whole process felt quick. They wheeled me in for xrays but the results thankfully didn’t show anything broken. The doctor wrote me a prescription for vicodin (which I haven’t filled) and crutches. He said that in 5-7 days I should be feeling much better and that this was just a really bad sprain.
So I owe Tyla a HUGE thanks for driving me around late at night both to the ER and then to try and find a drug store that was open and sold crutches. I realized that I’m much better at giving help like this than receiving it. I love you!
The good news is that it’s already feeling quite a bit better. I spent much of Sunday with it elevated. While this sprain did feel a lot worse than ones I’ve had before, I probably would have just hobbled on it for a while instead of using the crutches. But Tyla is moving her stuff to the condo this weekend (she’ll live at her parents for the two weeks before the wedding) and I want to be healthy to help. And then there is the wedding in less than three weeks. So I’m glad we got the peace of mind that came with the xrays and I’ll take every precaution I can to help this heal as quickly as possible.