I’ve had this pie chart floating around in my head for a year and finally got around to making it. Does it look accurate for your own projects?


I’ve had this pie chart floating around in my head for a year and finally got around to making it. Does it look accurate for your own projects?
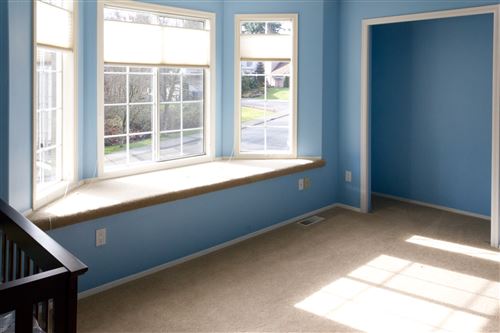
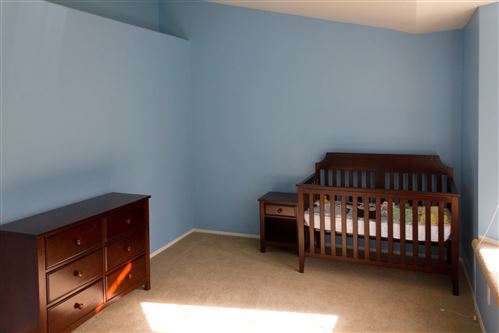
The room we’ve picked for the baby took it’s first big step towards that goal. Tim and Chelsea stopped by to help put new paint on the walls. Previously it was a couple shades of yellow (like almost every single room in the rest of the house when we bought it) but we covered it in a nice baby blue. It really looks nice with the white trim and the dark wood furniture. Tyla has a lot more decorations in mind and I have quite a few projects remaining like putting shelves back on the closet, but here are a couple photos to show you what it looks like now. I wish we lived closer to Jackie so she could do one of her wonderful murals in this room!
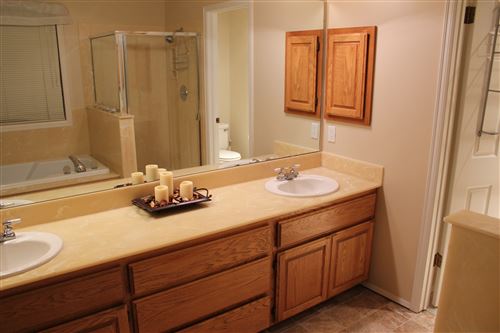
When I wrote the “before” post for our bathroom remodel, I said I’d have finished pictures in a couple weeks. That was being very generous in case there were mistakes that I found to have them clean up, etc. I’m happy to report that the job is finished and I will make the final payment tomorrow. This room is perfect! As a reminder, here’s the before photo:
And here’s what it looks like now!
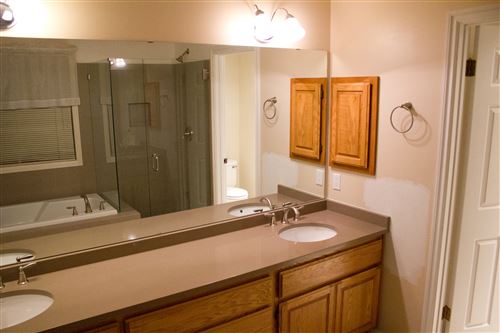
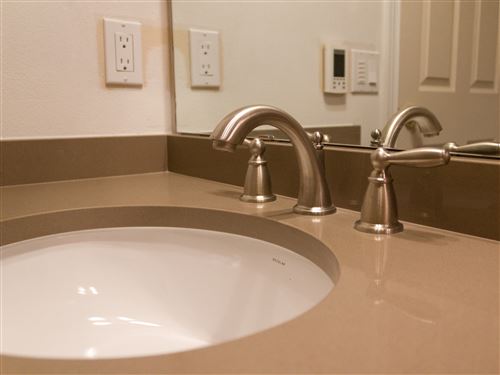
It’s difficult to get good photos in such a small space but hopefully you get a decent idea of what it looks like now. Everything is in the same place and the cabinets are the same, but everything else is new. You’ll notice that we didn’t pay the contractor to paint for us. We’ll do that ourselves later. Tyla also wants me to point out that the “ugly curtains” are being replaced too. Here’s a list of some of the more visible changes:
There are also some great changes that aren’t quite as obvious:
The project all went remarkably according to plan. They finished a couple days before planned and our total overrun was less than 2%. The only surprises in the project were:
Now that the project is done, I can give a 100% recommendation for Ron Palmer Construction. He was not the cheapest bid, but he was super detailed. The other contractors gave one page bids. Ron’s was 9 pages with only one page of boilerplate content. Everything was completely broken down so I could see exactly what he was charging for each task. We had a schedule listing what they would be doing every single day. His whole team was very professional and friendly. We had no problem leaving them a key to work in our house each day. From day 1 until they end, they did a marvelous job of protecting the rest of our house and cleaning up after themselves. They had plastic down on the carpet all the way out to the front door, padding on the hardwood floors, and even a huge plastic sheet with a zipper door separating our bed area from the bathroom dust. And as I said before, he was almost spot on with his cost estimate and beat his schedule. Once we save up our pennies for the next remodel, I’ll have a hard time picking anyone but Ron.
So there you have it. The project we talked about the very first time we saw the house is done! Given the same budget, there’s nothing I’d do differently.
When Tyla and I walked through this house in the fall of 2011, we loved a lot of things about it, but the master bathroom was not one of them. It was almost a deal breaker. In the end we bought the house with a plan to save our pennies for a remodel as soon as possible. When that positive pregnancy test came around, I tossed out my hopes of doing some of the work by myself and started the search for a general contractor to run the project. The project should be completed in the next couple weeks, but before I get to the pictures of our new bathroom, I figure it’s worth spending a post talking about what was there before.
I’ll start by saying that I know some of you have these features in your current bathrooms. That’s fine! Everyone likes different things and has different priorities. Just because we changed out something in our bathroom that you have in yours doesn’t mean we think you should do the same in yours (or that we even notice!) But I do think it’s useful to talk about this kind of thing. When we were shopping for houses, we learned a lot about what we like and don’t like. That info was supplemented by talking to friends about their preferences. The only way you can really form your own opinions is to see lots of ideas and hear what other people think so I’ll give you one more data point.
This is one of the few projects where I actually remembered to take a bunch of “before” photos. The one below gives you the basic idea of what we started with. This photo looks towards the sinks with the reflection of the tub and shower in the mirror. The door to the right goes into a small room with a toilet.
Actually this isn’t exactly how it was when we bought the house. There was originally carpet on the floor, but we knew that was one thing we wanted to change. When we had new carpet installed before we moved in, we didn’t put carpet there and I laid some vinyl so we didn’t have to walk on the subfloor.
The entrance to the bathroom is to the left of this photo. What you can’t see is that there is no door to the bathroom. Some people like that, but it felt so odd to us (in addition to being too noisy when we got up at different times) that we have been using the guest bathroom the entire time.
I’ll include a full project list when I post the “after” photos, but some of our top goals were to add a door to the bathroom, get rid of all the yellow synthetic marble stuff, and tile the floor. That meant that the bathroom was pretty much taken down to the subfloor and studs. The contractor estimated this at as a six week project and he’s on track to hit his estimate almost to the day. His cost estimate is coming in right on target too. I’ll reserve a full recommendation until the final tasks are crossed off the list, but we’ve been very happy with our choice so far.
While the project is six weeks on the calendar, the last couple weeks are mostly waiting around for the counter top and the shower glass to get templated, cut and installed. It’s hard to pay somebody for work that I could do myself, but I would have had to subcontract chunks of this out anyway. It was also hard to contract this out after watching Tim redo their bathroom by himself. His end product is extremely impressive and comes with a huge sense of accomplishment. All I get for contracting our project out is a hole in our bank account. But after I see how much work they put into it, I know it would have taken me forever and there’s no way I would have finished before the baby arrived. The bid included 236 hours of work. If you assume that it would take me twice as long as a professional and if I could find 15 hours a week to work on it, that’s 31 weeks of work!
I know this post is kind of a tease, but we’re hoping to have the second, more interesting post ready by mid-February. Stay tuned!
 We’re a couple weeks away from having our master bathroom remodel finished. I’ll do a full write up on that with lots of pictures when it’s finished, but I wanted to share one small slice of the project with you now.
Going into this project, one of the biggest question marks in my head was how in the world we were going to decide on what tile to used. We needed to pick out a new counter top, tile for the floor, and tile for our soaker tub and the shower stall. I looked around at the websites of a few tile places and was scared away by what I thought would be extremely high prices. Looking to save a buck, I headed to a discount tile store in Bellevue. They’re small but they have a nice showroom and the employees were fantastic in helping me design our bathroom. I took in a door from the cabinet and walked out with samples to show Tyla. The floor was white with some gray and brown in it and the shower/tub tile was 8×20” sage. The counter was a gray color. She loved the look so as soon as we signed the contract with our general contractor, we placed the order for the tile. Everything was scheduled to arrive two weeks before the contractor started any work on the bathroom. Perfect!
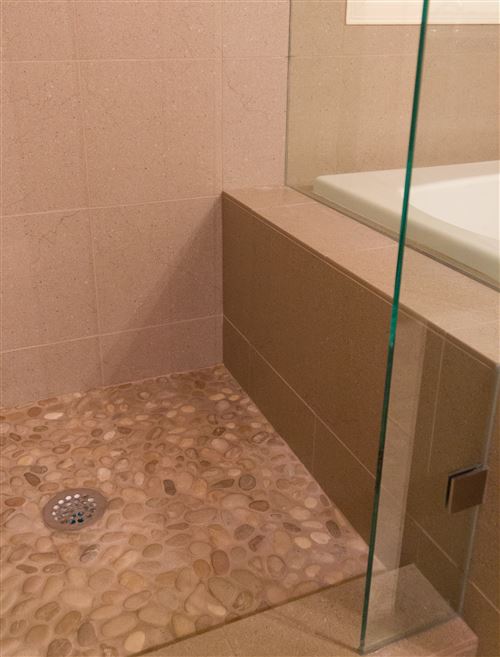
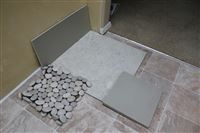
The tile arrived so I picked it up and set it in the garage. We had the 8×20 wall tile, 20×20 floor tile, and rocks for the bottom of the shower. The next day I realized that the wall tile and the rocks were wrong.
No problem. I called, they ordered the new stuff and said it would arrive in a couple days. A couple days turned into a couple weeks but they were sure that it would show up on the exact day that the tile install was scheduled to begin. The correct rocks did show up pretty quickly but I had to wait for the tile.
While I waited, I got more and more nervous about what would happen if the tile didn’t show up. Additionally, I wasn’t sure I even wanted it to show up. Was that sage green going to look ok? Would it still look good in 10-15 years?
The magic day came with silence so I gave them a call. They had to check on it and get back to me. “Your tile isn’t here. It’s not coming. It’s never coming. It’s discontinued.” Apparently the warehouse they work with had been sending mixed messages and here I am at the end of the chain with a contractor waiting to install tile that I don’t have. Yikes.
Thankfully my contractor was super helpful. He suggested a couple places in this huge complex of tile warehouses in south Seattle that kept a lot of tile in stock. They looked pretty fancy but what could I do? We were in a hurry. Tyla and I headed down there with our contractor and asked to only see tile that was in stock. We pretty quickly settled on a 12×12 tile that was gray with some brown in it. And the price? The price about 40% of what the original tile cost! We picked up the tile that same day and we were back in action. On top of that, I felt a LOT more comfortable with our less ambitious design. I figure that gray, brown and white are going to be at least sort of in style for a long time.
I eventually got my money back from the original tile store, the new tile got installed, and it all has a happy ending (minus a few weeks of little sleep, but that’s just prep for a baby, right?) If we ever need tile again, I’ve learned my lesson and will head back to one of the big tile warehouses like Daltile where we ended up getting our tile. The prices were excellent and a lot of it was in stock. What does the new tile look like? You’ll have to wait a couple more weeks until the bathroom is finished!
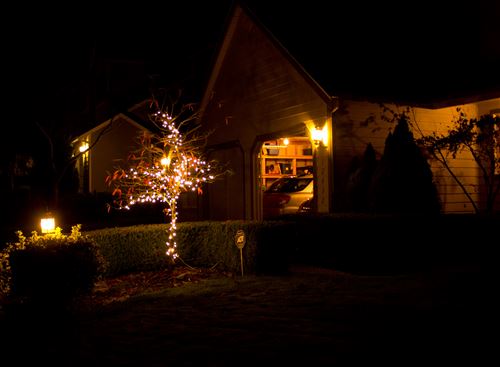
I’ve always dreamed of having my own Christmas light display. It would cost too much to do the whole house with LED lights right now, but I got a small start by wrapping the little tree in the front yard. With LED lights, you can chose from the very cool (as in cool on the temperature scale for color) white lights or the “warm white” lights that more closely match incandescent. Both have their advantages but I went with the warm white lights to more closely match my existing yard lighting and other displays on the street. My hope is that I can continue to find white LED lights that match this color every year and slowly build out the rest of the exterior lighting. Our house is really set up well for a magnificent display. If I had easy access to a 30 foot lift, we could decorate the huge cedar (am I right Tim?) tree on the corner of our house!
So here’s a photo of what we have now. I’m almost embarrassed to show it. In 20 years I can look back and laugh at how we got started!
 Sometimes not paying attention to the news catches me by surprise. For example, a trip to Home Depot to buy a replacement 100w incandescent bulb left me confused. They didn’t have any 100w bulbs!
I mentioned it at dinner to Don and he said we had President Bush to thank for that one. Sure enough, in 2007, President Bush signed the Energy Independence and Security Act. 100W bulbs are gone this year, 75W disappear next year, and 60W and 40W bulbs are gone in 2014.
I’ve mostly converted to CCFL bulbs (good LED bulbs are still too expensive) but there are a couple places where I really want incandescent bulbs even though they are inefficient. Specifically,I want instant bright light in the garage and the motion sensor switch installed out there causes CCFL bulbs to flicker.
Luckily you can still find the 100W bulbs on Amazon so I bought a 24 pack. That seemed like a good idea until they arrived at my house in a poorly packaged box containing a million light bulb pieces. Amazon has a good return policy though so I sent it back and found 100w bulbs at Fred Meyer.
The bottom line is don’t miss out on buying these if you need them in your house!
 I’m at a weird point in our home ownership: my todo list is getting short! When we moved in, it seemed like no matter how hard I worked, I kept finding more and more things that need to be done. Here’s a list of the bigger projects that have been completed since we bought the house last October:
There’s lots more but those are the bigger projects. Whew! It makes me tired just thinking about it all. We still have things that we want to do but I feel like we’ve moved off of required list into the wish list. Now it’s more of a decision of whether or not it’s worth the investment.
 Tyla has been very good about letting me fill up the garage with tools. I didn’t need much in the condo and now I’m finally getting to the point where I can start and finish a job with the tools I already have. Some have been duds and some have been great choices. Here are my top recommendations:
What’s your favorite tool? I’m always looking for something new!
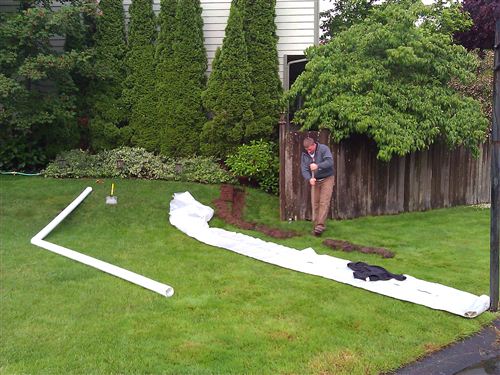
 The area on the northeast part of our lot towards the cul-de-sac has always been mushy and swampy. One day I was out there when the sump pump turned on and I saw it shooting out a LOT of water right down the hill into that area. After chatting with Tim, we decided to see if we could improve the situation.
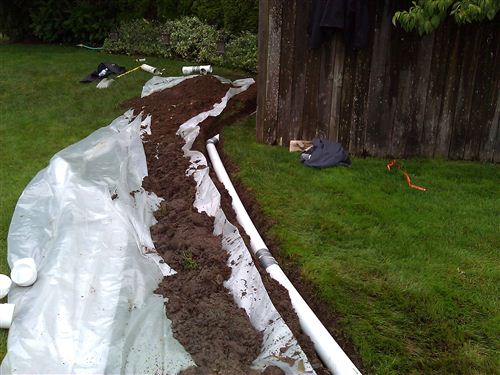
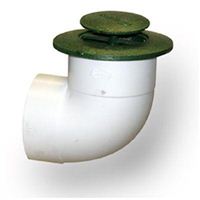
We met at Home Depot one Saturday morning at 6am (he had to drop Chelsea off for a half-marathon) and were done with the project by 9:30! We trenched 30 feet out to the street, connected the top end to the sump pump and a downspout, and installed a popup drain right by the curb. When the pipe fills with water, the drain pops up and water flows out to the curb.
It was super helpful having Tim there. He taught me a couple great little tricks:
I might need to dig up the popup drain at the end and redo that some day. It has a small hole at the bottom that let’s excess water drain out. But since we just set it right on the dirt, the wet dirt filters up through that hole and plugs it up so now I have a layer of dirt at the bottom of the pipe. I imagine that over time it will start to plug up the pipe. At that point I’ll dig up the end of the pipe, dig a small hole right underneath that point and fill it with some gravel. There’s no rush though. That can wait.
We’ve had pretty consistent rain since this project so the swamp has never had a chance to fully dry out. At that point we’ll know how much this drain helps. I suspect it will still be wet down there since this area used to be a pond and we’re at the bottom of a hill, but hopefully it helps. When we redo the whole yard in a year or two, I’m tempted to tie all my downspouts into drains like this and also run a big French drain along the west side of my lot to stop water from flowing down the hill.